Hello everyone, today we decided to please the fans of the Marvel comic universe and draw a portrait of probably the most famous representative of this universe - Spider-Man. The lesson will be very simple, because we will draw Peter Parker, whose face is hidden under a spider mask.
In fact, this is a continuation of the portrait theme - after all, recently we drew a portrait, and for those who have coped with that lesson, this one should not cause difficulties. The main thing is not to get confused in the patterns and correctly convey all the shapes.
By the way, we have already drawn a large number of both Spider-Man's enemies (like, for example, and), and allies - and others. We also did a lesson dedicated to ourselves, only then we drew his whole figure in a dynamic pose. On our site, perhaps a lesson dedicated to Peter - the red-haired Mary Jane, has not appeared, but if you want to draw her - just leave a comment under this post. In the meantime, we begin our step-by-step drawing lesson dedicated to the portrait of Spider-Man!
Step 1
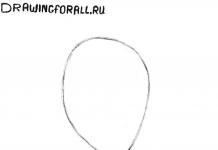
Let's draw the outline of the head. The head in the frontal position, due to the narrowing towards the chin and expansion in the region of the cranium, looks like an inverted egg in shape. But our today's character is not located towards us in a full-face position, but rather half-turned, so the outline of this stage will look asymmetrical.
Another feature is a slight downward tilt of the head, which also affects the outline of this step. Please note that on the left side of us there is a cheekbone outline formed by an obtuse angle, on the right in this place there are no hints of an angle, there is a straight line.

Step 2
Mark out the silhouette of the head with a vertical line of facial symmetry, which will divide the face into two equal parts. Pay attention - it is significantly shifted to the side due to the fact that the head itself is unfolded. It will be crossed by two horizontal lines, which will indicate the upper and lower edges of the mask's eyes.

Step 3
Draw the eyes along the lines outlined in the last step. In the lower part they are rounded, the upper part bends only slightly. The corner of the eye, which is located near the temple, is sharp, and the one that is located at the bridge of the nose is obtuse. Please note that in the area of the temple, the black part of the eye is much more voluminous than that of the nose.
By the way, the fantasy of the writers and artists of Marvel has created two more characters with eyes of a very similar shape - we are talking about terrible monsters and they are one of the main enemies of our hero.

Step 4
We will trim the resulting drawing and outline the lines of the shoulders. Nice mask design, isn't it? I liked him so much that this mercenary made his own costume very similar to the costume of our hero. Especially in terms of mask design.

Step 5
Let's start drawing a pattern on Spider-Man's mask. From the area just above the bridge of the nose, we will direct smooth, smooth, thin lines that will diverge throughout the mask, passing to the suit. Please note that the lines should expand as they move away from the bridge of the nose. An important point is that exactly five lines fit between the eyes, both above and below. By the way, the lines in the forehead should be curved - along the contours it is slightly similar to hair combed back.

Step 6
Now let's draw the cross section of the pattern. It is this part that makes the pattern look like a real spider web - each resulting segment should bend in the center. Pay attention - in the lower part, from the nose to the chin, 6 such horizontal lines are obtained, and if you go from the nose to the back of the head, 7 lines of the horizontal pattern will be visible.
An important point is that the intensity of the location of the lines increases as you approach the nose, that is, the farther from the bridge of the nose, the greater the distance between the horizontal lines. If everything was done correctly in the previous step, then in this we will get a beautiful pattern that expands as we move away from the bridge of the nose.

Step 7
We will trim the contours of the face and shoulders of our Spider-Man. Apply a small area of the shadow using a soft one.
So we finished the step-by-step drawing lesson on how draw spiderman... Be with us on the pages of the drawing for all site.
Hello everyone! Today's lesson will be especially enjoyable for those who know that with great power always comes great responsibility. I think you already guessed that we will draw the most recognizable character in Marvel comics - Spider-Man.
In general, the appearance of Spider-Man and the development of his story in comics / cartoons / movies is a rather amazing phenomenon. In fact, this was the very first invented superhero who experienced the same problems and difficulties as the most ordinary person (and far from being fond of fate). Indeed, in contrast to (hereditary billionaire) and (alien with superpowers from birth), school orphan Peter Parker, living with an elderly aunt, looked extremely interesting and outstanding.
High moral ideals, incredible strong-willed qualities, dedication and an excellent sense of humor have made Spider-Man so famous among people all over the world. Indeed, almost every person on the planet knows this character from American comics. Even Spider-Man, Mary Jane, has become one of the most recognizable comic book heroines. So, how to draw Spiderman!
Step 1
After we have prepared everything for drawing, sketch out the pose of Spider-Man using a stickman - a man made of sticks and circles (small circles represent joints). Please note that the character's head in the first stages will seem disproportionately large, and the arms, and legs, too, will be too small.
If you understand the pose of Spider-Man, everything will become clear: the head is closest to all other parts of the body to the viewer, the legs are strongly bent, the arms are spread out along the movement of the character, and the body is significantly expanded. Here we apply the perpendicular lines of the face (vertical symmetry and eye level).
Step 2
Now it's the turn of the body silhouette. Look closely at how complicated Spiderman... His physique is very different from the proportions of the stereotypical superheroes, resembling a mountain of muscles with huge chins.
Here we see a very proportional figure, similar to sinewy figures - moderately developed muscles, good relief, in general, nothing superfluous. In the same step, we will draw the eyes of the mask - they should be located at the bottom of the head, this will convey the effect of a slight tilt, looking from top to bottom. By the way, there is a separate lesson on our site dedicated to.

Step 3
The third stage is not difficult at all, here we will deal with the costume and draw the main parts of it, marking the places where the red and blue colors are separated. Also here we detail the muscles of our Spider-Man, drawing the relief, sinewy body of the superhero.
Let's work on the eyes of the mask, making them a characteristic "spider" edging. We finish the stage by erasing unnecessary strokes, schematic lines and sketching out the web, which the favorite of children of the whole world has just thrown back.

Do not forget an important detail - a small drawing of the foot. The sole is outlined with literally one strip:

Step 4
This is also not a particularly difficult stage, which, nevertheless, if performed incorrectly, can significantly distort the final result. Here we will tackle the longitudinal lines of the spider web pattern on the Spider-Man suit. which diverges from the bridge of the nose over the head and torso.
Pay special attention to the fact that these lines are superimposed taking into account the curves of the body and the relief of the muscles of the superhero. It is the correct fulfillment of this condition that will give the drawing volume and realism.

Step 5
We continue to draw Spider-Man. Now it will be very similar to the usual appearance of Spider-Man. We draw transverse lines that should not be straight - a slight bend of each section and symmetrically lowered / raised edges are required here.
At the same stage, we will draw an emblem in the form of a small black spider in the center of the chest, and also draw a spider web located behind the hero's figure.

Step 6
The last stage is shadowing. It should be noted that today's lesson is about how to draw spiderman it is in the classic style, therefore, we will apply the shadows with the appropriate technique.
Firstly, for the classic Spider-Man, shadows are characteristic only on the blue parts of the suit. On the red parts there will be only barely noticeable shadows from the muscles and a large monolithic shadow from the head.
Another technique of artists of the classic comic style is the use of large shadows (like the above, cast by the head), which are drawn in two stages - first, the outline of the shadow is outlined, then the shadow itself is applied. A little tip - use the softest for applying shadows in the same style as now
In this tutorial we will draw one of the most beloved and popular comic book heroes - Spider-man. Spider-Man possesses extraordinary strength, dexterity and the ability to stick to various surfaces (including high-rise buildings), with the help of a special spider thread, which he releases from his hand.
The Spider-Man costume is distinguished by extraordinary brightness and originality. The color of the main hero's costume is red and blue, and a large black spider is depicted on the chest of the costume. In addition, almost the entire costume is covered with an image of a spider web, which fully characterizes his nickname "Spider-Man" ... Drawing this character is quite complex, it will take about 25-30 minutes of free time and patience when drawing a spider web. Let's start our step-by-step drawing:
Stage 1. To begin with, we will draw auxiliary lines that will facilitate our further drawing. We draw them barely noticeable, because then we will have to erase them.

Stage 2. Let's move on to drawing the body, or rather the Spider-Man costume. First, draw a head with large eyes typical for Spider-Man.

Stage 3.Now we move on to drawing the costume on the torso, and also draw the neck and shoulders using the auxiliary lines drawn at the pen stage.

Stage 4. We draw the hands of our hero, his rui is sufficiently inflated, and one hand is bent into a fist. We look at the picture below and draw also

Stage 5. Our Spider-Man is depicted in a standing pose. We draw his legs, and immediately draw a little bit of the sole of the boots of his suit as follows:

Stage 6. The main outlines of the suit are ready, so you can erase the auxiliary lines, already in the further drawing they will only interfere with us.

Stage 7.Let's move on to decorating the Spider-Man costume. First, draw a large spider on his chest and some lines on the character's costume

Stage 8. Now the most difficult part begins, namely drawing a spider web on the hero's costume. At this stage, draw a net on his head. To make it easier for you to draw, we have enlarged the place where you will draw at this stage.

Step 9.Then, in the same way, draw a net on the chest of Spider-Man. Here we also increased the drawing area.

Step 10. And we add a spider web on the legs and arms of the spider-man, it will not be so difficult to do this. We look and sketch in the same way

Spider-Man is a well-known character who was invented back in 1962, then it was a fundamentally new story of a lone hero, and a teenager who was rejected by many peers, because he was not clear to them. Up to this point, if a teenager participated in a heroic act, it was only an assistant.
In our time, a person came from the pages of the Marvel comics, the creators of this character were Stan Lee and Steve Ditko. The adaptation of comics began in the 70s, there were films, even a whole series (Japanese) was shot that was dedicated to Spider-Man.
Modern film adaptations are more successful, apparently due to the many high-quality special effects. Three Spider-Man films have already been filmed (2002, 2004, 2007), and now the story is being relaunched: The Amazing Spider-Man and the recently released Amazing Spider-Man: High Voltage. I suggest you take simple pencils step by step draw spiderman(black, 2099), although you can see that the spiderman hasn't changed from the first part of this century's film.
Simple pencil step by step for beginners.
We draw a spiderman in stages:
Step one. Sketching the position of the spiderman.

Step two. We draw a sketch of the body and a large hand that launches the thread.

Step three. Draw triangles for the eyes and muscles on the arms, torso and legs on the face.

Step four. Now drawing is much more difficult, you need to draw a spider-man costume and circle it with a bold outline.

Already painted +10 I want to draw +10 Thank you + 131
On this page we will show several ways how you can draw Spider-Man with a pencil step by step for beginners.
How easy it is to draw Spiderman
- Step 1
The first step is to draw an oval of the head and a silhouette of the shoulders on a piece of paper.
- Step 2
After that, we outline the body with another oval.

- Step 3
The next stage - we outline with the help of dots and straight lines of the arms and legs

- Step 4
Getting started drawing Spider-Man's hands, building up his muscles

- Step 5
We do a similar operation with the hero's legs.

- Step 6
The preliminary stage is over, the character has acquired a general appearance, we remove all unnecessary lines inside the contour

- Step 7
How to draw Spider-Man? Start with a mask - draw the big eyes of the spider

- Step 8
On the mask we draw the contours of the cobweb, on the legs - a line of boots, on the hands - gloves.

- Step 9
On the chest of the super-hero is his symbol - a large and strong spider

- Step 10
Gradually cover the arms and torso with lines of cobweb

- Step 11
We do the same with the hero's boots - draw a web on them.

- Step 12
Now we hatch the entire body, arms and legs of Spider-Man.

- Step 13
With a darker shading, add volume to the whole figure as a whole.

- Step 14
Using a white pencil and an eraser, we use highlights to indicate the play of light and shadow.

Video: How to draw a spiderman face
How to draw a spiderman running in stages
- Step 1
In the lesson about the spider man, I saw a request to draw him in RUN, well, I tried it and that's what happened). I described the work as I do myself. VERY IMPORTANT point =) I would say necessary - this is POSITION CHOICE! I'm used to "thinking" on paper. We take a piece of paper and quickly sketch out the pose that we want to see ... In our case, it is RUNNING ... BUT there are several types of running, ordinary, relaxed (sports walking), fast ... maybe there is more, but it all depends on what the author wants to show. I wanted to show that he runs fast, in any case, I see that spider-man runs like that =).
No less important than the previous one =) - this is the CHOICE OF ANGLE ... Throw in just as quickly. Shows the character of the character through the foreshortening! For example, if you want to show power and importance, you will look at it from the bottom up (option 3) ... But I stopped at the first one. About this angle I will say that it looks like something is not clear .. it lacks something, and I think you will agree. That's right, it's all about the pose ... it looks pretty relaxed and at ease, but when a person is running fast, all muscles are tense ... you need to bend your arms, leg and stretch your neck. The most basic thing when running is twisting the body ... perhaps because of this it is difficult to draw it ... well, we will disassemble it, after we have chosen an angle - we start drawing =)
IMPORTANT: If you cannot draw the desired angle in a small, rough form, practice drawing the angles! Draw the foreshortening until you get what you WANT to see! If you have already drawn a sheet on both sides ... throw it out and start AGAIN!
- Step 2
We quickly outline the already chosen pose and see if the character of the drawing has gone astray, we look at what is missing, we correct it. In running, you need to show pushing, with what force the character is pushing and how the character runs. Twisting, the distance between the legs, tilting the head, tension - by varying these properties you will give the character character.

- Step 3
In the previous paragraph, I did not like the hands and head, so we take the back hand back, stretch the neck, tilt the head. Immediately we begin to work out the muscles.

- Step 4
Making Spidey's eyes, working on the most difficult (in my opinion) leg muscles.

- Step 5
We clean up the picture.

- Step 6
In the previous paragraph, I did not like the KEY, at the top of the body there should be something like a rhombus. Modifying the intercostal muscles, starting toning.

- Step 7
I tint, then put the spider on the suit and spider web.

- Step 8
To give even more dynamism to the picture, you can draw stripes, showing in which direction it is moving. Well, that’s done =) In general, I didn’t draw spidey before, although he is my favorite character. But I think the lesson will help

How to draw Spiderman for beginners
_karandashom-step-1.png)
How to draw a chibi spiderman in stages for kids


Video: how to draw a chibi spiderman
How to draw 3D Spider-Man step by step

Video: How to draw 3D Jumping Spiderman


