- 1. Comparison of decks with modern hives
- 2. DIY
- 3. Features of deck beekeeping
During the time of Peter I, Russia developed vigorously, which is why beekeeping felt significant difficulties. Forests were actively harassed for the construction of ships, wood was burned for coal for a rapidly developing industry, soil was required for arable land. The beekeepers began to save the boards: cut off a piece of wood with a bee family, and drag it into a pile at the cutting site. So after cutting down, "apiaries" appeared.
Over time, deck beekeeping developed: hollowed-out pieces of wood were covered with a thatched roof, placed in a group near the house, populated by swarms. It became easier to work, no need to walk all over the forest, climb trees.
The deck for bees was made by burning or gouging. The device of the bee house is simple: a hollow cylinder of a meter and a half high with an internal diameter of 30–40 cm. A wooden cross is strengthened at the top, insects will build honeycombs on it, the structure was covered with a thatched roof, a vertical notch was made a little higher than the middle.
Comparison of decks with modern hives
Of course, field beekeeping is less convenient than stock beekeeping: the apiary is not scattered over the area, there is no need to drag around the forest and climb trees. But after all, almost no one does it anymore. So let's compare the benefits of keeping families in a deck and frame hives. Benefits of deck beekeeping:
- hives are stronger than composite ones;
- the deck is made with a minimum of the simplest tools. With his own hands, a novice carpenter easily makes;
- The area/perimeter length ratio is ideal for a circle. Therefore, the hive deck wins against square or rectangular ones, the volume is maximum with a minimum of surface area. In winter, heat is saved;
- it is easy to clean it from deadness in the spring: moved it, removed it, put it back;
- the presence of space under the comb helps the family to self-cleanse a little from varroatosis. A tick that has fallen from a bee cannot reattach itself to a passing bee - they do not walk along the bottom;
- decks look solid, solid, reliable. A find for summer residents who love the old Russian style;
- a minimum of knowledge is enough for housekeeping, all the same, a beekeeper can change little in the development of families.

Deck beekeeping also has disadvantages:
- decks are non-transportable. Nomadic beekeeping, even a one-time transportation of families, is very difficult;
- the beekeeper is very limited in the impact on the bees. It is difficult or impossible to carry out well-established techniques that are easily used when kept in collapsible frame hives. Everything is difficult: selecting / giving food, strengthening / separating families, breeding queens, breeding work, any control over the activity of the swarm.
DIY manufacturing
Making a hive deck is not at all difficult, the main thing is to have the right tool. We have selected a video for you, where it is more than clear how to build such a house for bees with your own hands.
Features of deck beekeeping
The owner is only able to slightly influence the development of families. If necessary, add volume, it is easy to dig a little under the deck. Beekeepers are also trying to make multi-tiered decks with separate sections. Such a cylinder with a cross is placed shortly before the main bribe. The bees prefer to fill the top of the nest with honey, the selection of the extension will be the beekeeper's reward for his work.
It is difficult to take part of the food from the deck, especially since it is the top of the combs that is filled with honey. After all, it is impossible to cut off the top, leaving the bottom. Usually, during selection, the family lights up (destroys). Moreover, negative breeding work is underway: the most productive swarms are eliminated first ...
Wasted in vain the work of the bees on the construction of honeycombs. When selecting honey, wax buildings are cut out; there is no way to substitute them for other families, only remelting.
The amount of honey in the deck (approximately) is estimated by the following trick. The deck must be placed on a knee or support, finding the center of balance. It is imperative that the honeycombs lie edge to the ground, otherwise they can be broken, they are long! Honey is heavier than empty cells or cells filled with brood, and it is folded mainly from above. According to the deviation of the center of balance from the middle of the deck, they estimate the amount of collected food.

Kolodny beekeeping complicates breeding work. To increase the apiary, natural reproduction is used, the caught swarm simply spills out into an uninhabited dwelling. And with a high probability, the new family was going there on its own. Empty decks standing in the apiary are the best option for a new apartment, according to scout bees.
If some of the bees are kept in frame hives, it is possible to set up a store before the bribe. True, only with a relative coincidence of sizes, when there are no gaps left. Nevertheless, it is not always possible to combine a rectangular magazine with a deck that is round in section without gaps.
Onboard beekeeping is backward compared to deck beekeeping, but that's all history. Who is doing it now? Kolodnoe beekeeping loses to the content in modern frame hives in terms of commodity output - it is difficult to conduct it intensively, directing the development of families in the desired direction. Bees flying out of the logs pollinate the garden no worse and no better than those starting from the frame hive.
Of course, there are fans of "close to natural" beekeeping, the old Russian style of the estate. Also, they tend to work less with bees, albeit due to a shortage of honey. Here a well apiary suits them, not for getting high honey yields, but for the soul.…
From time immemorial, beekeeping has been practiced in Rus'. This was the name of the trade, which was associated with considerable risk: beekeepers collected wild honey, which forest bees stored in tree hollows.
Modern beekeeping just "grew" out of beekeeping. Initially, they simply hollowed out the trunks of thick trees, installed them in the right places as primitive hives, and domesticated wild swarms of bees. Later, the trunks were transformed into more convenient rectangular boxes, in which frames appeared, and the industrial production of honey began.
The modern deck has a more complex structure than its predecessor, but many of the design elements remain. It cannot be said that they are often found, but with due diligence, you can find borti.

Bee decks are very reminiscent of the natural dwellings of bees. In such a board, the swarm has the opportunity to equip its living space in accordance with its desires, with conveniences for itself, and not for the one who will collect honey.
You will not find a bee board deck in an apiary where honey is collected for sale. A hive of this type, as a rule, is chosen by a beekeeper who is just getting acquainted with beekeeping or one who stands up for conditions that are as close to natural as possible. Some simply experiment or don't have the opportunity to spend a lot of time caring for bees.

It is important that the taste of honey harvested by the bee colony in the borti is distinguished by high taste characteristics and aroma, it is more seasoned.
This compensates for the fact that it is several times less than in a standard rectangular hive. For this reason, the type of deck beekeeping is more suitable for amateur beekeepers.
The board is placed with an entrance to the south side, it is installed on a stand, and it is located both at ground level and above - on a tree, a roof. It is not worth setting it too high, it is believed that a bee is more accustomed to a height of human height. The deck should be located in a dry, shady place (the heat melts the honeycomb wax), the place should not be in a strong wind, and the absence of strong odors is also important.


Differences from the hive
Can be listed differences between the deck-board and the standard rectangular beehive.
- The deck is stronger.
- With sufficiently large boards, even a large bee colony will live there for a long time.
- It is more comfortable for a swarm to live in than a rectangular industrial hive, although, on the other hand, the beekeeper experiences certain inconveniences when removing combs or ensuring cleanliness inside the board.
- A person almost does not participate in the life of bees - the beekeeper just needs to clean the deck from the inside in the spring and take out some of the honeycombs with honey in the fall.
- They build honeycombs and close up extra holes, treat possible bee infections in the bees on their own. They place the cells of the honeycomb as they please, and over time, the entire internal space of the deck is completely filled with them.
- Thus, on the part of a person there is neither regular control over the life of a bee swarm, nor any preventive treatments.


Advantages and disadvantages
This approach to beekeeping has its advantages and disadvantages.
Advantages
- Ecological cleanliness: there is no use of artificial materials when equipping honeycombs; there are no drugs that are processed to prevent diseases, destroy pests.
- Since the swarm is not disturbed, it is less prone to beekeeper stings, and the boards are quite freely and safely installed in suburban areas, in close proximity to neighbors.
- The bees themselves form the inner space of the deck, build honeycombs to their liking, the board inside is completely filled, holes in the walls of the deck are eliminated. This reduces diseases, the bees live longer, become more resistant, the quality of honey increases.
- It becomes cheaper and less time-consuming to maintain the deck: there is no need for constant monitoring of the health of the bee family, in its feeding. Many apiary tools are not required.
- For wintering bees do not need a separate room, which is necessary for standard hives. The internal volume of the board, even with significant temperature fluctuations, ensures safe hibernation of the swarm.
Collecting honey in this way is safer for insects, a person practically does not injure them, they lose only part of the combs, a person does not touch the nest itself, there is enough honey left to last for the winter.


Flaws
- The deck contains relatively little honey. Bort serves more for the convenience of the bee swarm than for the production of honey.
- The deck is not opened for a whole year after the family has settled - the insects settle down and create a reserve for the first wintering.
- Bort leaves only a little free space to collect honey, the comb is quite difficult to remove. How quickly the bees restore the supply depends only on the family.
- The walls of the deck from the inside are completely occupied by honeycombs, which fill almost the entire internal space of the deck, and the old combs tend to clog. For this reason, they have to be cleaned. This must be done at least once every five years, since the bees will not live in a littered board - the swarm will go to another place.
The board is unsuitable for moving - it is too large and weighs a lot, besides, the walls of the honeycombs inside will probably break.


Kinds
Types of deck designs can be divided into 3 types:
- vertical;
- inclined (bed);
- collapsible multi-level type.
Vertical cylindrical structures are most like ancient boards. They are a sawn thick trunk of a deciduous tree up to two meters long, the diameter of which should not be less than half a meter, with a removed core and walls no thinner than 5–7 cm. Wooden covers are closed on both ends.
An inclined bed is made from a trunk, the thickness of which should also be sufficient for the bees to feel comfortable in it. If a trunk of this diameter cannot be found, a deck can be made using boards of sufficient thickness. In this case, you get a straight parallelepiped. Such a bee board should have a slope of up to 30 degrees.
You can make sections that are hollow inside, which are installed one on top of the other. When the top one fills up with honey, it is replaced with a new one, but the bottommost section is never emptied.


If you want to get more honey, you can add frames to any of the designs.
If the deck consists of a solid tree trunk, and not of sections, then you will have to cut a door in the back surface. It will also help in the future when cleaning the board from littered honeycombs. As a rule, the frame is installed immediately under the "ceiling" - an insulated top cover.

Manufacturing
It is necessary to make a board exclusively from dry deciduous wood: birch, oak, linden, ash, aspen, poplar.
There are various ways to produce a bee board:
- in accordance with the drawing, either a trunk of a suitable diameter is selected, or the deck is made of sufficiently thick boards;
- the height of the deck should not be lower than 1200 mm, with an internal diameter of at least 400 mm;
- if the deck is made of a thick board, it is necessary to fill the slats inside to obtain a cross section close to a circle, or hammer the boards in such a way that the board becomes barrel-shaped.


General DIY tips.
- Two blanks for covers are sawn off from the tree trunk. Their thickness must be at least 50 mm.
- The rest of the trunk is sawn lengthwise and hollowed out, leaving walls at least 50 mm thick. The inner surfaces of the walls are processed, everything must be dried well.
- Then the halves of the resulting hollow cylinder are connected by providing / sawing out a tap hole. It must be at least 10 mm wide, and in length - at least ¾ of the length of the entire deck.
- Sometimes holes of 20–30 mm are additionally drilled, but there should not be any more through slots.
- For the bottom cover, it is necessary to make hinges and a latch (lock, latch) to provide access to the internal space of the board.
- The top cover is fixed tightly.
- Inside, at different heights, two or three supports (cross-wise rails) of honeycombs are usually installed.
- For convenience, a collapsible deck is sometimes made from mini decks, each about 300 mm high. This is done to make it easier to collect honey.
- Before settling the swarm, the collected board must be thoroughly dried.


Keeping bees in decks is one of the budget variations that allow you to equip the hive in conditions as close to nature as possible. It is budgetary in view of the fact that it does not require cash costs as such. However, despite the apparent simplicity of the method, it implies a large amount of time and labor costs from the performer, because in addition to arranging housing for bees, several more related procedures will be required.
This is what we would like to talk about in more detail. Next, we will cover topics regarding the creation of a deck for bees with our own hands, the construction of a deck, settling and maintenance in the future.
Kolodny beekeeping, as we have already said, is one of the methods that allow you to equip bees in conditions as close as possible to nature. In this regard, a distinctive feature of the variant implies the almost complete independence of the bees. There is no need to carry out any additional care for the apiary, except for the appropriate collection of honey, and therefore there is no need to disturb the residents. Now this type is called an unattended hive.

If we briefly talk about the settlement procedure itself, then at the beginning a standard settlement takes place in the deck and the beekeeper can only observe the whole process. The bees at this moment are equipping a new home according to their own needs. That is, the notch is covered with propolis and only holes for the passage remain, the combs begin to be created close to each other and at the same time they have two varieties - one for storing honey, and the other for the uterus and larvae.
Pros and cons of the method
Deck beekeeping has a number of both its own advantages and disadvantages. We will highlight the most important indicators. So, the generalized list includes the following items. Advantages:
- The collection of honey in the hive is carried out several times a year, and before wintering, only sugar syrup is left for the bees, which weakens the immune system of the bees. In the case of decks for bees, some of the honey itself remains, which avoids such problems;
- The ability to build honeycombs according to your own wishes. Here, residents are not limited to artificial models and they can build the proper size of honeycombs themselves. In this regard, the larger the cell, the larger and stronger the future individuals;
- Large dimensions compared to a standard hive. Along with the size, the number of housing stock also increases;
- Fewer maintenance costs;
- The option of making a deck is great for a beginner, because it allows you to practically not deal with the care of the hive.
Flaws:
- The need for careful harvesting. In this case, it is necessary to cut out the combs, and sometimes with such a procedure there is a big risk of hurting individuals, which will significantly reduce their numbers;
- The ability of bees to move to another place;
- Exclusion of control over the process. Above, we already wrote that a hive-deck implies the complete independence of bees.
Manufacturing
At the moment, there are several ways to create the above design. We analyze the most popular and at the same time simple variations.
From a tree trunk
This method is extremely simple and to reproduce it, you need to find the tree trunk itself and hollow out the core in it. Of course, after you need to equip it for bee housing. So, describing the process of the task itself, it is necessary:
- Saw the resulting material into two parts, and then hollow out the core in one of them;
- Make two cuts, which will later become due. In other words, these are the upper and lower housing covers;
- The resulting parts must be connected in such a way that one seam leaves a notch at a height of about 0.3 m from the bottom. At the same time, it should occupy approximately 0.75 of the length of the structure and have a gap of approximately 8 millimeters;
- If any gaps remain on the outside, then they should be sealed with clay;
- Fixing the top and bottom covers. The first is fixed with nails, and the second must be opened at the same time, which will allow you to collect honey from the deck in the future;
- On the inside, make two crosses - the bees will equip the honeycombs in them.

From the boards
- As a case, we choose a bottomless box with approximate dimensions of 3.5 by 31.5 by 22 cm. The thickness is not limited, but the most preferable will be from 3.5 centimeters;
- Further, the body is equipped with a plywood sheet on the inside and plastic on the outside. Be sure to additionally lay insulation in the form of cardboard or foam between the layers;
- For longer duration, impregnate the plywood with propolis wax;
- At the end of the hive deck, you need to add a roof. You can make it from improvised materials and at the end cover it with roofing iron or roofing material.

Accommodation
In this case, the area where the hive will be located is of the greatest importance. Be sure it should be a place lit by the sun and protected from the wind. It is highly recommended not to place the deck in close proximity to pets and especially cats.
If we talk about height, then 70 centimeters from the ground and at an angle of about 30 degrees will be most suitable.
Settlement
A full-fledged settlement can be made only the next year after installation, because only after this period will the structure form suitable conditions for future residents.
After direct settling, it is strictly forbidden to interfere in the settling process for about a week, otherwise the bees may change their place of residence. Also, first of all, you need to populate the uterus in the cage, and then the rest of the swarm.
As we said above, the indicated method belongs to the category of beekeeping for beginners, and therefore, as such, there are no tasks related to the maintenance of the hive. The only thing that is required to be done from the owner is to carry out a full collection of accumulated honey. This must be done in the fall.
In addition, in winter or in spring, it is imperative to clean the nest from debris and check the condition of the family. When cleaning, pay attention to black honeycombs - they need to be removed. Otherwise, there is no need to do manipulations with the hive, and only occasionally should the overall integrity of the housing be checked.
Conclusion
Here, care is minimized and practically not required by the bees. Above, we have analyzed two main ways to create a deck, the principle of its placement, the colonization of bees in the created structure, and the tasks of caring for it in the future.
A beehive, or as Father Uspensky aptly dubbed it - “beekeeping wrapping paper”, is called the dwelling of bees artificially prepared for them by a person (from the book “The Life of Bees and the Main Rules of Intelligent Beekeeping” by V.P. Popov, Penza 1892, p. 70)
As a result of many years of studying the literature on beekeeping of the 19th century, in terms of deck beekeeping, as well as their natural study in the Belarusian Polissya
I made dozens of decks, hollows made of linden, alder, willow, elm and spruce. They are captivating by simplicity, a certain beauty, and, most importantly, is that after it is equipped and installed, a bee swarm flies there. It brings you joy and pleasure from the realization of a good deed. The prospect of getting honey from bees is not the most important thing here. How many good emotions are brought by observing the life of these insects, their years, the rumble, the fuss at the notch, the smell. As without frames, they build honeycombs at their own discretion, pull out tongues.
Of all the hives, the deck is closest to the natural home of the bees - the hollow. Much has been written about its shortcomings. Considering personal experience in their  manufacturing, for me the main drawback was their significant weight. It is especially inconvenient to work when the tree trunk is still damp. It is easier to make a deck of sieve wood. But here, when looking for a dry tree trunk, you have to reject a lot - since very often the wood turns into dust and does not have the required strength.
In the course of work, useechainsaw, electric drill, electric planer, angle grinder, milling cutter, axes and various hand tools. Gradually I gained experience and tried to optimize the manufacturing process of the so-called LIPNE and CHURBASH. Once a friend suggested a link on the Internet (seeYoutube - maruta765), where the video shows a chainsaw fixture that allows you to make identical cylinders from a tree trunk, with the desired inner and outer diameter, height.
I radically modified it and this simple “adapt” allowed me to defeat the main drawback of the deck - its weight. She was divided into parts. The evolution of the process of sculpting KOLOTKOV and CHURBASHKOV has led to a simple technology and an increase in labor productivity in this matter.
All of the above successfully converged and superimposed on the photographs in the "History of Russian beekeeping" by I.A. Shabarshov, and, on the book of Viktor Fedorovich Shapkin "Non-contact beekeeping" - the section "Collapsible deck". Theory and labor led to the result, which we see in the photo:


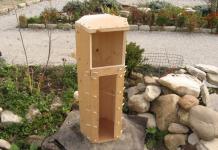
The deck consists of a roof, head, insulation, canvas, 2-5 cases, bottom, stand.
Roof
Made of galvanized steel in the form of a cone. It has a large area, which allows you to effectively protect the body of the deck from slanting rain, snow and the scorching sun. Thanks to it, even the protruding elements of the bottom do not accumulate snow on themselves, the lower body does not get wet.
The second version of the roof is made in the form of a large bottle cap. It is advisable to use it in cramped conditions and when installinghemp on the tree. It has less area and weight.
Nagolovok (Upper bottom).

 It is a cut of a tree trunk 10-12 cm high. Preferably from linden, white willow (willow), aspen. The wood of these species is lighter and less prone to cracking. Its outer diameter is equal to or slightly larger than the outer diameter of the housings. In this decision, we are guided by the fact that a cut with this thickness will allow keeping heat in the head of the deck and well “pump out” moisture from the nest without drafts. The vapor permeability of wood along the fibers is 4-5 times greater than across. The bees will propolis the lap over the rulers at their own discretion and will regulate the air flow that will pass upward through the lap - insulation - heads.
  The significant size and weight of a dry tree cut makes it possible to easily attach a galvanized steel roof to it. To prevent the head and roof from being thrown off the deck by gusts of wind, they must be fixed with strips of perforated tape with self-tapping screws to the body of the deck. Large cracks can be easily sealed with polyurethane foam.
A canvas is placed on top of the rulers (snows), 1-2 layers of cotton-printed fabric are placed on it. This material is widely represented in the construction markets and has a low price. It will fill the gaps between the plane of the body and the head. At the same time, it itself has a certain moisture capacity and vapor permeability.
Corps (tier).
For decks and hives, it is preferable“Soft woods, such as willow, poplar, alder, linden, aspen, pine, spruce, are very good and warm. But beech, oak, ash, and other hard woods are cold until they are spoiled; only when softened do they become warm and good. And in general, the softer the tree itself or half-decayed, the warmer the hive. Therefore, the goodness of the hive does not only depend on the type of tree, but on the porosity and softening ability. The more easily the tree becomes soft and rotten, the more suitable it is for beehives. (Yu.V. Lubenetsky "Complete practical guide for beekeepers" 1876)
And further: From the thoughts of P. I. Prokopovich
- The best forest for building hives is considered to be willow, followed by lime (light grade), aspen, ash, alder, spruce, pine, elm, sedge, and oak, maple, birch, elm, birch bark, pine are not suitable for beehives. , pear, apple tree.
In general, all heavy trees are unsuitable for their weight, but all lightweight ones can be used, and among them the willow is the best.
Selected articles on beekeeping by P. I. Prokopovich,
"Selkhozizdat", 1961
Sieve (rotten wood of various species that has not lost some strength) has excellent thermal insulation and vapor transmission due to its low density. The thickness of the walls of the cases of a collapsible deck is 75-80 mm. The walls have sufficient thermal resistance for our climate and thermal inertia. The thermal inertia of the walls makes it possible to smooth out daily temperature fluctuations - night cold in winter and daytime heat in summer. If the walls of the bee dwelling “do not keep up” with these temperature fluctuations, then we provide the bees with more comfortable conditions. Thick walls also have a significant moisture capacity. They are able to absorb excess moisture from the nest.(“Thermophysics of wintering bees” Sukhodolets L.G.).
The inner diameter of each body is 27.5 cm. It allows you to give the nesting part an elongated shape, similar to the shape of a club of bees; it contributes to the winter layout of the nest, natural for bees - to place honey at the top and settle down below, penetrating the head of the club into the honeycombs. This size allows one swarm to occupy and cover with its mass the entire section of the deck and maintain the necessary temperature and humidity there. At the same time, there are no cold corners that are not covered by bees. In the Simple Hive of Varre, the Alpine Hive, the Boa Constrictor, the Shapkin Hive, the Krylatsky Hive, the diagonal of the body is 42-44 cm - and this is already a significant size. The inner diameter of 27 cm (6 inches) was also in the "golden" hives of Cullanda. In general, for riser decks, an inner diameter of 22 to 35 cm is acceptable. If the hollow is wider than 35, then it is better to convert them into sunbeds (they have an inner diameter of 8-12 inches (35.6-53.4 cm)).
The cylindrical shape of the hive is optimal in terms of heat distribution and its maintenance for the bee colony. The shape and size of the collapsible deck ensures the minimum consumption of honey without compromising the development of the family.
With the same volume, the area of \u200b\u200bthe walls of the hive with a square section is greater than that of cylindrical by 13 percent (“Thermal physics of wintering bees” Sukhodolets L.G.).
At the top of each case, a 12 by 12 mm rebate is selected. In the starting tier, rulers rest on it, and a crosspiece is laid in the lower ones to hold the skid. Additionally, in the middle of the height of each body, holes are drilled in the walls perpendicular to the tap-hole axis, into which a square rail with a section of 12x12 mm is inserted. Its ends protrude outside the body by 10-20 mm. When cleaning the inner surface of the tier, the rulers and crosses are easily removed and do not interfere with work.
 The height of each body is 31 - 33 cm. The area of honeycombs in one body will be about 44-48 square decimeters. In two buildings there will be 88-96, respectively, and this area of \u200b\u200bcombs is enough for wintering and spring development of any family.(“Beekeeping for all” by Emil Varre, translated by A. Starodum
)
All "tongues" of honeycombs of the body will contain 10 - 12 kg of honey. The internal volume of each case is 18 - 20 liters. This volumecorresponds to the volume of the hive bodies - Alpiyskiy, Boa constrictor, Shapkin hive, Krylatsky hive, Varre hive - the so-called small-format hives.
 A swarm can be populated in 2 buildings or more. The better the terrain, the smaller the hives can be, and the worse, the larger they should be. In all well-known literature on deck beekeeping, riser hives indicate an internal diameter of 22 to 35 cm with a volume of 42 to 90 liters. The hulls of the collapsible deck allow us to select any size for the swarm at any time without fear of cooling the nest, as the hulls are substituted from below!
About flying.
They are round with a diameter of 30 mm. Located 25-27 cm from the head of each body. In those tiers where the notch is not used, it closes. It is convenient to use cork champagne corks or cuts of 7-8 cm from the handle for industrial-made rakes. To prevent them from falling in on the side, they need to screw in a small self-tapping screw as a limiter. The thickness of the walls allows you to select a small arrival shelf with an angle grinder with a disc for wood with a diameter of 125 mm at the entrance to the notch in wood.

ALL CASES ARE INTERCHANGEABLE!!!
In the upper (starting) case, before settling the deck, we install 6-7 rulers. They are made of slats with a section of 10 by 10 mm and fastened with nails in pairs. Before installation in the body, strips of honeycomb are fixed between them with a height of 1 to 15 cm and a length of: 2 pairs - 18-20 cm each, 2 pairs - 22-24 cm, 2 pairs 25-27 cm. Below the starting rulers in the middle of the height of each the body is equipped with a cross to hold the skid.

It is desirable, for a more reliable capture of the swarm and keeping the family in the deck, instead of foundation, in the center, on 1-2 rulers, install 1-2 pieces of dark land. She is good at luring swarms. It does not hurt to rub the rulers and walls in the back of the deck of the upper case with lemon balm, essential oil of lemon balm with honey, propolis, sprinkle wax and honeycomb well-fed. In the lower cases, only crosses are installed on which the honeycomb tongues will rest - this will allow you to inspect the entire volume of the nest from below thanks to the stand and a specially made bottom made of thick plywood. When it is opened, we see the entire range of the hive from the inside, we can calmly consider the state of the family, drift, death of bees and nest debris. Make a conclusion about setting up new buildings from below, and removing the upper full ones for your income. The bees, however, do not react to this in any way.
Stand
 The upper frame can have an internal size of 450 by 450 mm, it is advisable to make it from a corner. Legs 50 cm high made of pipes, square pipes, fittings. In the process of working with a stand, where the legs are made of reinforcement 10-12 mm, when a set of decks is placed on it, small vibrations from the wind appear from a significant weight, and when touching the case. Therefore, it is necessary to weld more bars diagonally to eliminate it.
 The bottom is made of plywood measuring 44 by 44 cm. The diameter of the hole is 33 cm. The cut in a circle is carried out with a jigsaw at an angle of inclination of the blade of 45-70 degrees. Thickness from 20 mm. Formwork plywood is desirable (brown), or ordinary plywood is well impregnated with paint, drying oil to increase resistance to delamination from moisture and sun. The circle is fastened on one loop, closed with a window latch.
There is also a second version of the stand for attaching it to the trunk of a growing tree. The size of the frame is also 45 by 45 cm. However, one of the side corners is needed 65–70 cm long with a hole for the “capercaillie” (large self-tapping screw with a diameter of 8 mm), and the second 55–60 and at its end 40 mm a strip 15–20 long see with a hole for the screw. The cut of the strip compensates for the difference in the diameters of the tree trunks and the growth of the tree in thickness. In this design, where one side of the stand is made of a solid corner, and the other with a strip piece, it does not allow vibrations of the block on the tree trunk. The lower stops are 100-120 cm long. They are attached to the frame with bolts, and at the bottom to the trunk with a “grouse”. They should not interfere with the opening of the bottom circle. The harm from screwing a wood grouse into the trunk of a living tree is minimal, no more than a dried knot.

In this photo, from below, through the open bottom cover, we see the entire section of the deck and the fact that the bees have mastered the entire upper case of the three standing ones.

Beekeeping in a collapsible deck.
Option 1

In working with a collapsible deck, we are guided by the book of Viktor Fedorovich Shapkin "Contactless beekeeping" - the chapter "Collapsible deck" pp. 114-119).
During the first season, in the presence of a good bribe, the settled swarm will build a nest and provide itself with food for the winter. That is, he will master 1.5 - 2 tiers (buildings). A drift height of 45 cm or more will be optimal for wintering. We carry out control over the volumes of drift, as indicated above, at any time visually through the opening bottom, or by weighing. At the same time, the family of bees does not worry, the nest is not cooled, the garbage is removed. If we see that the volume of the nest is not enough, then we substitute 1-2 cases from below. The letok needs to be opened in the building in which the brood is located. Honey stocks of bees are stored in the head in cells above the brood. The flying bee, returning to its usual notch, contributes to its rapid development.
In the future, all the work of the beekeeper is to select the honey building "A". Having cut out honey (honeycomb) from it, the case is substituted under the “D” case. If a flying bee with nectar and pollen actively returns to the “B” enclosure, this tells the beekeeper that there is brood in this enclosure. There is a need for an additional taphole. To do this, you need to open the notch of the "G" building. The bringing of a large amount of nectar and the storage of ready-made honey in the upper part of the brood nest force the bees to rebuild and develop a new honeycomb space in the “G” building. After the full development of building "G", it can be assumed that building "B" is completely filled with honey. The control for this can be the weighing of the deck and the flight of bees. In our case, we can assess the state of the nest by opening the bottom and looking up at the skid.
At the moment, we can observe an active flight of bees into the building "G", and a reduced flight of bees into the entrance of the building "C". Before the bees begin to explore the body "D", it is necessary to select honey from the body "A" and put this empty body under the body "D". In the conditions of the existing honey collection in the Moscow region, you can get only about 10 kg of marketable honey, and even then not every season. During this period, you need to be especially careful when keeping bees in decks. In the spring, with a successful wintering, the bees do not have problems with the availability of food in the nest. Spring honey plants contribute to the good development of families.
If the beekeeper did not have time to substitute 1-2 more under the 3 blocks of the deck, then the bees begin to swarm. You can eliminate the swarming of families by substituting 2 additional ones under 3 buildings. Letki in the deckeverything is closed . Only the notch in the lower case opens.
Roy went out and settled in another deck. The task of the swarm is to build a nest, to bring honey sufficient for wintering and spring development, to grow a large number of bees necessary for a successful wintering. To complete all these tasks, 3 summer months and a large amount of feed will be required. The nature of the Moscow region and the northern regions often does not indulge beekeepers with a good bribe. During the summer, the beekeeper is simply obliged to provide bees with food. The formula "Honey makes bees - bees make honey" has never been questioned. You don't have to rely entirely on nature. There were cases when the "gift of nature" led to the death of the family in the deck.This "gift" was so insignificant that it did not allow the family to build up a sufficient number of bees for wintering.. To save the bees, at the first stage, it is necessary to constantly weigh the decks (once a week). With a slight weight gain, a vessel with full honey or printed honeycombs is placed on the bottom. It is better to hang it on the lower crossbar of the lower tier. To prevent the bees from drowning, a plywood raft is placed in this vessel. What weight should a deck have for a safe wintering? Usually families go to wintering in 2-4 buildings. Each empty case weighs 13-15 kg. If the weight of the deck is 65 kg (in September), then, subtracting the weight of 3 tiers + bottom 2-3 kg: 65 - (45 + 3) = 18 kg. This weight includes honey, perga, bees and wax honeycombs. 15 kg of honey is the minimum that a beekeeper should strive for.
This technology of beekeeping, although it is considered extensive, but it has its pros and cons, and everyone should choose beekeeping methods on their own. In this case, financial, time and many other factors must be taken into account.Extensive beekeeping aimed at increasing production by increasing the number of bee families with a proportional decrease in the amount of time spent on care for each of them. Almost all citizens of Russia can do it. The range of mandatory work in extensive beekeeping includes: periodic weighing of the weight of the hive (deck); external examination of the work of bees - bringing pollen, nectar, propolis; nest cleaning by bees; vertical (hull) expansion of the nest without disturbing the nest itself; maintenance of families according to natural (natural) technology.
Note:Information about the Collapsible deck is taken from the Book "NON-CONTACT BEEKEEPING" by V.F. Shapkin and from the Internet at the request: "Collapsible deck in Shapkin"
Option 2.
Method of I.S. Kulanda,
It is stated in his book “People's bee. A public guide to proper beekeeping.
The technology of manufacturing wooden cases allows us to completely repeat the dimensions of Kulanda's cylindrical "golden" straw hives and adopt this method. It is more complicated than the Shapkin Method, but allows you to adapt to different conditions of honey collection, different intentions of the beekeeper, unforeseen accidents.
This method is also disclosed in detail in the book "Methods of beekeeping" by Vsevolod Yulievich Shimanovsky (pp. 238-250).
Technology
production of a collapsible (split) deck .
(allows you to make housing for bees, squirrels, starlings, tits and other living creatures from any tree trunk)
For the manufacture of cases (tiers) with the same dimensions, a chainsaw with a tire of 50 cm (20 inches) is required. To it, you need to make two simple adaptations, namely:1. Nozzle on the chainsaw tire with a guide rack.
Chainsaw bar attachment
From a square pipe with a section of 25 x 25 mm, it is necessary to cut 9 pieces 150 mm long and one 120 mm long. We lay them on a flat surface and squeeze them with a clamp. Then we weld together by electric welding from both ends and sides. On a segment of 120 mm and in the two closest to it from the outside, we drill 2 holes at a distance of 100 mm along their axes with a diameter of 8.5 mm. Bolts with a diameter of 8 mm will be inserted into these holes to attach the nozzle to the chainsaw bar. The nuts of the bolt must be screwed in the inner cavity of the second profile from the tire. It is advisable to drive a block of dense wood into the cavity of a segment of 120 mm. This will allow you not to crush it when pressing the nozzle to the tire. To offset vibrations and prevent rapid destruction of the profile,as well as to obtain an inner diameter of 27.5 cm - between the tire and the nozzle it is necessary to install a gasket of 10 mm plywood in the form of a strip of 40 x 130 mm. To compensate for the gaps and sagging of the saw, (pulling the toe of the tire towards the center) between the nozzle and plywood, we put on the lower bolt 2-3 gaskets 0.5 mm thick. It is convenient to use pieces of perforated tape. We fasten the handle from the angle grinder to the nozzle in the middle of the seventh segment from the tire. In the photo below we see this nozzle. The gray stripes on it correspond to the selection of the outer and inner contours of the deck body.
In the chainsaw tire 50 cm long, strictly in the center, at a distance of 350 mm from its toe, we drill a hole with a diameter of 8 mm and the second one 100 mm closer to the chainsaw body. The tire itself is made of durable steel and high-quality drills are needed to drill it. You can first go through the drill 3-4 mm, and then 8 mm. The above distance from the nose of the tire of 350 mm to the nozzle will allow us to enter the wood to this depth. The nozzle makes it possible to select cylindrical cavities with a diameter of 15 to 50 cm in 25 mm increments in a segment of a tree trunk.

 Guide stand.
A steel pipe with a diameter of 20 mm and a length of 60 cm is welded perpendicularly to a round or 6-8 carbon plate 5-10 mm thick. 8-10 holes with a diameter of 4-5 mm are drilled symmetrically in the plate along the edge and closer to the center. The rack will subsequently be attached through the holes with self-tapping screws to the end cut of the tree trunk (see photo). 
2.Adaptation for trimming cases.
It allows you to align the upper and lower end cuts, make them parallel.
 In the photo we see that the saw is mounted on a vertical stand, which can be lowered and raised. At the top of the stand there is a bearing that allows the saw to rotate in a circle parallel to the base.
The vertical stand, in turn, is fixed on a horizontal guide, which regulates the vertical distance from the center of rotation. The horizontal guide is welded to the housing with two bearings mounted on the central shaft. From below, the shaft rests on a cruciform base, and at the top, a three-beam stand is installed on the shaft for installing blanks of collapsible deck cases on it.
That is, the chainsaw can rotate both on a vertical stand and walk around a blank for a deck mounted on a three-beam stand.
And here it is disassembled.

Side view.

We can see a video of such a device atYoutubelink "maruta765"

There can be many manufacturing options for this device based on the availability of suitable components and assemblies from various mechanisms.
Desktop.

Using the power tool that we see in the photo, we bring the cases to full readiness.

We can see the quality of workmanship and the uniformity of the dimensions of the cases of a collapsible deck in the photo - the total height of the rack from the cases is more than 2.5 meters.

Algorithm
actions for the manufacture of a blank body (tier) of a collapsible deck:
We find and select a tree with a butt thickness of 50 cm or more. Preferably damaged by a windblow or windbreak. The minimum diameter can be from 45 cm. The thicker the trunk, the more blanks we will get. At the same time, it should not have a hollow, since we will not be able to fix the guide post on the cut.
If there is a hollow, then THIS IS A FIND!!! We make segments of 100-120 cm and subsequently we make classic decks from them (risers and deck chairs, depending on the inner diameter of the hollow) in different ways:
1- cleaning the hollow with a chainsaw by sampling rotten and healthy wood with a saw chain sliding it along the inner diameter at high speeds. For convenience of work, we set the trunk at an angle of 30-40 degrees to the surface of the earth. First we select from one end - then from the other. The longer the tire, the more in the depth of the hollow we will clean. Ideally, the length of the tire should be 4-6 cm longer than half the length of the deck. In our case, for STIHL tires with a length of 63 or 75 cm;
2 - cut the trunk in half lengthwise. We clean the hollow with an ax and a carpenter's adze;
3 - in other handy ways;
Law: the more and better we remove the chips and bark in the forest, the easier it will be to pull the deck out of it .
If it is standing, then, observing all safety measures and precautions, we roll it;
Using a tape measure or a template made, we mark the trunk into segments 36 cm long;
Using a chainsaw with a high-quality sharpened chain, we cut the trunk into chocks with the above length. We especially try to cut so that the cut is as perpendicular to the trunk as possible. This will reduce the amount of marriage and simplify further work;
We put the chocks vertically with a more perpendicular and even cut up at a distance from each other allowing you to move between them with a saw;
Using a screwdriver and self-tapping screws, we fix the guide post in the center of the cut;
We fix a nozzle from a square pipe on the tire, start the engine and put the saw on the stand in the profile that will allow you to select the outer contour of the deck tier in the workpiece;
The operator is on the spark plug side of the engine. Headgear, goggles and gloves are required. Long sawdust fly up to a height of more than two meters and strive to get everything behind the collar and crumble into shoes;
Lifting the saw with the nozzle with the handle from the angle grinder on the nozzle with the left hand, and with the right hand we correct the direction of the tire and give full throttle with the middle finger. And, lower the tire into the wood. At the same time, it easily, in a matter of seconds, crashes into the trunk. After starting the movement of the bar with the chain down, you can only hold the saw by the throttle handle. Having dropped down to the stop, we release the gas, raise the saw up and shift it in a circle to the width of the tire, repeat the operation until the circle of cuts closes. On the outer circle, you need to make 20-22 cuts;
Having selected a hole on the nozzle corresponding to the inner diameter, we cut out the inner part in the above order. Here it is necessary to go in a circle in increments of the width of the bar, then additionally cut corners and so on until the bar with the chain freely rotates in a circle on the guide post. Holding the saw only with the right hand by the handle, gasping a little, we ideally select the inner part of the future deck in a circle;
We remove the saw from the guide rack, and turn it off. Unscrew the screws with a screwdriver and remove the rack
Tip: To extend the life of the chainsaw engine, it is recommended that after a heavy load, let it idle for 1-2 minutes. And then just shut it down. At the same time, the temperature of the engine parts stabilizes and decreases gently and more evenly;
Our tires are deepened by 34-35 cm, and the workpiece is 36. The remaining 1-2 cm of wood hold the core on which the stand is fixed and do not allow the chain to touch the ground on which the tree is cut. With an ax we separate the trimmings from the outer contour for firewood. We hit the butt on the core and take it out. Having placed the workpiece on the whole neighboring chock with an ax, we cut off the unnecessary remaining edges on the outer contour. THE PREPARATION IS READY!!!;
ON AVERAGE, ALL OF THE ABOVE OPERATIONS FOR ONE BODY TAKE 10-15 MINUTES. Up to 20 cylindrical blanks can be made per working day.
Note: In order to fully use the tree trunk from segments with a diameter of 45 to 37 cm, it is possible to make cases with walls 5 cm thick. The internal size is the same - 27.5 cm. They are lighter.
You can choose only inside and leave the tree trunk in the bark or without - then the productivity increases three times. Inside, they are all the same, but outside, each has its own size and shape. This will not affect the life of the bees in any way. Outwardly, we see a cut of a tree trunk, and inside there is a cozy housing for the "God's fly". It turns out semi-antique decks, magnificent traps for swarms. They consist of 2-3 tiers and are much lighter.
Tip: in this case, it is recommended that before cutting the trunk into segments of 36 cm along the trunk, make a cut to a shallow depth and divide these segments into groups of 2 or three bodies, number them from top to bottom by cutting on the bark - for example 1-11-111,. So that it would be easier later to assemble the cases of decks or traps vertically in the form in which the tree grew.
You can successfully make squirrels, and thinner than 35 cm - birdhouses and titmouses (see photo).

From personal experience, we build the work as follows:
We are looking for a tree, sawing it into 36 cm chocks. Then we make blanks. Sawdust, firewood and logging residues for their intended purpose. We no longer have heavy and unbearable items. We transport the blanks to the place of their drying and further processing.
We end up when there are 30 of them in order to rationally use the time. And in the subsequent final fine-tuning with a power tool (grinding inside the angle grinder, cleaning with a planer from the outside, sampling a quarter with a milling cutter for laying snow, drilling a notch, etc.)
Total: if you have all the tools and fixtures for turnkey manufacturing of one collapsible deck of 4 cases (tiers), you need 1.5 - 2 working days.
If the processing of the barrel and cases is carried out only inside, the labor intensity is reduced by 2-3 times, then 1-2 decks, or traps, can be made per day.
BUT THE RESULT IS WORTH IT!!!
USED BOOKS
1. Sukhodolets L.G. Thermal physics of wintering bees "Kolos" 2006
2. V.F. Shapkina T.V. Shapkin "Contactless beekeeping" Moscow 2009
3. Emile Varre "Beekeeping for all" Per. from French A.Starodum 2011
4. Yu. Lubenetsky "Complete practical guide for beekeepers" Moscow 1876
5. VN Korzh "Fundamentals of beekeeping".
6. I.V. Kullanda “Folk bee. A public guide to proper beekeeping "Penza 1882
7. O.P. Popov "On deck hives and their improvement" 1889
8. V.P.Kuryshev R.V.Kuryshev "Beehive Krylatsky" Moscow 2004
9. I.A. Shabarshov "History of Russian beekeeping" Moscow 1996
10. N. Sokolov "Guide to beekeeping" Moscow 1877
11. E.N. Vasilieva I.A. Khalifman "Bees" The story of the biology of the bee family and the victories of the science of bees "Moscow 2001
About the deck. About what I came to.
After re-reading a lot of information on deck beekeeping, I found that the principles are set out from all angles, but without explaining why this is so and not otherwise. And a lot of beekeepers who tortured the "wells" with questions: why so ?, why so ?, remained without answers. As a result, these principles became unconvincing. Therefore, the article will begin by closing those very questions left unanswered.
I. The structure of the recumbent deck:
Starting to create our own apiary, we set the goal of placing on it the maximum possible number of decks. Therefore, the requirements for the decks were as follows:
1. Maximum comfort for the bees.
2. Ease, simplicity and speed in manufacturing.
3. Minimum cost.
As a result of reflections, the following scheme was born:
Boards 6x20, 6x15 or bars 6x10 (sawmills do not always have suitable material) are cut off on the sides to a profile section in the form of a trapezoid, then tightly fitted, planted at the ends on wooden tongues, planted on non-toxic glue and tightened with straps for tightening loads. It turns out a "monolithic", wooden barrel. Covers are made of the same thickness as the walls, half recessed into the deck. 6 decks come out of a cubic meter of material! There was an idea for an economical option - creating decks from thinner boards, followed by sheathing them with free slabs, but it did not prove itself as more labor-intensive and problematic in terms of final preparation. It's easier to overpay The thickness of the boards is chosen based on the conditions of the Russian winter, purely empirically (it may turn out that we made a mistake and another thickness will be more optimal). The material is desirable not coniferous, without resin, because. it increases the thermal conductivity of wood. According to the old people, it is best to use sieve spruce for this business, they say her bee loves it very much
The length of such a deck is 1.5 meters, the diameter is 40-47 centimeters (due to the fit of the boards). It is installed at an angle that is calculated by eye (as will be described later). The notch is made in the middle of the side wall 1.5 cm high, either with dotted cuts or holes going as close to each other as possible. The notch is 1.1-1.2 meters long. The letok stretches from the upper end. On the bottom of the deck, at the lower end, if desired, a 2.5 cm garbage hole is made for self-cleaning of the deck by bees. End caps are removable.
Honeycomb nest tongues are built vertically, so the vertical sectional area of the deck is very important. The diagram shows the lines of the level of temperature distribution in clubs of different shapes: t4-maximum, t1-minimum. Its distribution is due to the fact that the lower bees warm the upper ones. From calculations for frame hives, it is known that for excellent wintering of bees in the conditions of the Russian winter, tongues should be ~ 50 cm high. With the right ratio of the diameter of the deck and its slope, the height of the vertical section of the deck can be brought to the optimum. Someone will say: why not just increase the diameter? The fact is that the honeycomb tongues should not be too wide - this reduces their strength and there is a high probability of their collapse. Their roundness is also important for wintering, look at the diagram:
A club of bees during wintering can leave part of the honey aside not eaten and die from lack of food. Therefore, an oval section with an oval height of at least 50 cm is considered optimal for wintering (it is taken into account that honeycomb tongues are not built to the very bottom). Someone will notice that under such conditions it is possible to create oval-shaped decks and put them without tilt, but this is extra labor costs and technical difficulties (an ideal circle is easier to make). There is less strength in the oval design! Moreover, the slope of the stack, combined with the oval shape of the upper ends of the tongue, allows the bees to move from the lower tongues to the neighboring higher ones, which increases the upper limit of the possible wintering period. Another plus is that the notch in an inclined state creates a natural air circulation from the bottom up. The length of the deck determines the volume required by the family for two years of development. Do not reduce the diameter of the deck too much - this will significantly complicate the cutting of honey.
[This is about the diameter and angle of inclination]
The letok is located in the middle for several reasons. If it is made at the bottom, then the evaporated moisture will accumulate in the nest near the ceiling - this is extra work for the bees, the worst conditions for wintering. If you make it at the very top, it threatens to lose all the heat. The middle was the best option. It is not brought to the lower end with the aim that the bees would not breed brood there, but only honey (the brood is always opposite the notch). At the first stage (after settling), the notch can be halved to make it easier for the bees to protect the nest, later, when the colony gains strength, it may even not be enough. In cold weather, bees close the notch with bodies, and in hot weather they simply open it. There is no work on artificial ventilation, everything goes by itself: the entrance is closed by bees, the temperature of the nest rises, the entrance opens and warm air leaves the nest along with moisture, then


