Friends, I greet you! Today I want to talk about the most common homemade radio amateurs. We will talk about a thyristor power controller. Due to the ability of the thyristor to instantly open and close, it is successfully used in various homemade products. At the same time, it has low heat dissipation. The thyristor power controller circuit is well known, but it has a distinctive feature from similar circuits. The circuit is designed in such a way that when the device is initially connected to the network, there is no current surge through the thyristor, so that dangerous current does not flow through the load.
Earlier I talked about, in which a thyristor is used as a control device. This controller can control a load of 2 kilowatts. If the power diodes and thyristor are replaced with more powerful analogues, then the load can be increased several times. And it will be possible to use this power regulator for an electric heating element. I use this homemade vacuum cleaner.
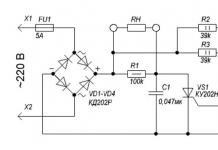
Scheme of the power regulator on the thyristor
The scheme itself is simple to disgrace. I don't think it's worth explaining how it works:

Device details:
- Diodes; KD 202R, four rectifier diodes for a current of at least 5 amperes
- Thyristor; KU 202N, or another with a current of at least 10 amperes
- Transistor; KT 117B
- Variable resistor; 10 Kom, one
- Trimmer resistor; 1 room, one
- Resistors are constant; 39 Kom, two watts, two pieces
- Zener diode: D 814D, one
- Resistors are constant; 1.5 kΩ, 300 ohm, 100 kΩ
- Capacitors; 0.047 Mk, 0.47 Mk
- Fuse; 10 A, one
Do-it-yourself thyristor power regulator
The finished device assembled according to this scheme looks like this:

Since there are not very many parts in the circuit, you can use a hinged installation. I used printed:

The power regulator assembled according to this scheme is very reliable. At first, this thyristor regulator was used for an exhaust fan. I implemented this scheme about 10 years ago. Initially, I did not use heat sinks, as the current consumption of the fan is very small. Then I started using this one for a 1600 watt vacuum cleaner. Without radiators, power parts would heat up significantly, sooner or later they would fail. But even without radiators, this device worked for 10 years. Until the thyristor blew. Initially, I used a TS-10 thyristor:

Now I decided to install heat sinks. Do not forget to apply a thin layer of heat-conducting paste KPT-8 on the thyristor and 4 diodes:


If you do not have a unijunction transistor KT117B:

then it can be replaced by two bipolar assembled according to the scheme:

I didn't do it myself, but it should work.
According to this scheme, direct current is supplied to the load. This is not critical if the load is active. For example: incandescent lamps, heating elements, a soldering iron, a vacuum cleaner, an electric drill and other devices that have a collector and brushes. If you plan to use this regulator for a reactive load, for example, a fan motor, then the load should be turned on in front of the diode bridge, as shown in the diagram:

Resistor R7 regulates the power at the load:

and resistor R4 sets the boundaries of the control interval:


With this position of the resistor engine, 80 volts come to the light bulb:

Attention! Be careful, this homemade product does not have a transformer, so some radio components may be at high network potential. Be careful when setting the power regulator.
Usually, the thyristor does not open due to the small voltage on it and the transience of the process, and if it does open, it will be closed at the very first transition of the mains voltage through 0. Thus, the use of a unijunction transistor solves the problem of forced discharge of the storage capacitor, at the end of each half-cycle of the supply networks.
I placed the assembled device in an old unnecessary case from a broadcast radio. I installed the variable resistor R7 in its original place. It remains to put a pen on it and calibrate the voltage scale:


The case is a little big, but the thyristor and diodes are cooled just fine:

On the side of the device, I placed a socket so that I could connect the plug from any load. To connect the assembled device to the mains, I used a cord from an old iron:

As I said earlier, this thyristor power regulator is very reliable. I've been using them for over a year now. The scheme is very simple, even a novice radio amateur can repeat it.
Thyristor voltage regulators are devices designed to control the speed and torque of electric motors. The speed and torque are controlled by changing the voltage supplied to the motor stator, and is carried out by changing the opening angle of the thyristors. This method of controlling the electric motor is called phase control. This method is a kind of parametric (amplitude) control.
They can be performed with both closed and open-loop control systems. Open-loop controllers do not provide a satisfactory quality of the speed control process. Their main purpose is to control the torque to obtain the desired mode of operation of the drive in dynamic processes.

The power part of a single-phase thyristor voltage regulator includes two controlled thyristors, which ensure the flow of electric current at the load in two directions with a sinusoidal voltage at the input.
Thyristor controllers with closed loop control system are used, as a rule, with negative speed feedback, which makes it possible to have sufficiently rigid mechanical characteristics of the drive in the zone of low speeds.
Most efficient use thyristor regulators for speed and torque control.
Power circuits of thyristor regulators
On fig. 1, a-d shows possible circuits for switching on the rectifier elements of the regulator in one phase. The most common of them is the scheme in Fig. 1a. It can be used for any connection scheme of the stator windings. The permissible current through the load (effective value) in this circuit in continuous current mode is:
Where I t - allowable average current through the thyristor.
Maximum forward and reverse thyristor voltage
![]()
Where k app - safety factor, selected taking into account possible switching overvoltages in the circuit; - effective value of the linear voltage of the network.
Rice. 1. Schemes of power circuits of thyristor voltage regulators.
In the diagram in fig. 1b there is only one thyristor included in the diagonal of the bridge of uncontrolled diodes. The ratio between the load and thyristor currents for this circuit is:
![]()
Uncontrolled diodes are selected for a current half that for a thyristor. Maximum forward voltage across the thyristor
![]()
The reverse voltage across the thyristor is close to zero.
The scheme in fig. 1b has some differences from the circuit in Fig. 1a on the construction of the control system. In the diagram in fig. 1, and the control pulses to each of the thyristors must follow the frequency of the supply network. In the diagram in fig. 1b, the frequency of control pulses is twice as high.
The scheme in fig. 1, c, consisting of two thyristors and two diodes, if possible, control, loading, current and maximum forward voltage of thyristors is similar to the circuit in fig. 1, a.
The reverse voltage in this circuit is close to zero due to the shunt action of the diode.
The scheme in fig. 1, d in terms of current and maximum forward and reverse voltage of thyristors is similar to the circuit in fig. 1, a. The scheme in fig. 1, d differs from the considered requirements for the control system to provide the required range of change in the thyristor control angle. If the angle is counted from zero phase voltage, then for the circuits in Fig. 1, a-c
![]()
Where φ - load phase angle.
For the scheme in fig. 1, d, a similar ratio takes the form:
![]()
The need to increase the range of angle changes complicates. The scheme in fig. 1, d can be used when turning on the stator windings in a star without a neutral wire and in a triangle with the inclusion of rectifier elements in the linear wires. The scope of this scheme is limited to non-reversible, as well as reversible electric drives with contact reversal.
The scheme in fig. 4-1, e is similar in its properties to the circuit in fig. 1, a. The triac current here is equal to the load current, and the frequency of the control pulses is equal to the double frequency of the supply voltage. The disadvantage of the circuit on triacs is that the permissible values \u200b\u200bof du / dt and di / dt are much less than those of conventional thyristors.
For thyristor regulators, the most rational circuit is in fig. 1, but with two back-to-back thyristors.
The power circuits of the regulators are made with back-to-back thyristors in all three phases (symmetrical three-phase circuit), in two and one phases of the motor, as shown in fig. 1f, g, and h, respectively.
In regulators used in crane electric drives, the symmetrical switching circuit shown in fig. 1, e, which is characterized by the lowest losses from higher harmonic currents. Higher losses in circuits with four and two thyristors are determined by voltage unbalance in the motor phases.
Basic technical data of thyristor regulators of the RST series
Thyristor regulators of the RST series are devices for changing (according to a given law) the voltage supplied to the stator of an asynchronous motor with a phase rotor. Thyristor controllers of the RST series are made according to a symmetrical three-phase switching circuit (Fig. 1, f). The use of regulators of this series in crane electric drives makes it possible to control the speed in the range of 10:1 and control the engine torque in dynamic modes during start-up and braking.
Thyristor regulators of the PCT series are made for continuous currents of 100, 160 and 320 A (maximum currents are 200, 320 and 640 A, respectively) and voltage of 220 and 380 V AC. The regulator consists of three power units assembled on a common frame (according to the number of phases of back-to-back thyristors), a current sensor unit and an automation unit. Power blocks use tablet thyristors with coolers made of extruded aluminum profile. Cooling air - natural. The block of automatic equipment - uniform for all executions of regulators.
Thyristor regulators are made with IP00 degree of protection and are intended for installation on standard frames of magnetic controllers of the TTZ type, which are similar in design to TA and TCA series controllers. Overall dimensions and weight of PCT series regulators are given in Table. 1.
Table 1 Overall dimensions and weight of PCT series voltage regulators

TTZ magnetic controllers are equipped with direction contactors for reversing the motor, rotary circuit contactors and other relay-contact elements of the electric drive, which communicate the controller with the thyristor regulator. The structure of the controller control system is visible from the functional diagram of the electric drive shown in fig. 2.
The three-phase symmetrical thyristor unit T is controlled by the SFU phase control system. With the help of the controller KK in the regulator, the speed setting of the BZS is changed. Through the BZS block, as a function of time, the acceleration contactor KU2 is controlled in the rotor circuit. The difference between the reference signals and the TG tachogenerator is amplified by the U1 and US amplifiers. A logical relay device is connected to the output of the ultrasonic amplifier, which has two stable states: one corresponds to the switching on of the forward direction contactor KB, the second corresponds to the switching on of the reverse direction contactor KN.
Simultaneously with the change in the state of the logic device, the signal in the control circuit of the switchgear is reversed. The signal from the matching amplifier U2 is added to the delayed feedback signal on the motor stator current, which comes from the current limiting unit TO and is fed to the input of the SFU.
The BL logic block is also affected by a signal from the DT current sensor block and the LT current presence block, which prohibits switching of the direction contactors under current. The BL block also performs non-linear correction of the rotation speed stabilization system to ensure the stability of the drive. Regulators can be used in electric drives of lifting and moving mechanisms.
Regulators of the RST series are made with a current limiting system. The current limiting level for protecting thyristors against overloads and for limiting the motor torque in dynamic modes smoothly changes from 0.65 to 1.5 of the rated current of the controller, the current limiting level for overcurrent protection is from 0.9 to. 2.0 regulator rated current. A wide range of protection settings ensures operation of a regulator of the same standard size with motors that differ in power by about 2 times.
Rice. 2. Functional diagram of an electric drive with a thyristor controller of the RST type: KK - controller; TG - tachogenerator; KN, KB - direction contactors; BZS - speed setting block; BL - logic block; U1, U2. US - amplifiers; SFU - phase control system; DT - current sensor; IT - current presence block; TO - current limiting unit; MT - protection unit; KU1, KU2 - acceleration contactors; KL - linear contactor: P - knife switch.
Rice. 3. Thyristor voltage regulator PCT
The sensitivity of the current presence system is 5-10 A of the effective value of the current in the phase. The regulator also provides protection: zero, from switching surges, from the disappearance of current in at least one of the phases (IT and MT blocks), from radio interference. High-speed fuses of the PNB 5M type provide protection against short-circuit currents.
In order to get high-quality and beautiful soldering, you need to choose the right soldering iron power and provide a certain temperature of its tip, depending on the brand of solder used. I offer several schemes for home-made thyristor temperature controllers for heating the soldering iron, which will successfully replace many industrial ones that are incomparable in price and complexity.
Attention, the following thyristor circuits of temperature controllers are not galvanically isolated from the electric network and touching the current-carrying elements of the circuit is life-threatening!
To adjust the temperature of the soldering iron tip, soldering stations are used in which the optimum temperature of the soldering tip is maintained in manual or automatic mode. The availability of a soldering station for the home craftsman is limited by the high price. For myself, I solved the issue of temperature control by developing and manufacturing a regulator with manual smooth temperature control. The circuit can be modified to automatically maintain the temperature, but I don’t see the point in this, and practice has shown that manual adjustment is quite enough, since the mains voltage is stable and the room temperature too.
Classic thyristor regulator circuit
The classic thyristor circuit of the soldering iron power regulator did not meet one of my main requirements, the absence of radiating interference into the mains and the air. And for a radio amateur, such interference makes it impossible to fully engage in what you love. If the circuit is supplemented with a filter, then the design will turn out to be cumbersome. But for many applications, such a thyristor regulator circuit can be successfully used, for example, to adjust the brightness of incandescent lamps and heating appliances with a power of 20-60 watts. That's why I decided to present this scheme.
In order to understand how the circuit works, I will dwell in more detail on the principle of operation of the thyristor. A thyristor is a semiconductor device that is either open or closed. to open it, you need to apply a positive voltage of 2-5 V to the control electrode, depending on the type of thyristor, relative to the cathode (k is indicated in the diagram). After the thyristor has opened (the resistance between the anode and cathode will become 0), it is not possible to close it through the control electrode. The thyristor will be open until the voltage between its anode and cathode (marked a and k in the diagram) becomes close to zero. It's that simple.
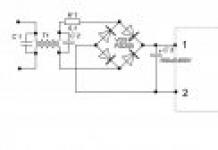
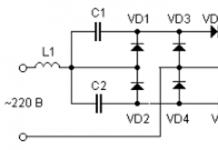
The circuit of the classical regulator works as follows. The AC mains voltage is supplied through the load (an incandescent bulb or a soldering iron winding) to a rectifier bridge circuit made on VD1-VD4 diodes. The diode bridge converts the AC voltage into a DC voltage that changes according to a sinusoidal law (diagram 1). When the middle terminal of the resistor R1 is in the leftmost position, its resistance is 0, and when the voltage in the network begins to increase, the capacitor C1 begins to charge. When C1 is charged to a voltage of 2-5 V, current will flow through R2 to the control electrode VS1. The thyristor will open, short-circuit the diode bridge and the maximum current will flow through the load (upper diagram).
When you turn the knob of the variable resistor R1, its resistance will increase, the charge current of the capacitor C1 will decrease and it will take more time for the voltage across it to reach 2-5 V, so the thyristor will not open immediately, but after some time. The larger the value of R1, the longer the charge time for C1, the thyristor will open later and the power received by the load will be proportionally less. Thus, by rotating the knob of the variable resistor, the heating temperature of the soldering iron or the brightness of the incandescent light bulb is controlled.

Above is a classic thyristor controller circuit made on a KU202N thyristor. Since more current is needed to control this thyristor (according to the passport 100 mA, the real one is about 20 mA), the values of the resistors R1 and R2 are reduced, and R3 is excluded, and the value of the electrolytic capacitor is increased. When repeating the circuit, it may be necessary to increase the value of the capacitor C1 to 20 microfarads.
The simplest thyristor regulator circuit
Here is another of the simplest thyristor power controller circuits, a simplified version of the classic controller. The number of parts is kept to a minimum. Instead of four diodes VD1-VD4, one VD1 is used. Its principle of operation is the same as that of the classical scheme. The schemes differ only in that the adjustment in this temperature controller circuit occurs only according to the positive period of the network, and the negative period passes through VD1 without changes, so the power can only be adjusted in the range from 50 to 100%. To adjust the heating temperature of the soldering tip, more is not required. If the VD1 diode is excluded, then the power adjustment range will be from 0 to 50%.

If a dinistor, for example KN102A, is added to the circuit break from R1 and R2, then the electrolytic capacitor C1 can be replaced with an ordinary one with a capacity of 0.1 mF. Thyristors for the above circuits are suitable, KU103V, KU201K (L), KU202K (L, M, N), designed for a forward voltage of more than 300 V. Diodes are also almost any, designed for a reverse voltage of at least 300 V.
The above circuits of thyristor power controllers can be successfully used to control the brightness of the glow of lamps in which incandescent bulbs are installed. It will not work to regulate the brightness of the glow of lamps in which energy-saving or LED bulbs are installed, since electronic circuits are mounted in such bulbs, and the regulator will simply disrupt their normal operation. The bulbs will shine at full power or flash and this may even lead to premature failure.
The circuits can be used for regulation with a supply voltage of 36 V or 24 V AC. It is only necessary to reduce the resistor values by an order of magnitude and use a thyristor that matches the load. So a soldering iron with a power of 40 W at a voltage of 36 V will consume a current of 1.1 A.
Thyristor regulator circuit does not emit interference
The main difference between the circuit of the presented soldering iron power regulator and those presented above is the complete absence of radio interference in the electrical network, since all transients occur at a time when the voltage in the supply network is zero.
Starting to develop a temperature controller for a soldering iron, I proceeded from the following considerations. The scheme should be simple, easily repeatable, components should be cheap and available, high reliability, minimal dimensions, efficiency close to 100%, no radiating interference, the possibility of modernization.

The temperature controller circuit works as follows. The AC voltage from the mains is rectified by a diode bridge VD1-VD4. From a sinusoidal signal, a constant voltage is obtained, varying in amplitude as half a sinusoid with a frequency of 100 Hz (diagram 1). Further, the current passes through the limiting resistor R1 to the zener diode VD6, where the voltage is limited in amplitude to 9 V, and has a different shape (diagram 2). The resulting pulses charge the electrolytic capacitor C1 through the VD5 diode, creating a supply voltage of about 9 V for the DD1 and DD2 microcircuits. R2 performs a protective function, limiting the maximum possible voltage on VD5 and VD6 to 22 V, and ensures the formation of a clock pulse for the operation of the circuit. With R1, the generated signal is fed to the 5th and 6th outputs of the 2OR-NOT element of the logical digital microcircuit DD1.1, which inverts the incoming signal and converts it into short rectangular pulses (diagram 3). From the 4th output of DD1, the pulses are fed to the 8th output of the D trigger DD2.1, operating in the RS trigger mode. DD2.1, like DD1.1, also performs the function of inverting and signal conditioning (diagram 4).
Please note that the signals in diagram 2 and 4 are almost the same, and it seemed that it was possible to apply a signal from R1 directly to pin 5 of DD2.1. But studies have shown that in the signal after R1 there is a lot of interference coming from the mains, and without double shaping, the circuit did not work stably. And it is not advisable to install additional LC filters when there are free logic elements.
On the DD2.2 trigger, a soldering iron temperature controller control circuit is assembled and it works as follows. Rectangular pulses arrive at pin 3 DD2.2 from pin 13 DD2.1, which with a positive edge overwrite at pin 1 DD2.2 the level that is currently present at the D input of the microcircuit (pin 5). At pin 2, the signal is the opposite level. Consider the work of DD2.2 in detail. Let's say on pin 2, a logical unit. Through the resistors R4, R5, the capacitor C2 is charged to the supply voltage. Upon receipt of the first pulse with a positive drop, 0 will appear at pin 2 and capacitor C2 will quickly discharge through diode VD7. The next positive drop at pin 3 will set a logical unit at pin 2 and capacitor C2 will start charging through resistors R4, R5.
The charge time is determined by the time constant R5 and C2. The larger R5, the longer it will take C2 to charge. Until C2 is charged to half the supply voltage at pin 5 there will be a logical zero and positive pulse drops at input 3 will not change the logic level at pin 2. As soon as the capacitor is charged, the process will repeat.
Thus, only the number of pulses from the supply network specified by resistor R5 will pass to the outputs of DD2.2, and most importantly, these pulses will fluctuate during the transition of the voltage in the supply network through zero. Hence the absence of interference from the operation of the temperature controller.
From pin 1 of the DD2.2 microcircuit, pulses are fed to the DD1.2 inverter, which serves to eliminate the influence of the thyristor VS1 on the operation of DD2.2. Resistor R6 limits the control current of thyristor VS1. When a positive potential is applied to the control electrode VS1, the thyristor opens and voltage is applied to the soldering iron. The regulator allows you to adjust the power of the soldering iron from 50 to 99%. Although the resistor R5 is variable, the adjustment due to the operation of DD2.2 heating the soldering iron is carried out in steps. With R5 equal to zero, 50% of the power is supplied (diagram 5), when turning through a certain angle it is already 66% (diagram 6), then already 75% (diagram 7). Thus, the closer to the rated power of the soldering iron, the smoother the adjustment works, which makes it easy to adjust the temperature of the soldering tip. For example, a 40W soldering iron can be set to 20W to 40W.
The design and details of the temperature controller
All parts of the thyristor temperature controller are placed on a fiberglass printed circuit board. Since the circuit does not have a galvanic isolation from the electrical network, the board is placed in a small plastic case of the former adapter with an electrical plug. A plastic handle is put on the axis of the variable resistor R5. Around the handle on the body of the regulator, for the convenience of adjusting the degree of heating of the soldering iron, a scale with conditional numbers is applied.

The cord from the soldering iron is soldered directly to the PCB. You can make the connection of the soldering iron detachable, then it will be possible to connect other soldering irons to the temperature controller. Surprisingly, the current drawn by the temperature controller control circuit does not exceed 2 mA. This is less than the consumption of the LED in the lighting circuit of the light switches. Therefore, special measures to ensure the temperature regime of the device are not required.

Chips DD1 and DD2 any 176 or 561 series. The Soviet thyristor KU103V can be replaced, for example, with a modern thyristor MCR100-6 or MCR100-8, designed for a switching current of up to 0.8 A. In this case, it will be possible to control the heating of a soldering iron with a power of up to 150 W. Diodes VD1-VD4 are any, designed for a reverse voltage of at least 300 V and a current of at least 0.5 A. IN4007 is perfect (Uob \u003d 1000 V, I \u003d 1 A). Diodes VD5 and VD7 any pulse. Any low-power zener diode VD6 for a stabilization voltage of about 9 V. Capacitors of any type. Any resistors, R1 with a power of 0.5 W.
The power regulator does not need to be adjusted. With serviceable parts and without installation errors, it will work immediately.
The circuit was developed many years ago, when computers, and even more so laser printers, did not exist in nature, and therefore I made a printed circuit board drawing using old-fashioned technology on chart paper with a grid pitch of 2.5 mm. Then the drawing was glued with Moment glue to thick paper, and the paper itself to foil-coated fiberglass. Next, holes were drilled on a home-made drilling machine and the paths of future conductors and contact pads for soldering parts were drawn by hand.

The drawing of the thyristor temperature controller has been preserved. Here is his photo. Initially, the VD1-VD4 rectifier diode bridge was made on the KTs407 microassembly, but after the microassembly was torn twice, it was replaced with four KD209 diodes.
How to reduce the level of interference from thyristor regulators
To reduce interference emitted by thyristor power controllers into the electrical network, ferrite filters are used, which are a ferrite ring with wound turns of wire. Such ferrite filters can be found in all switching power supplies for computers, TVs and other products. An efficient, interference-suppressing ferrite filter can be retrofitted to any thyristor controller. It is enough to pass the wire for connecting to the electrical network through the ferrite ring.

It is necessary to install a ferrite filter as close as possible to the source of interference, that is, to the place where the thyristor is installed. The ferrite filter can be placed both inside the instrument housing and on its outer side. The more turns, the better the ferrite filter will suppress interference, but it is enough and just to pass the mains wire through the ring.
The ferrite ring can be taken from the interface wires of computer equipment, monitors, printers, scanners. If you pay attention to the wire connecting the computer system unit to the monitor or printer, you will notice a cylindrical thickening of the insulation on the wire. This location contains a ferrite high-frequency noise filter.

It is enough to cut the plastic insulation with a knife and remove the ferrite ring. Surely you or your friends will find an unnecessary interface cable from an inkjet printer or an old kinescope monitor.
In amateur radio practice, one of the important tools is a soldering iron. But over time, for each soldering iron, as a rule, the tip burns out and we have to sharpen it. After some time, this procedure is repeated. Then, again and again. This is because the alloy of tin with rosin in constant contact with copper burns out at a temperature of ~ 200 degrees. There are a lot of different soldering irons on sale now, different models and different price categories. And the tip on these soldering irons is brass (or something else), to which the solder does no harm. But not all fans of rosin smoke like these soldering irons in view of the fact that they are designed for spot soldering. Many (like me, for example) prefer only a copper sting and monitor its condition. To prolong the life of this undoubtedly important tool, radio amateurs develop and assemble various power regulators for the soldering iron. One of these thyristor regulator circuits, which I recently assembled for my soldering iron, I want to share with you.The scheme, as you can see, is simple to the limit! The printed circuit board is not needed, everything is soldered on the terminals of the thyristor, variable resistor and socket under load. The thyristor power controller circuit works not only with a soldering iron, but also with any other load. For example chandeliers (night lamp). In my case, the thyristor is installed on a small radiator, which will allow you to connect a fairly powerful source of consumption to the load.

This is what the installation looks like in my version of the device. True, it has not yet been completed, due to the lack of a variable of the required denomination. But the device itself is already assembled, it remains to solder the regulator.

Appearance homemade on the thyristor in front.

It's from the rear...

Checking the regulator is carried out visually, using a conventional light bulb. We turn on the load and turn the variable resistor. If the brightness decreases and increases, then everything is, as they say, tip-top. Usually, a choke and a capacitor are installed in such regulators to smooth and filter interference, but in this case they were not observed.
Discuss the article THYRISTOR POWER REGULATOR
The article describes how the thyristor power controller works, the circuit of which will be presented below.
In everyday life, it is very often necessary to regulate the power of household appliances, such as electric stoves, soldering irons, boilers and heating elements, in transport - engine speed, etc. The simplest amateur radio design comes to the rescue - a power regulator on a thyristor. It is not difficult to assemble such a device, it can become the very first home-made device that will perform the function of adjusting the temperature of the soldering tip of a beginner radio amateur. It is worth noting that ready-made soldering stations with temperature control and other nice features are much more expensive than a simple soldering iron. The minimum set of parts allows you to assemble a simple thyristor power controller for surface mounting.
For your information, surface mounting is a method of assembling electronic components without using a printed circuit board, and with a good skill, it allows you to quickly assemble electronic devices of medium complexity.
You can also order a thyristor regulator, and for those who want to figure it out on their own, a diagram will be presented below and the principle of operation will be explained.
By the way, this is a single-phase thyristor power regulator. Such a device can be used to control power or the number of revolutions. However, first you need to understand because this will allow us to understand what load it is better to use such a regulator.
How does a thyristor work?
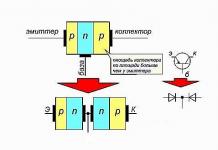
A thyristor is a controlled semiconductor device capable of conducting current in one direction. The word “controlled” is used for a reason, because with its help, unlike a diode, which also conducts current to only one pole, you can choose the moment when the thyristor starts to conduct current. The thyristor has three outputs:
- Anode.
- Cathode.
- control electrode.

In order for the current to start flowing through the thyristor, the following conditions must be met: the part must be in a energized circuit, a short-term pulse must be applied to the control electrode. Unlike a transistor, controlling a thyristor does not require holding a control signal. The nuances do not end there: the thyristor can be closed only by interrupting the current in the circuit, or by forming an anode-cathode reverse voltage. This means that the use of a thyristor in DC circuits is very specific and often unreasonable, but in AC circuits, for example, in such a device as a thyristor power regulator, the circuit is designed in such a way that a condition for closing is provided. Each of the half-waves will close the corresponding thyristor.
You, most likely, do not understand everything? Do not despair - the process of the finished device will be described in detail below.
Scope of thyristor regulators
In what circuits is it effective to use a thyristor power regulator? The circuit allows you to perfectly regulate the power of heating devices, that is, to influence the active load. When working with a highly inductive load, the thyristors may simply not close, which can lead to failure of the regulator.
Can the engine?

I think many of the readers have seen or used drills, angle grinders, which are popularly called "grinders", and other power tools. You may have noticed that the number of revolutions depends on the depth of pressing the trigger button of the device. It is in this element that such a thyristor power regulator is built in (the diagram of which is shown below), with the help of which the number of revolutions is changed.
Note! The thyristor controller cannot change the speed of asynchronous motors. Thus, the voltage is regulated on collector motors equipped with a brush assembly.
Scheme of one and two thyristors
A typical diagram for assembling a thyristor power regulator with your own hands is shown in the figure below.

The output voltage of this circuit is from 15 to 215 volts, in the case of the use of these thyristors installed on heat sinks, the power is about 1 kW. By the way, a switch with a dimmer switch is made according to a similar scheme.
If you do not need full voltage regulation and it is enough to get 110 to 220 volts at the output, use this diagram, which shows a half-wave thyristor power regulator.

How it works?

The information below is valid for most circuits. Letter designations will be taken in accordance with the first circuit of the thyristor regulator
The thyristor power regulator, the principle of operation of which is based on the phase control of the voltage value, also changes the power. This principle lies in the fact that under normal conditions, the load is affected by the alternating voltage of the household network, which changes according to a sinusoidal law. Above, when describing the principle of operation of a thyristor, it was said that each thyristor works in one direction, that is, it controls its half-wave from a sinusoid. What does it mean?
If, with the help of a thyristor, the load is periodically connected at a strictly defined moment, the magnitude of the effective voltage will be lower, since part of the voltage (the effective value that “falls” on the load) will be less than the mains voltage. This phenomenon is illustrated in the graph.
The shaded area is the area of stress that turned out to be under load. The letter "a" on the horizontal axis indicates the moment of thyristor opening. When the positive half-wave ends and the period with a negative half-wave begins, one of the thyristors closes, and at the same moment the second thyristor opens.
Let's figure out how our thyristor power controller works specifically
Scheme one
Let us stipulate in advance that instead of the words "positive" and "negative" "first" and "second" (half-wave) will be used.
So, when the first half-wave begins to act on our circuit, the capacitances C1 and C2 begin to charge. Their charge rate is limited by potentiometer R5. this element is variable, and with its help the output voltage is set. When the voltage necessary to open the VS3 dinistor appears on the capacitor C1, the dinistor opens, a current flows through it, with the help of which the VS1 thyristor will be opened. The moment of breakdown of the dinistor is the point "a" on the graph presented in the previous section of the article. When the voltage value passes through zero and the circuit is under the second half-wave, the thyristor VS1 closes and the process is repeated again, only for the second dinistor, thyristor and capacitor. Resistors R3 and R3 are used for control, and R1 and R2 - for thermal stabilization of the circuit.
The principle of operation of the second circuit is similar, but it controls only one of the half-waves of the alternating voltage. Now, knowing the principle of operation and the circuit, you can assemble or repair a thyristor power regulator with your own hands.
The use of the regulator in everyday life and safety

It cannot be said that this circuit does not provide galvanic isolation from the network, therefore there is a danger of electric shock. This means that you should not touch the regulator elements with your hands. An insulated housing must be used. You should design the design of your device so that, if possible, you can hide it in an adjustable device, find a free place in the case. If the adjustable device is stationary, then it generally makes sense to connect it through a switch with a light dimmer. Such a solution partially protects against electric shock, eliminates the need to find a suitable case, has an attractive appearance and is manufactured by an industrial method.


