Technological sequence for processing a men's shirt
1. Finish the top edge of the pocket with a width of 2.0 cm.
2. Sew the pocket to a shelf w/w 0.1-0.2 cm.
3. Sew parts of the lower collar w/w 1.0 cm,
Stitch the collar w/w 0.5 cm.
4. Stitch the ends of the cuffs w/w 1.0 cm.
5. Stitch and overcast the side and shoulder sections, w/w 1.0 cm.
6. Sew the sleeve seam w/w 1.0 cm, overcast.
7. Sew cuffs w/w 0.7 cm, overcast.
8. Sew the sleeves into the armhole, w/w 1.0 cm, and overcast the seam allowance.
9. Sew the collar into the neckline w/w 0.5 cm, overcast, overstitch the ledges, stitch the collar stitching seam/0.2 cm.
10. Stitch and turn out the corners of the hem.
11. Hem the bottom of the product w/w 1.0 cm.
12. Sweep the loops on the left shelf.
13. Sew on buttons
14. Final WTO
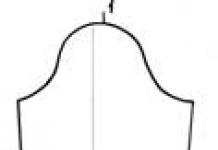
Details of the cut of a men's shirt with the name of the sections
Shelf - 2 parts
1.Neck cut
2.Head cut
3. Bottom cut
4. Side cut
5. Armhole cut
6. Shoulder cut

Sleeve - 2 parts
1. Cutting edge
2. Side cut
3. Bottom cut
4. Side cut

Lower back - 1 piece
1.Top cut
2. Armhole cut
3. Bottom cut
 Upper back or yoke - 1 piece
1. Neck cut
2. Shoulder cut
3. Armhole cut
4. Bottom cut
Pocket - 1 piece
1.Top cut
2. Side cut
3. Bottom cut

Collar-2 parts
1. Take-off cut
2. Collar ends
3. Neck cut
Trousers" href="/text/category/bryuki/" rel="bookmark">trousers.
2. Process the belt
3. Process the belt loops
4. Treat pockets
5. Process the side cuts
6. Process the fastener
7. Finish the top edge of the trousers with a belt
8. Process step cuts
9. Process the middle sections
10. Process the lower cuts
11. Perform OBE on all trousers
Details of the cut of the trousers with the name of the cuts
Name of parts | Name of slices |
Front half of trousers - 2 parts
| 1.Medium cut 2. Top cut 3. Step cut 4. Bottom cut 5. Side cut |
Back half of trousers – 2 parts
Pocket details A) Side part of trousers, one-piece with pocket burlap – 2 parts b) Burlap pocket - 2 parts | 1.Medium cut 2. Top cut 3. Step cut 4. Bottom cut 5. Side cut |
a) Belt – 1 piece with a fold or 2 parts with seam b) Belt belt – 5 parts or according to model |
Technological sequence for processing a skirt.
1. Check the cut details using the patterns
2. Stitch the darts of the front panel and iron them towards the center
3. Stitch the darts of the back panel and iron them to the middle sections
4. Sew the middle seam of the back panel, leaving a gap at the top for the fastener and at the bottom for the vent or cut
5. Overcast the middle seam
6. Iron the middle seam onto the left half of the back panel or iron it
7. Stitch the side sections of the skirt
8. Overcast the side sections
9. Iron the side cuts
10. Overcast the bottom edge of the waistband
11. Glue the padding (non-woven fabric) to the belt
12. Fold the belt in half and sharpen the side edges
13. Process the fastener
14. Sew the belt
15. Iron the waistband
16. Process the slot or cut
17. Finish the bottom of the skirt
a) Sew the bottom of the skirt
b) Hem the bottom of the skirt by hand using blind stitches
18. Iron the bottom of the skirt
19. Sew on a button
20. Produce the final WTO of the skirt
Details of the skirt cut with the name of the sections
Name of parts | Name of slices |
1. Front half of the skirt - 1 piece with fold
| 1. Top cut 2. Side cut 3.Bottom cut |
1. Back half of the skirt - 2 parts with seam
| 1. Top cut 2. Side cut 3.Bottom cut 4. Middle (central) cut |
Belt - 1 piece with fold | 1. Top cut 2. Bottom cut 3. Side cuts |
Technological sequence for processing men's underpants.
4. Sew the crotch seams with a backstitch (w/w) 0.5 cm
5. Finish the top edge of the panties with a hem seam with a closed cut, leaving on the right back half an unsewn area 1.5 cm wide under the elastic band, securing on both sides (hem width 1.5 cm, w/w 0.1-0.2 cm)
6. Sew the bottom edges of the panties using a closed hem seam (hem width 0.7-0.8 cm, w/w 0.1-0.2 cm)
7. Perform WTO of the entire product
Details of the cut of men's briefs with the name of the cuts
Name of parts | Name of slices |
The front half of the panties -
| 1.Top cut 2.Anterior middle cut 3. Step cut 4. Bottom cut 5. Side cut |
The back half of the panties - 2 parts
| 1.Top cut 2. Posterior middle section 3. Step cut 4. Bottom cut 5. Side cut |
Instructional map of the technological sequence for processing men's underpants.
1. Sew the middle seam of the back halves of the panties using a backstitch (w/w) 0.5 cm
2. Sew the middle seam of the front halves of the panties using a backstitch (w/w) 0.5 cm
3. Sew the side seams with a backstitch (w/w) 0.5 cm
4. Sew the crotch seams with a backstitch (w/w) 0.5 cm
5. Finish the top edge of the panties with a hem seam with a closed cut, leaving on the right back half an unsewn area 1.5 cm wide under the elastic band, securing on both sides (hem width 1.5 cm, w/w 0.1-0.2 cm)
6.Sew the bottom edges of the panties using a closed hem seam (hem width 0.7-0.8 cm, w/w 0.1-0.2 cm)
7. Perform WTO of the entire product
Send your good work in the knowledge base is simple. Use the form below
Students, graduate students, young scientists who use the knowledge base in their studies and work will be very grateful to you.
Posted on http://www.allbest.ru/
Specification of cut details
Processing methods
“Processing the neckline with an undercut facing”
Place the facing on the neckline, right side to right side.
Baste the pieces along the neckline.
Stitch the pieces along the seam allowance line.
Notch seam allowances along the neck line.
Fold the facing to the wrong side, straighten the corners, sweep along the edge.
Finish the edge of the facing with an overcasting machine or with a decorative stitch on a sewing machine.
Secure the facing with a machine stitch at a distance of 5mm from the edge of the neckline.
Iron the facing.
Processing of side seams, double reverse
Processing the bottom cut
Closed hem seam
Baste - finish and secure the folded edge using hand stitches
Stitch - secure, fold the edge with a machine stitch
Iron - reduce the thickness of the seam
Technological sequence for processing a women's shirt
1. Check the cut details, their compliance with the selected cut model and size.
2. Sew the control card onto large parts (back, shelf).
3. Process the shoulder section of the yoke, the seam width is 10mm, the stitching line is laid along the shelf.
4. Sew the shoulder section towards the back.
5. Iron the shoulder section towards the back.
6. Overcast the neck of the yoke with a piping stitch with a seam width of 5-6 mm.
7. Sew the side seam of the bottom of the shirt with a seam width of 10mm.
8. Overcast the side seam
9. Iron the side seam towards the back.
10. Place two thin parallel lines along the top edge of the bottom panel.
11. Gather the top edge of the bottom panel to the length of the shirt yoke.
12. Baste the yoke and bottom edge using running stitches along the bottom.
13. Connect the top and bottom of the shirt with a seam width of 10mm.
14. Overcast the joint seam using a special stitch. machine class 51, laying a basting line along the bottom.
15. Clean the seam connecting the lower part with the yoke from production debris.
16. Place a separate line along the yoke of the back and front, first iron the seam up.
17. Process the armhole cut with a closed edge seam with a seam width of 5mm.
18. Carry out quality control of the shoulder cut, neckline, and seam connecting the yoke to the lower part of the armhole.
19. Baste the side seam of the back and front, laying basting lines along the front, seam width 10mm.
20. Stitch the side seam of the back and front, laying a 10mm stitch along the front.
21. Overcast the side seam using a special machine 51kl., laying the overcasting line along the shelf.
22. Press the side seam towards the back.
23. Place a tack on the top of the side seam to secure it towards the back.
24. Trim the bottom edge of the nightgown.
25. Finish the bottom edge of the nightgown with a hem seam.
26. Finish the finishing bow and attach it to the neck of the shelf yoke.
27. Carry out the final wet-heat treatment of the nightgown.
28. Mark the product by sewing a coupon to it indicating the name of the product, size, and production date.
29. Carry out quality control of the finished product.
Description of the appearance of the shirt
The women's shirt is intended for everyday wear by women of younger, middle and older age.
The shirt has a yoke along the back and front, the neckline is finished with a edging cut with a closed seam. The armhole cut is also finished with a closed cut edge stitch. The lower part of the shirt is gathered using rare machine stitching. The bottom section of the shirt is finished with a hem seam with a closed cut 1cm wide.
There is a testma as finishing for the yoke.
For sewing you will need:
1. Chintz 80 cm wide - 2.5 m.
2. Plain fabric for finishing 80 cm wide - 0.5 m.
3. Threads No. 40 in the color of the fabric - 3 pcs.
Technical conditions for performing manual work.
1. When performing temporary stitches and lines, use white threads of the corresponding numbers.
2. Needle numbers must correspond to the thickness of the fabric and the nature of the operations performed
3. All estimating work is performed at a distance of 1 mm. from the marked chalk line towards the cut of the part so that the basting lines fall under the machine stitch.
5. Chalk lines using patterns and rulers; the thickness of the chalk lines should not exceed 1 mm.
6. When removing temporary sutures, they are trimmed after 10-15 cm and removed.
7. To speed up sweeping and improve the quality of work, the parts are first cleaved with pins.
8. The length of the stitches must correspond to the dimensions specified in the OST "Sewing products, technical requirements for stitches, stitches, seams."
3. All basting work is performed at a distance of 1 mm from the intended chalk line towards the cut of the part so that the basting lines do not fall under the machine stitch.
4. The ends of the basting lines are secured with 1-2 reverse stitches.
5. Mark the lines using patterns and rulers; the thickness of the chalk lines should not exceed 1 mm.
6. When removing temporary threads, they are cut with scissors after 10-15 cm and removed.
7. To speed up sweeping and improve the quality of work, the parts are pre-folded with pins.
Equipment used.
Car 1022 class.
To make a nightgown I will need:
b Sewing machine with electric drive.
ь Iron with steam humidifier, ironing board.
ь Cutting scissors for cutting fabric.
b Centimeter tape for taking measurements from the figure.
b White tailor's chalk for outlining details.
ь Tailor's pins for folding parts.
b Hand needle for basting product parts.
b A thimble to protect your fingers from being punctured by a needle.
b Machine needle No. 90.
ь Cutting ruler.
Safety rules during operation
WHEN OPERATING AN ELECTRIC IRON
ь Check the serviceability of the cord.
b Turn the iron on and off with dry hands, holding the plug body.
b Place the iron on the stand, making sure that the sole of the iron does not touch the cord.
ь Make sure that the thermostat position is set correctly. When finished, turn off the iron.
WHEN OPERATING A SEWING MACHINE WITH AN ELECTRIC WIRE.
ь Before work, check the condition of the cord.
ь When turning the machine on and off, only grasp the plug body.
b Put your foot on the pedal correctly, press it smoothly, without jerking.
ь Hair should be tucked and pulled back.
ь There should be no foreign objects on the machine.
ь Check before work. Are there any pins or needles left in the item?
ь Do not lean close to moving or rotating parts of the machine.
b Make sure your hands are in the correct position.
Quality control
The finished product meets the following requirements:
ь Corresponds to the idea and sketch of the model.
ь Corresponds to technical parameters.
ь Made carefully, the stitches are even, the seam standards are observed.
Ecological justification
When making a nightgown, there is no environmental pollution, since the materials from which the product is made do not emit toxic substances. Fabric waste from a nightgown can be used to make appliqués, rag products, and decorative elements for finishing products.
Disadvantages andthe virtues of my nightgown
ADVANTAGES:
1. Natural fabric.
2. Evenly stitched seams.
3. Modern model.
4. Fun drawing.
FLAWS:
Gained knowledge and skillsme after the work done
While doing this job I learned how to handle the neck - this was the main task we had to learn. I also remembered how to sew with a hidden seam. After this work my stitches are straighter. I also remembered how to process the bottom and sleeves. facing stitching nightgown
I learned how to manipulate fabric where it is difficult to stitch. And, of course, I learned how to sew a nightgown.
WITHmodel cost
Calculation of total cost.
Conclusion
Clothes, depending on their purpose, can be divided into several types: household, sports, industrial, uniform.
Household clothing has a variety of characteristics - it is home, casual, weekend, national, and leisure clothing.
Home clothes are intended for sleeping, morning and evening dressing, and relaxing at home.
My nightgown is just one of those home clothes. When developing my model, I fulfilled almost all the requirements for clothing.
My nightgown ensures the normal functioning of the body (the skin breathes in it).
The fabric is quite durable and wear-resistant.
The model has a comfortable silhouette; when sleeping, the shirt does not hug the body, and you feel comfortable in it.
The cheerful colors of the fabric have a positive effect on my morning mood.
This model is inexpensive and accessible.
Literature
1. A.T. Trukhanov "Fundamentals of sewing technology".
2. E.P. Maltsev "Materials for the introduction of clothing production."
3. I.N. Litvinova, A.N. Shakanova "Making women's outerwear." Moscow "Legprombytizdat" 1986
4. L.P. Chitinov "Clothing Design and Modeling Club". Moscow "Enlightenment" 1990
5. L.V. Martoplyas, G.V. Skachkova. "Courses for cutting and sewing at home." Minsk LLC Etotim", 1994
6. N.M. Kaminskaya "History of Costume".
Posted on Allbest.ru
...Similar documents
Product requirements, model selection. Characteristics of the appearance of a women's nightgown. Standardization of significant material properties, assortment analysis and material selection. Determination of bending rigidity, humidity, crease resistance. Technical level map.
test, added 05/15/2016
Justification for choosing the model. Technological sequence of product processing. Processing side and shoulder seams, neck and armholes, bottom of the dress. Workplace for performing manual, machine and ironing work. Final finishing of the product.
course work, added 09/26/2014
The history of the origin of pajamas, acquaintance with the tools necessary for sewing them. Basic safety rules when performing wet-heat work and when working on a sewing machine. Choice of material, stages of work, cost of the product.
creative work, added 09/05/2013
Working parts of lockstitch machines, their purpose and design varieties, structure and operation. Bonding of clothing parts, area of application of adhesive joints. Operations for processing the knot, processing the cut of the sleeve of a men's shirt with a facing.
test, added 02/13/2010
Mass production of garments. Mechanization and automation of assembly and connecting operations. Technological process of making a shirt. Selection and characteristics of the model. Selection and justification of materials and accessories, product processing.
course work, added 05/14/2009
Selection of materials, types of hand and machine stitches and stitches. Algorithm for the technological sequence of product processing. Possible defects, ways to eliminate them. Specification of cut details, technical conditions for layout. Calculation of the price of the finished product.
course work, added 02/22/2012
Characteristics of basic technologies and methods of tailoring. Determination of types of clothing belonging to the group of outerwear. Distinctive features of edge seams. Unit processing of various types of assortment. Generalization of industrial requirements for clothing.
test, added 08/18/2010
The essence of turning. Turning is a type of metal cutting. Main types of turning work. Processing of structural materials on a small-sized, wide-universal machine. Rules for operating lathes.
abstract, added 04/29/2009
Preparation of metal (parts) for welding, selection and justification of modes and techniques. Sequence and rationale for welding seams, heat treatment of the part. Quality control using geometric measurements. Labor protection when performing welding work.
course work, added 04/17/2010
Methods for cutting pipes before welding. Centralizers for assembly and alignment of pipelines. Technology of gas welding of various seams. Features of welding horizontal, vertical, ceiling, inclined seams. Safety precautions when performing hot work.
Send your good work in the knowledge base is simple. Use the form below
Students, graduate students, young scientists who use the knowledge base in their studies and work will be very grateful to you.
Posted on http://www.allbest.ru/
Creative project
Nightdress
Introduction
pattern technological fabric shirt
ABOUTjustification for the project topic
Nowadays, it is difficult to find a woman who does not have a nightgown in her night wardrobe. Such products are distinguished by a variety of styles, materials and colors. A nightgown can not only provide a comfortable sleep, but also emphasize the dignity of a woman’s figure. Today, a variety of women's shirts fit so organically into our lives that it is difficult to imagine a time when these clothes were not in use.
Since in technology lessons we learn to sew products for ourselves, I decided that I would sew a nightgown.
1 . Historical information
The history of fashion is a topic in which one can trace a certain time line. Here I present a timeline of rather unusual content - this is the story of the nightgown.
Until the 14th century, women either slept naked or slept in what they wore during the day. They had to sleep in uncomfortable outer clothing or naked. What was the main reason for the creation of the nightgown is unknown today. Either it was too cold to sleep naked, or it was not possible to rest properly in outer clothing.
The first mention of special sleepwear appeared in the Czech Republic in the 15th century, where they spoke of a “bedroom skirt”. At that time, the nightgown was very large - wide and long, and only wealthy people could afford this piece of clothing.
Only in the 19th century did the nightgown become more accessible and became widespread, becoming an integral element of both women's (women's nightgown) and men's wardrobe (men's nightgown) - many men also slept in similar clothes. In addition, a shirt was no longer considered a luxury as before. Thanks to this accessibility, every woman had the opportunity to diversify her wardrobe with several models of nightgowns. Even in those days, different styles of such products were used. The most popular were the strict, classic models of nightgowns, which were made of cotton or linen. Women from wealthy families preferred luxurious models made of natural silk. Such shirts were usually decorated with expensive lace. Thanks to this, they looked more like a dress than sleepwear.
Since then, a variety of shirts have never left the women's night wardrobe. But men no longer sleep in such clothes - they prefer to wear pajamas or something else.
Nightgowns, which were worn in our country just a couple of decades ago, were quite ugly - wide and shapeless, made of unattractive and uncomfortable fabrics. Most often, such nightgowns were made of satin, cotton or flannel. And even “getting” such a product in a store was considered a great happiness. Due to the total shortage, women had to sit down at sewing machines and make their own nightgowns.
Now every woman can afford to have several shirts for different purposes - a simple cotton shirt of a classic cut for warmth, you can choose a sports shirt, or choose a shirt made of natural silk, short or long, reminiscent of an evening dress, open, with lace inserts on the chest, trims in the form of ruffles.
Having seen the inscription “women's nightgowns” on the window and looking there with the desire to buy a nightgown, everyone will understand that nightgowns are not necessarily just comfortable and beautiful clothes for sleeping. Today's nightgowns can be very elegant and sophisticated clothing.
2 . Product selection
Project goals and objectives
Purpose This project is to make a nightgown for yourself during technology lessons, which has practical significance.
Objectives of this project:
1. Deepen knowledge of design and modeling,
2. Improve and develop skills in working with new fabrics,
3. Master new techniques for working with a sewing machine,
4. Fostering perseverance and hard work.
Product selection
Model№ 1 . Straight silhouette nightgown. The sleeves are short and one-piece. The neck and bottom are oval. Length max.
Model№ 2 . Nightgown with yoke. Length max. Front and back under the gathered yoke. The bottom of the shirt is trimmed with a frill. The sleeves are short, one-piece, gathered at the bottom and end with cuffs.
Model№ 3 . The nightgown has a trapezoidal silhouette with a straight yoke, parallel to the widening of the lower part. Short, one-piece sleeves, oval neckline. The length is average.
Model№ 4 . Nightgown with wing sleeves. The bottom of the shirt is trimmed with a frill. The length is average.
Model№ 5 . The nightgown is one-piece, with straps. Fitted cut, made of jersey, with thin openwork braid.
Model№ 6 . Nightgown "Grandmother's". The shirt is one-piece. The sleeves are short, the neckline is oval. The length is average.
I chose model No. 6, since I was sewing a nightgown for the first time and decided not to complicate my work. The straight silhouette also fits my figure well and I don’t regret my choice.
Fabric selection
I chose fabric for the night magpie from two types: flannel and chintz. I chose chintz because summer is coming and it will be hot to sleep in a flannel nightgown.
Chintz is a natural material made from cotton. Chintz is very thin and delicate, it allows air to pass through better than flannel, is pleasant to the body and washes well.
I chose a fabric with a spring floral pattern. Since the nightgown is sleepwear, I didn't choose the fabric to match my eye or hair color. My choice was practical - natural fabric is pleasant to the body, as well as its low cost. This fabric is optimal for beginner craftswomen.
3 . Design and modeling
Measurements for drawing
Ssh-17 cm; СrII-42 cm; Dts-35 cm; St-35 cm; Op-27 cm; Di-78 cm.
Line designations on the pattern
Laying out patterns on fabric
4. Plandesign and manufacturing of the product
Tools and materials
Routing
|
The name of the operation. |
Tools and accessories. |
|||
|
Taking measurements. |
Tape measure. |
|||
|
Constructing the basis of a drawing of a shoulder product with a one-piece sleeve (nightgown) on a sheet of whatman paper. |
Whatman paper, pencil, ruler |
|||
|
Product cutting: a) Take the fabric and fold it right side inward. b) pin the pattern and trace it. c) Cut out, leaving seam allowances |
Fabric, pencil, pattern, scissors, pins. |
|||
|
We sew the product with copy stitches |
Needle, floss, scissors |
|||
|
Finishing the neck with a facing |
||||
|
Hemming the side sections of the product |
Sewing machine, thread, scissors |
|||
|
Processing the bottom of the sleeve and the product closed hem seam |
Sewing machine, thread, scissors |
|||
|
Wet heat treatment |
5. Results
Calculation of the cost of materials spent on making a nightgown
|
Name used materials |
Material consumption per product |
for materials |
|||
|
Fabric "Chintz" |
150 rub. (1m) |
2 m (1.5 m fabric width) |
|||
|
Sewing threads No. 40 |
30 rub. (1 PC.) |
1 reel |
|||
|
Floss threads |
25 rub. (1 skein) |
||||
Self-esteem
So my work is over. I'm generally pleased with it. My nightgown turned out neat and true to size. The stitches are even, the hem of the fabric is the same on all sides.
When developing my model, I fulfilled almost all the requirements for clothing. My nightgown ensures the normal functioning of the body (the skin breathes in it). The fabric is quite durable and wear-resistant.
The model has a comfortable silhouette; when sleeping, the shirt does not hug the body, and you feel comfortable in it.
The cheerful colors of the fabric have a positive effect on my morning mood.
This model is inexpensive and accessible.
I am very pleased that I managed to sew my own nightgown and have one more nightgown in my wardrobe.
This is a real victory for me!
Posted on Allbest.ru
...Similar documents
Characteristics of the product model and materials, specification of cut details. Selection of processing methods, equipment and means of small-scale mechanization. Development of a technological sequence for processing a product, constructing a graph of its manufacturing process.
course work, added 12/25/2015
Analysis of the assortment and identification of the basic requirements for a women's jacket. Selection of fabric, tools and devices for making the product. Layout of cut details. Safety instructions for working with fabric. Economic justification for the project.
course work, added 01/20/2016
The concept and methods of manufacturing glass products, their classification and types, methods and materials used. History of ceramics and general description of the manufactured product, equipment. Features of the use of glass and ceramic products in decoration.
course work, added 11/17/2013
General characteristics, basic physical and chemical properties of the steel used in the manufacture of the part. Analysis of the technical requirements of the drawing. Workpiece calculation. Selection of equipment and its technical features. Route description of the process.
course work, added 01/07/2015
Justification of the problem, implementation scheme, choice of model. Selection, rationale for choosing fabric. Equipment, tools, accessories for sewing. Drawing, skirt modeling, manufacturing sequence, cost calculation.
practical work, added 10/02/2009
Mass production of garments. Mechanization and automation of assembly and connecting operations. Technological process of making a shirt. Selection and characteristics of the model. Selection and justification of materials and accessories, product processing.
course work, added 05/14/2009
Materials for making a kitchen table. Drawing up a table drawing, specifications and calculation of dimensions. Rough cutting of boards and bars for the frame. Drilling holes for dowels on the lid. Tools and equipment. Organization of the workplace.
course work, added 03/15/2015
Description of the product "Layrinth cover with honeycomb seal" and requirements for it. Assessment of material weldability. List of possible methods of welding a product, selection of its design options. Welding materials, main and auxiliary equipment.
thesis, added 04/20/2017
Description of the design and operating principle of the designed product, description of the design. Justification of the type of production, main stages and principles of implementation of the corresponding technological process. Calculation of workpiece parameters. Processing machines.
test, added 10/17/2014
Technological sequence of manufacturing a women's jacket. Requirements for the product. Justification of the chosen model, description of its appearance. Selection and justification of materials and accessories. Methods of processing products, means of small-scale mechanization.
Work plan
on production
shirts
Take measurements.
Construct a drawing of a shirt.
Prepare pattern pieces for cutting.
Cut out the details of the shirt.
Perform sewing and finishing work.
Taking measurements

Measurements for drawing
apron on the belt
p/p
Name of measurements
Designation of measurements
1
2
Half chest
Length of the product
SG
Di
Construction of a drawing of a shirt

Preparing the details of the shirt for cutting

Cut out crewneck shirts.
Progress:
Prepare the fabric for cutting: check the quality of the fabric - whether there are any tears or dyeing defects, determine the front and back sides, the direction of the grain thread, cut off the edge, iron the fabric with moisture.
Fold along the longitudinal thread with the right side inward, align the longitudinal sections, pin, align the cross sections.
Place the pattern pieces on the fabric, aligning the middle of the piece and the fold of the fabric, pin it with pins, and trace the contours of the pattern pieces.
Set aside seam allowances and draw the outlines of the pattern pieces.

5) Cut out the details of the shirt along the allowance lines.
cut off the pattern, pin and carefully fold the cut pieces.
6) Cut out bias facings to process the armhole and neckline cuts.
Checking the quality of work: 1 ) the grain thread of the fabric and the direction of the grain thread on the details of the shirt pattern coincide;
2) the fold of the fabric and the middle of the parts coincide; 3) seam allowances are set correctly; 4) the parts are cut exactly along the allowance lines; 5) the cuts of the cut parts are smooth, without cuts.
Preparing shirt cut details for processing
Progress:
Transfer the contour lines along the lower edges of the front and back parts of the shirt from one side of the part to the other using pins and chalk. Sew straight stitches along shallow contour lines.
Lay control lines with lines of straight stitches along the lines of the middle parts of the front and back of the shirt (stitch length 10-15 mm).
Checking the quality of work: 1) lines of straight stitches are laid exactly along the lines of the bottom and middle of the parts; 2) straight stitches are even, meet the requirements for hand stitches.
Sewing work plan
crew neck shirts
Process the shoulder sections.
Process the neck cut.
Process the side cuts.
Process the armhole cuts.
Process the bottom cut.
Iron the finished product, fold .
1 . Processing the shoulder sections of the shirt with a sewing seam.
Progress:

Fold the shoulder edge of the front piece over the seam allowance of the back piece and baste. Stitch at a distance of 2-3 mm from the cut of the back part. Remove threads from temporary stitches.

Place the pieces in different directions. Fold the seam towards the cut and baste. Stitch at a distance of 1-2mm from the folded edge. Remove temporary stitch marks and iron seams.

Checking the quality of work:
2. Processing the cut of the shirt neck with a double oblique facing.
Progress:
1) the width of the facing is 15 mm; 2) the stitching is even, laid at a distance of 1-2 mm from the fold; 3) the width of the facing edge on the wrong side is 1-2 mm; 4) wet-heat treatment was performed efficiently.3. Processing the side sections of the shirt
closed seam.
Progress:
1) the width of the sewing seam is 7 mm; 2) the machine stitch is even, laid at a distance of 1-2 mm from the edge of the hem; 3) on the front side there is no slack in the fabric in the seam; 4) wet-heat treatment was performed efficiently.4 . Processing of shirt armhole sections
double bias facing.
Performed similarly to work No. 2
5. Processing the bottom edge of the shirt using a hem seam with a closed edge and
final finishing of the product.
Progress:
Fold the bottom edge of the shirt to the wrong side along the line of straight stitches (contour line of the bottom edge), baste the folded edge.Set aside 10 mm from the folded edge, fold the edge, and baste the hem.

Stitch at a distance of 1-2 mm from the edge of the inner hem, using a machine tack. Remove temporary stitch threads and iron the seam.

Remove remaining temporary stitch threads. Iron the finished product and fold it.

Checking the quality of work: 1) the width of the hem seam along the entire length is the same and equal to 10 mm; 2) the machine stitching is even, made exactly along the edge of the hem; 3) wet-heat treatment was performed efficiently.
Checking the quality of the finished product:
The appearance of the product corresponds to the selected model;
The side and shoulder seams are the same length, the armhole lines and necklines along the front and back are the same;
The machine stitches are straight and meet the requirements;
The bias trim is done neatly.
Wet-heat treatment performed with high quality
Charming and sensual, the nightgown is a comfortable and practical item, which is why it should be in every woman's wardrobe. Buying a universal shirt model is so difficult that it’s easier to sew it yourself in a couple of hours than to spend half a day shopping.
Nightgowns usually require some skill and skill when making them. However, there are models that are easy to sew and undemanding in taking measurements.
The nightgown, the pattern of which is below, is just one of these.
For work you will need:
Fabric 1.5x0.7 m;
Small lace;
Nightie pattern;
Tools (scissors, thread, etc.).
You can use any material for sewing, but it is better if it is environmentally friendly and natural: such fabrics are hygroscopic, they will not be hot in stuffy summers or cold in severe frosts, they do not stretch and do not shrink. Flannel, satin and other cotton-based materials that are easy to work with fit the description. If you have experience working with a sewing machine, then you can use silk or satin as a basis.
To draw up a pattern, you need to know the chest circumference and the length of the future shirt.
The pattern lines can be changed depending on your tastes. You can shorten the entire nightie or remove the sleeves, change the shape of the neckline.
for women is drawn up on whatman paper or any other piece of paper of sufficient size, for example, wallpaper.
First, the ABC figure is constructed. The segment AG in this case is equal to the length of the nightgown, AB - the chest circumference + 2 cm.
From mark A, 7 cm are laid to the right 2 downwards and marks D and D1 are placed, respectively. A line is drawn between them, indicating the neck of the back. From mark A, lay down 8 cm and mark D2. Line AD2 indicates the head of the front.
To construct the sleeve, 10 cm are laid off from mark B, the mark is designated as K. From K downwards, 16 cm are laid down (K1). A perpendicular line is drawn from K1 to the BV line. The place where the two lines intersect is designated as Zh. From the mark Zh they are laid 7 cm to the left and downwards, designated E and E1. The last marks are connected by a line.
The lower features of the product are constructed. From mark B, 7 cm are laid to the right (B1). Marks B1 and E are connected. From B1 2 cm are deposited upward (I). Labels I and B are combined.
The pattern is cut out.
The fabric is folded in half, face down. The pattern is placed parallel to the fold and traced. The front and back parts are cut out taking into account allowances of 10-15 mm.
The parts are stacked face to face. The line of the shoulder and side is basted, stitched and processed using an overlocker or a zigzag seam.
Bias tape is sewn to the neckline. Then, the latter is turned inside out and machine stitched.
The edge of the bottom of the shirt is folded twice, basted, then stitched. The product is ironed.
The result is a cute nightgown model. It will look even more elegant and attractive if you decorate it with lace, sewing, decorative bows or buttons.
One of the components of a comfortable sleep is the clothes you sleep in. It should be comfortable, pleasant to the body and beautiful. I propose to sew such a nightgown with your own hands. It is spacious, with short one-piece sleeves, gathering (small folds) in the front and lace.
What measurement was used to determine the width of the product?
СгІІ
Which segment in the drawing corresponds to the dimensional attribute Di?
B 1 B 5
B 1 G
What formula is used to determine the depth of the armhole?
СгІІ:2+Пгх0.5
Op:2+Pg
What measurement was used to determine your waistline?
What is the difference between the back and front neck?
depth
Which segment in the drawing corresponds to the length of the sleeve?
BB 1
BB 2
IN 1 IN 5
How many cm is the extension of the hemline?
What is the measurement used to determine clothing size?
Which segment in the drawing corresponds to segment B 1 B 5?
BB 2
BB 3
GG 1
Which segment in the drawing corresponds to segment GG 2?
B 1 B 5
G 1 G
G 3 G 4
V I. Summing up
- analysis of students’ independent work performance,
- analysis of typical student mistakes,
Causes of errors
- explanation of how to resolve errors,
- self-analysis of work.
WITH communication about the achievement of lesson goals, evaluation of work results
V II.Homework
pp. 48-52 , textbook Technology 7th grade.Draw a model of a shirt or robe and write a brief description.


 2 parts
