Currants are among the most common berry crops that grow in almost every front garden. It is worth highlighting that this plant is not demanding to care for. It is for this reason that gardeners often ignore such a very important and responsible process as preparing currants for winter, and in vain.
The fact is that the yield of the bush next year depends on the properly organized preparation for wintering. So, why prepare currants for wintering, and what measures will help increase the yield of the bush. This is what will be discussed below.
Preparation rules
First of all, if you organize competent care for currant bushes, then this culture will delight you with a good harvest up to 20 years. Naturally, for the first five years, the gardener can count on good yields without any effort. But, over time, the currant bush tends to grow and thicken unnecessarily, and this has a strong effect on the quantity and quality of the fruit.
The fact is that a large number of green mass requires more recharge. As a result, there are practically no nutrients left for the formation of fruits.
Moreover, there is a strong depletion of the soil, the bush weakens, and if winter comes along with severe frosts, then you can lose not only the harvest next year, but also the culture itself. It is for this reason that it is so important to properly prepare the bushes for the coming winter.

So, what gives the gardener the autumn preparation of currant bushes:
If you treat such a question as preparing currants for wintering responsibly, then the result will certainly delight the gardener. At the same time, it is worth highlighting that this process does not require much effort and does not take much time if all stages of preparation are strictly followed. So, where to start this preparation, let's take a look below.
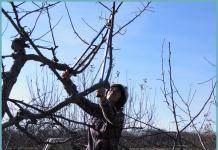
Shrub pruning
When carrying out this manipulation, you need to excise the following pagons:
- defective and dry;
- old thick branches on which the yield has decreased;
- young weak processes that will not fit for replacement.
After the weak and damaged branches have been removed, it is necessary to thoroughly cover all the cut points with garden pitch. In doing so, please note that the trimming tools must be sharp and pre-disinfected.
And also when performing autumn pruning, shorten all the tops of healthy and strong pagons by ¼. This manipulation will help stimulate intense spring branching.
And the main thing to consider when pruning: if you are a beginner gardener, then try to always leave only the strongest and most fertile pagons that do not shade each other.
When the pruning is done, you must immediately remove all cut fragments and dry foliage from the front garden. And then carefully remove the currant grove so that when the time comes for digging, the area is clean.

Moisturizing currants
The second stage of the preparatory work in the autumn garden is the moistening of the currant bush. Such a procedure is performed only if the autumn turned out to be dry. Watering is very important, as it performs two functions at once, namely:
- protects the root system from getting burned when applying top dressing;
- nourishes the root of the plant before the period of winter dormancy.
Watering is necessary from September to early October.
Fertilization
Despite the fact that the currant is an unpretentious culture, it will not refuse fertilizers. And if you feed the shrub correctly, then in return it will please you with a good yield. It is recommended to make top dressing from the end of summer. This procedure is performed as follows:
- First, clear the entire front garden of old foliage and branches if no harvesting activities were carried out during pruning.
- Then it is necessary to carry out the so-called soil disinfection. To do this, you can use a solution of potassium permanganate or a solution of laundry soap.
- After the performed manipulations for the disinfection of the earth, you can proceed to the introduction of phosphorus and potassium substances. It is worth highlighting that they should be brought in at the beginning of October, so that such a top dressing would be enough for the shrub until May.
- Further, with the onset of November, it is also possible to rotten bird droppings, which not only nourish the root system, but also protect it from the most severe frosts.
When choosing funds for autumn feeding, be sure to pay attention so that the funds do not contain nitrogen components in their composition. The fact is that nitrogen contributes to the growth of green mass in currant bushes.
Such a remedy is very important for this culture. But only if it is brought in in the spring or early summer. But before wintering, such a component will do more harm than good, since the plant can grow. Therefore, always consider this point when choosing a fertilizer.
Digging the soil
After the site is dug up, you need to thoroughly mulch each bush. For these purposes, you can prepare a special tool that will not only protect the root from freezing, but also feed the culture with useful components.
So, you can prepare nutritious mulch using the following components:
- Peat, compost and pine sawdust are taken in equal parts.
- Mix everything well.
- Spread around the near-barrel trunk with a layer of at least 10 cm.
The mulch mixture will help protect the root even in the most severe frosts. It will warm the shrubs and maintain the optimum temperature until spring.

Bending currant branches
And the final stage of preparing a currant culture is bending the bush. This procedure is performed in order to protect the branches from severe frosts. The fact is that if the temperature drops to -25 ° C, then there is a high probability of death or freezing of branches or even the entire shrub.
Therefore, in order to eliminate all risks of damage to the bush, they resort to this manipulation. Bending is done in several ways, namely:
- In the first case, you can take several bricks, then evenly divide the branches into small bunches so that there are no more than three branches in each bunch, and bend each resulting bunch neatly to the ground, and gently press down on top with a brick.
- In the second method, you can take tiles, only non-metallic, and also divide the branches and press them with the tiles to the ground.
- And the last method: prepare shallow grooves in advance, then divide all the branches in the same way as in the above method, and carefully place each bundle in the prepared grooves, and fix the branches on top with a wire. Next, cover everything with a thick layer of mulch, and when the first snow falls, sprinkle it with snow.
At the same time, keep in mind that bending must be done extremely carefully so that the currant branches do not break.

Burying
Another method that many seasoned gardeners use is called burial. As a rule, this method of preservation is resorted to only when the currant grows in a harsh region and in winter frosts can reach -35 ° C.
The burial method is only suitable for northern regions. The fact is that if you live in a milder climate, then under such a layer the currants may die. Therefore, use this method of preserving your garden beauty wisely.
Conclusion
So, above we examined in detail how to prepare currants for winter. It remains to add that this process is very important, because it helps not only to protect winter period culture, but also to increase the amount of the yield obtained. Therefore, do not ignore holding autumn preparation, in return you will definitely take off a rich harvest.
Hello dear friends!
Currant has established itself as a frost-resistant crop. It can withstand frosts down to -30? С. But if we want to see a full-fledged and high-quality harvest, the currants need help. Blackcurrant growing in the wild is thickened, has small fruits, rarely grows in a brush, on which you can see 3-4 berries. But the smell of wild currants is not transmitted: persistent and tart.
Varietal currants are grown in the garden. Its berries are large and ripen gradually on the cluster. However, nutrients it demands more. How the correct preparing currants for winter I will tell you today.
- From early autumn, treat the bushes and the soil under it from fungal diseases. Try to weed under bushes, leftover grass can be a breeding ground for disease. Sprinkle the bushes with ash, feed with superphosphate. You can read more about the fight against currant diseases.
- Preparing currants for winter should begin with pruning. The garden black currant bush should have 12 - 16 shoots: 3-4 shoots of different years of life. This is quite enough. Old, sick, young, not ripe shoots, remove everything and burn. You can read more about pruning black currant bushes. There will be no time in the spring. Currants enter the growing season early and pruning the bush in the spring damages a large number of buds, and part of the crop may be lost.
- We feed the bush with urea, a matchbox of dry granules for 10 liters of water. Spread the solution over the leaves and branches using a sprayer. Every other day, add the AVA fertilizer, or phosphorus-potassium fertilizer, over the entire ground area of the bush.
- We dig it shallowly so as not to damage the roots. We mulch with newspapers, hay, dry grass, sawdust. The roots will be warm.
- After the ground is covered with a crust from frost, we wrap the bush with twine, gradually pulling the branches upward, in a spiral. This work is more convenient to carry out with an assistant. Branches in this form will not rub against each other from the wind, and will retain the maximum number of fruit buds. If the work is done by one person, then the twine should be tied to one of the old branches and pulled in a circle. At the top, secure with a clothespin or tie a knot on a branch. Cover with mulch again.
- When snow falls, overlay the base of the bush with a layer of at least 10 cm and compact.
- A little later, when there is more snow, fill the bushes with it completely. Your currants will overwinter and yield a wonderful and bountiful harvest next year.
If preparing currants for winter was carried out correctly, then your bushes will perfectly tolerate the cold season, but spring can bring unpleasant surprises. If you have already removed the cover and removed the twine, and the frost is returning, cover the bush with a non-woven material. You can use other material, but first you should bend the branches to the ground. To preserve the currant crop from late frosts, boxes, old blankets, and straw are useful.
A perennial shrub is called a currant, the height of which can reach two meters (it depends on the variety and growing conditions). The life span of this plant, with proper care, can be up to 20 years. Currants are considered a frost-resistant crop, undemanding to soil conditions, so inexperienced gardeners do not know why they need to prepare currants for winter. We will consider the answer to this question and other similar ones in our article.
Despite the good winter hardiness of the crop in question, proper preparation for winter will increase the yield of berries. To get large high-quality berries you need:
- feed the currant bush;
- to process the culture from diseases and pests;
- prepare the soil.
Preparation of the soil consists in digging to a shallow depth in order to destroy the larvae of pests. Before carrying out these procedures, you need to remove the old currant foliage and dried grass (pathogens can be hidden in organic residues various diseases). Sprinkle the root zone wood ash, as well as superphosphate, after which the soil is mixed.
The first preparatory measure for wintering currants is pruning the bush and removing unnecessary branches outside the garden plot. After that, the soil is loosened and its composition is enriched with nutrients. It is better to take urea from fertilizers. For feeding, granules are poured into a matchbox and dissolved in 10 liters of warm water.
The prepared solution is poured into a sprayer and the bush is treated. After about two days, complex potassium-phosphorus fertilizers are applied under the plant. The soil is loosened to a shallow depth so as not to damage the root system of the culture. In the future, the root zone is covered with a thick layer of mulch. This can be chopped straw, sawdust, or dry grass. Such a shelter retains heat well, allows the roots to survive severe frosts.
With the arrival of winter, when the ground begins to be covered with a thin crust of ice, the branches of the culture are pulled together with a rope. In this case, the shoots must be folded so that each of them tends upward, but goes in a spiral. There is no need to pull the cord too far. Rope contours are placed every 15-20 centimeters. Currant strapping work begins on the underside of the bush.
The easiest way is to fix the string at the top using a clothespin. In this case, the maximum number of fruit buds is preserved. These plant elements do not touch each other in strong winds.
Note! Not only mulch, but also a thick layer of snow allows protecting the crop from the effects of negative temperatures. At the first precipitation over the currant bushes, a mountain is poured up to 20 centimeters high.
Popular mistakes gardeners
 Do not try to untie the cord and remove the mulch in the spring when the weather is warm. During this period, there is a possibility of frost return, so it is better to cover the currant bush with a special material, for example, agrofibre. If there is no such fabric, use unnecessary blankets, straw.
Currant seedlings must be covered for the winter without fail, because they have not yet had time to form a strong bark and can die from freezing temperatures. Earlier we said that the crops in question can last a gardener for about 20 years, but this does not mean at all that five-year-old bushes do not need protection. In the fall, after all the leaves have fallen off, the currants are cut off, and in the spring the bush needs periodic watering.
Advice! When pruning, shorten the zero shoots as well. The bush should not be thickened - this leads to a decrease in yield.
When pruning currant bushes, do not use a dull knife. Garden shears or a sharp pruner are considered the best tools for doing this. Thick branches can be shortened or removed with a hacksaw. Freedom from unnecessary shoots will enable the currants to better survive the winter and form a rich harvest.
Video
More details about preparing currants for winter can be found in this video.
Technique for preparing currants for winter
We all love to feast on healthy currant berries, and what a fragrant jam it turns out! But in order for the bushes to bear fruit, they need to be properly looked after. Despite the fact that currants are frost-resistant and can withstand cold temperatures down to -30 ° C, the culture needs to be helped.
Wild blackcurrant is thickened and bears fruit with small berries. But it can boast of a smell - wild currants have a tart and persistent aroma. In the garden, we grow varietal currants with large berries gradually ripening on the hand. But in return, the culture requires more nutrients. Today we will talk about literatepreparing currants for winter .
First of all, in early autumn, you need to cultivate the soil under the bushes and the bushes themselves from fungal diseases. It is important to weed under the bushes because leftover grass can cause disease. Sprinkle the bushes with gold, fertilize with superphosphate.
An important action is. On a bush of garden black currant there should be from 12 to 16 shoots: 3-4 for each year of life. The rest of the shoots - not ripe, sick and old, ruthlessly remove and burn. In the spring you will not have time for this due to the early onset of the growing season and the fact that pruning the bush during this period will damage a large number of buds, which will lead to the loss of part of the crop.
The bush should be fed with urea (it is recommended to take dry granules from a matchbox for 10 liters of water). Using a sprayer, the solution must be distributed over the branches and leaves. Every other day, it is important to distribute phosphorus-potassium fertilizer or AVA fertilizer over the entire surface area of the bush.
You need to dig shallowly so as not to touch the roots. To prevent the roots from freezing, the plant is mulched, as a rule, with sawdust, dry grass, hay, and newspapers.
After a frosty crust appears on the ground, the bush should be wrapped in twine, gradually pulling the branches upward in a spiral. It is better to work with an assistant. So the branches will not rub against each other and will be able to preserve almost all fruit buds. If the work is done by one person, then the string can be tied to one of the old branches and pulled in a circle. At the top, you can tie a knot on a branch or secure it with a clothespin. Then the bush is covered with mulch again.
After the snow falls, they need to overlay the base of the currant bush with a layer of more than 10 cm and carefully compact. When the amount of snow is already sufficient, the bushes should be covered completely. Such will allow the bushes to cope well with frost and give you a rich harvest in the coming season.
Congratulations, you have done the right preparation, but dangers may lie in wait in the spring. If you've already removed the mulch and twine, and the frost is back, don't forget to cover the bush with a nonwoven fabric. You can use other material (straw, old blankets, boxes), but first you need to bend the branches to the ground.
I wish you rich harvests!
Despite the fact that currants are a very frost-hardy crop, they have their limits. As a rule, in a temperate climatic zone, it always grows without problems and tolerates frosts down to -25 degrees, even without snow on the soil, due to which it is so popular with "lazy" gardeners. It almost never needs to be wrapped up for the winter. Nevertheless, if the frost is more than 25 degrees, the branches begin to die off and the yield decreases significantly. In some cases, the bushes freeze out completely and do not even come to life in the spring.
With proper care of the plant, it can withstand up to -50 degrees in winter and all branches will be alive and well to the very tips. To do this, you need to perform several steps. The first step is to bend the bush. This is done so that all branches are under the snow in winter and as close to the ground as possible, which will warm and protect from drafts (not a single plant likes it). Thus, frosts on the street are not terrible, even if it is a very cold and prolonged winter. There are several ways to bend the branches, let's consider them in more detail.
- Press down with a brick. It is advisable not to crush the stem itself when you press it to the ground. It is best to use a tile that has a groove in the middle. Place the branch in this furrow and then just lay it on the ground. It is advisable not to use metal surfaces - they have a high heat transfer and, in case of severe frost, they can transfer cold to the branches. You cannot try to place the whole bush under one load - distribute 5-8 bricks or other "weights" on all branches or combine 2-3 together, as they grow in different directions and too much kink in the other direction can greatly harm them.
- Bury. Some gardeners use the earth as a natural insulation, similar to the situation with pretending grapes. This is a rather rare method of warming a plant for the winter, however, many people use it and quite successfully. Even without snow, the plant can survive long frosts of -35 degrees under the cover of 10 centimeters of earth. The main thing is that there is no massive icing and freezing of the soil to such a depth, since the plant needs to breathe.
- Wrap with insulation. This method has both disadvantages and advantages. The main disadvantage is that you need to spend a lot of time wrapping up the bush. It is necessary to wrap each branch in agrofibre, it is advisable to add a little mineral wool if severe frosts are expected. It is necessary to remember one very important thing - the air must flow freely to the branches, otherwise they may die. That is, it is impossible to wrap it up with polyethylene and other similar materials. The main advantage of this method is its high frost resistance. Even in Siberia and other northern regions of Russia, currant bushes, wrapped in insulation and bent to the ground, can easily withstand the most severe winters. Temperatures of -45 degrees are not terrible for currants if you have properly prepared them for cold weather.
Before you start bending the bushes, you can trim the tops a little to make it easier to carry out the work. They will still have to be removed in the spring, so you will not lose anything, but wrap up much less stems and faster. It is necessary to open all branches in early spring, do not overexpose them underground or under insulation. The longer they are isolated, the less berries you will harvest this year - you need to allow the stem to develop so that it opens its buds and begins to release organic matter.


Pruning bushes and how to do it right
Currants are trimmed in much the same way as raspberries. That is, it is necessary to trim only the tops, approximately 20% of the annual sprout of the stem. This is done not only to make it more convenient to wrap it up for the winter, but also to carry out preventive measures against the pest. The fact is that fungal diseases remain, most often, at the very top of the stem, so its removal allows you to get rid of many problems by 80% in the spring. First of all, pruning the bush helps fight brown spot and other similar diseases that are typical for currant bushes.
If you pick up a pruner and do not know what to do with currants in the fall, then start removing everything that you do not like in appearance. First you need to cut out completely dry stems or shoots that are half dry. To the point of them already as from a squirrel of fur - they will only interfere with picking berries and clog the bush with leaves. Cut out at the root. All the energy of the bush, which was distributed to these underdeveloped shoots, will be addressed to healthy branches and will be used to create new fruits.
Next, you need to take care of the high-quality elimination of young shoots. Too thin stems still do not overwinter and will not give the expected result in spring, so they can be safely removed so that they do not interfere with the development of healthy stems and the root system of the plant. That is, currants should grow by means of "replacement", much like in the case of grapes - only two-year branches are left for growth, which have a thick trunk and endure any frost.
Only use a sharp pruning shear for trimming. Firstly, the cut will have a beautiful appearance, so the bush will be decorative, not "cut off". Secondly, a high-quality cut brings the least harm to the plant. If you break the branches or remove everything unnecessary by biting off with pliers and cutting with a knife, the currants will move away from the wounds for a very long time in the spring.




Fertilization and autumn soil care
Before you cut and bent the currant bushes for the winter (you can also after - this is not essential), you need to take care of the soil. The first step is to remove all the leaves. As you know, they are the main breeding ground for many diseases. All fungal and viral diseases remain in the fallen leaves and enter the soil, therefore, timely collection of garbage in the garden avoids many problems in the spring. The leaves must be burned, as pests can enter the soil and attack other plants.
Next, you need to disinfect the soil. Almost any solution is suitable for this, mainly potassium permanganate, copper sulfate, a solution of laundry soap (10%) and any other substance that you like. The main thing is to kill all bacteria and fungus that could have already entered the soil from a diseased plant or its “neighbors”. It is necessary to spray abundantly, not sparing the solution. The leaves are no longer on the bush, so you will not damage anything if there is a slight excess of the dose of the drug.
Digging up soil should be a tradition for you if you want to have a healthy garden. Most pests live in the soil at a depth of 20 centimeters, so deep loosening in the fall before frost will kill them. Up to 95% of destroyed enemies can be guaranteed with timely digging right before frost. The treated soil can be sprayed again with disinfecting liquid to be sure there won't be much, don't worry.
Fertilizing currants is also necessary. Suitable for this complex fertilizers and also specifically for the development of the root system and vegetative mass. Until the beginning of September, you can use nitrogen-containing preparations, which will allow you to gain vegetative mass. It is necessary for the formation of more berries for the next year. It is important to remember that such fertilizers cannot be used later than September, since the plant will not have time to "fall into hibernation" and the movement of the sap will be too fast for wintering. There is a high risk of stem freezing.
In October and November (depending on when the first frosts begin), it is necessary to make organic fertilizers and bird droppings. Wait until the droppings are half decomposed and dry, as this is a very strong, concentrated fertilizer that can burn the stems. It cannot be buried in the ground, you just need to scatter it around the bush. During the winter, it will decompose under the snow, and all the nitrogen will disappear. Thus, in the spring you will receive a very high-quality feeding, which will allow the currants to reanimate faster after winter.


