Having set ourselves the task of making a real sword of the 13th century using authentic technology, we were forced to repeat the entire path of the ancient metallurgists - starting from building a cheese-blowing furnace, recovering iron from iron ore and smelting the resulting metal into steel suitable for making a sword.
The 13th century sword is not the first “PM” experiment in the field of historical reconstruction of edged weapons. During the manufacture of Fedorov’s checker using the technology of the early 20th century (see “PM” No. 1’2007), considerable experience was accumulated, but it turned out that it was almost impossible to apply it to the current task. In the case of the checker, we used modern analogs of the types of steel that existed in the early 1900s (rail, spring, bearing) as starting materials. But it’s impossible to do the same with a 13th-century sword: at that time there were no standards for steel. Therefore, the main problem we face is the need to replicate the ancient metallurgical process of recovering iron from ore. This is what we did under the leadership of the famous blacksmith-gunsmith Vasily Ivanov, head of the workshop of historical Japanese weapons Ishimatsu.
From ore to critsa
Until the 14th century, the main process for obtaining iron was its reduction from ore in a cheese furnace (domnitsa). Such a furnace had a shape close to a truncated cone with a height of approximately 1.2 m and a diameter of 60–80 cm at the base and 30 cm at the top (flute) part, made of stone or refractory brick and coated with clay. The furnace was equipped with a tuyere - a pipe for supplying air from the bellows with a diameter of several centimeters, a hole for draining slag in the lower part, and sometimes a collapsible part for removing the iron ingot after the end of the process. After drying, the oven was heated with firewood to burn the clay, as well as to form ash, which later served as an underlying “non-stick” coating and acted as one of the constituent parts of the flux (ash contains soda and potash).
This part of the technology did not cause us any particular difficulties, and after the construction of the house and the passage of several days, which were required for the clay to dry and fire, we began the first part of the process - the restoration of iron.
As a starting material, we took a rich (and also enriched) ore - magnetite (FeOFe2O3) from the region of the Kursk magnetic anomaly.

The technology is quite simple: charcoal is loaded halfway into the furnace, lit, and then a mixture of ore and flux is poured on top (for which we used a completely historically authentic mixture of dolomite flour, sand and soda). Another layer of coal is poured on top, and then as it burns, layers of ore with flux and coal are added. This cycle is repeated several (up to five) times. At the same time, constant air blowing with the help of bellows is required for several hours in order for the temperature in the furnace to reach 1400–1500 C (here we were forced to deviate a little from the technology, since we used electric blowing due to a lack of workers).
Several processes take place in a cheese oven. First, the rock is separated from the ore at high temperature and flows down as slag. Secondly, iron oxides are reduced by carbon monoxide and carbon to iron, the grains of which are fused together, forming an ingot - kritsa. When the coal burns out almost completely, the slag is drained through a hole in the furnace, and then, after cooling, part of the wall is dismantled and the kritsa, a porous iron ingot, is removed.
From iron to steel
The efficiency of the cheese-blowing process is low: a significant part of the iron goes into the slag, and from 120 kg of ore we received only about 25 kg of kritsa. Moreover, this is still only raw source material, very heterogeneous in quality. During its stay in the furnace, the kritsa is saturated with carbon very unevenly and as a result contains fragments of soft iron with almost no carbon (0–0.3%), carbon steel (0.3–1.6% carbon) and cast iron (with a carbon content higher than 1.6%). These are completely different materials, with different properties, so the first thing you need to do is carry out an initial sorting. “The chicken is broken into small pieces, which, based on their mechanical properties - fragility and plasticity - are sorted into three piles with different carbon content,” explains Vasily Ivanov. “If the piece is soft and malleable, then the carbon content is low, if it is hard, it is high, if the pieces are brittle and easily split, revealing a characteristic fracture, then it is cast iron.”

Our goal is to ultimately obtain three types of steel with more or less standardized carbon content. The first type is low-carbon (up to 0.3%) steel (the so-called commercial iron - various household products such as nails, hoops, etc. were made from it), the second - with a medium (0.3–0.6%) content carbon, the third is high-carbon (0.6–1.6%) steel.

We put the sorted pieces into ceramic crucibles, sprinkle them with the same flux that we used earlier, put them in a forge filled with charcoal, and turn on the blower. Depending on the location of the crucible in the forge and the intensity of air blowing, it is possible to either saturate the steel with carbon (in the reduction zone - the upper part of the hearth above the burning coal), or burn off its excess (in the oxidizing zone - the lower part of the hearth, where air is supplied) and thus obtain the materials we need. It is also worth noting that we initially used relatively “pure” ore; our steel does not contain a significant amount of harmful impurities - mainly sulfur and phosphorus. Of course, we did not use any alloying additives such as chromium, molybdenum, manganese or vanadium (except for those small quantities that were originally present in the ore), so historical authenticity was maintained.
After melting, Vasily removes steel ingots from the crucibles and evaluates the result obtained, forging them into strips. “If necessary, a further process can burn off excess carbon from the strip directly in the forge,” he explains. “Or carbonize it, since during forging some of the carbon—up to 0.3%—inevitably burns out.”

Softness and hardness
As a result of the above operations, we received three approximately three-kilogram blanks from different types of steel in the form of strips. However, the sword is still quite far from these stripes. According to Vasily, “these are not parts of the blade yet, but only the material from which they will be made.”
One of the ways to create a hard cutting edge of a weapon in the 13th century was carburization - surface hardening, that is, carburizing the surface of products made from relatively soft steel. The product was placed in a closed vessel filled with an organic substance - a carburizer, which most often was coal, crushed horns, or a mixture of both. Then the vessel was placed in an oven, where at a temperature above 900 C without air access, the carburizer was charred and the surface of the product was gradually saturated with carbon. This method was widely used for carburizing axes and blades (more or less mass-produced products). But cementation is the hardening of a surface layer of a certain depth; when this layer was worn away, the cutting edge ceased to hold an edge, and the weapon had to be subjected to a new cementation procedure. And with increasing depth of cementation, the risk of making the surface too brittle increased. So we rejected this method, since it still does not allow us to achieve the qualities we need. After all, the “perfect blade” of the 13th century (as well as of any other time) should be elastic, dampen vibrations during impacts, viscous and not brittle, but at the same time, the cutting edge of the blade should be hard and hold an edge well. It is almost impossible to create such a sword from a homogeneous material, so we decided to resort to the composite technology of that time, using a batch design and pattern welding. Our sword will be “built” from seven packages of three types, each of which performs its own task.

The first package is made of soft low-carbon (up to 0.3% carbon) iron. From elongated strips of this soft iron we make a six-layer “sandwich”, forge it (in this case the layers are welded into a single package), cut it and fold it in half, forge it again, repeating this process eight times and ultimately obtaining a package of relatively soft Damascus steel, numbering approximately 1500 layers. This package will be the “backbone” of our sword - its core. Such a viscous core works under compression, absorbs shock loads and dampens vibrations, preventing the sword from breaking under strong blows. It also links all surrounding packages that perform other tasks into a cohesive whole.
The second package is the future blade. To make it, we used two types of steel we had previously obtained – medium-carbon and high-carbon. Alternating strips of these two types so that the medium-carbon material is “outside”, we put together a sandwich of seven layers and, pouring flux, weld them into a single package. Then we cut it, fold it in half and forge it again. We repeat the operation 14 more times. It’s easy to calculate that in the end with this folding we will get... more than 200,000 layers! Considering that the final thickness of the package is 6 mm, we can calculate the layer thickness to be about 30 nm. “Actually medieval nanotechnology! – Vasily laughs. “In fact, of course, these are very conventional ‘layers’ - with such mixing, the structure of the steel turns out to be close to homogeneous.” The blade should ultimately be hard and hold an edge well.
Springs
The third package is future covers, there are four of them. They are made from mild low-carbon and medium-carbon steel. This package begins with a seven-layer sandwich (low-carbon steel facing out), which is welded into a single package using a forge and hammer. Like the other two bags, we cut them, fold them in half and forge them again. We repeat the operation nine more times, eventually obtaining a strip of Damascus steel consisting of 7000 layers.

But that is not all! In order for the sword blade to ultimately better withstand transverse bending loads, as well as longitudinal twisting, the plates are torsioned, that is, each is twisted by 20 turns, resulting in a twisted steel “rope”. After hardening, such linings will become more elastic and will additionally dampen vibrations, preventing blows from being “blowed into the hand.” Since there are four plates, the directions of twisting them must be “compensated” in pairs - otherwise, if there is the slightest mistake during hardening, the sword will “go screwed.” Elastic torsion plates work in tension in the sword blade and actually perform the same role as reinforcement in reinforced concrete, that is, they strengthen the body of the blade.
Blade blank
But finally, all seven packages are ready and the final preparatory stage begins - making the blade blank. All packages are fastened with wire, Vasily heats them up in a forge, sprinkles them with flux and begins the forge welding process. As in the preparation of the packages themselves, he uses a pneumatic hammer, and this is another slight deviation from medieval technology: “Of course, it would be possible not to deviate from the original technology, but for this I would need a couple of hammers...” And sarcastically suggests: “Do you want try? The photographer pretends to be very busy with the shooting process, and I begin to ask Vasily about some of the smallest details of the processes taking place.
Meanwhile, the workpiece takes the form of a bar measuring 1.2x2.5x50 cm and weighing approximately 1.5 kg. If we remember that to make it we needed to process 120 kg of ore and about two weeks of time, the process does not look very effective (however, from this amount of ore we got not one, but two pieces). However, this is the reality - this is exactly how the process of making blanks for high-quality edged weapons took place in the Middle Ages. Now the most important thing remains - to forge our “ideal sword” from this blank, which looks like a slightly rusty crowbar.


Second attempt: Medieval sword
Forging a real sword of the 13th century from a blank, the work on which we described in the article “Iron Age” (“PM” No. 2’2009), turned out to be not so easy. Like medieval blacksmiths, we didn’t get the weapon right on the first try.
In the February issue of PM, we began a story about our project for the historical reconstruction of a medieval sword under the leadership of the famous blacksmith-gunsmith Vasily Ivanov, head of the workshop of traditional Japanese weapons Ishimatsu. In the first article, we described how we obtained the required grades of steel from iron ore, and promised to publish a continuation in the next issue. However, technical difficulties awaited us, which delayed the continuation for almost two months. However, these difficulties are also quite historically authentic - medieval blacksmiths and gunsmiths also encountered them.

From whetstone to blade
So, we have a steel bar assembled from seven packages - each of them has its own structure and purpose in the design of the blade. The first step is to turn this block into the actual workpiece - forge it into a steel strip of given dimensions, taking into account the margin for forging and pulling the blade (to save time, we deviated a little from historical authenticity, using a pneumatic hammer for this operation). At the final stage of this stage, Vasily, by hand, gives the strip its original geometry, forming the shank, tip and heel of the blade. From this moment on, the stripe’s shape already vaguely resembles the future sword. After the metal had cooled, Vasily once again carefully examined and measured the resulting workpiece, leaving a small supply of metal to correct future mistakes.

The next stage is forging the dales. Fullers are longitudinal grooves running along part of the length of the blade. Sometimes they are mistakenly called “blood fillers”, although in fact the function of the fullers in the design of the blade is completely different - they reduce the mass of the blade and play the role of stiffening ribs. The dales are forged using a special tool called a shperak. Shperak is a T-shaped pliers with circular jaws; the workpiece is clamped between them and forged, as a result of which longitudinal grooves appear on both sides of the blade.


And finally, the workpiece takes on a more or less final appearance after the blade is drawn (formed). “This is a rather painstaking process,” explains Vasily. “If at the previous stages you can use a pneumatic hammer, then to draw back the blade you need high precision, which can only be achieved by hand forging.” At this stage, the geometry of the future blade is finally set; you can slightly change the location of the center of gravity by varying the thickness of the blade at the tip or at the base. The thickness of the cutting edge at this stage is 2–2.5 mm. It can’t be thinner: the steel can be overheated, and there won’t be any reserve left for any “maneuvers.”

But the preliminary work is almost finished. Vasily once again checks that the dimensions of the blade comply with our technical specifications, straightens the workpiece and moves on to the next stage - heat treatment.
Heat treatment
Hardening does not begin immediately. First you need to get rid of internal stresses in the material that may have appeared during forging. To do this, the blade is annealed - heated to 950-970°C, and then left to cool slowly right in the forge - this process takes 5-8 hours. Then the workpiece is finally straightened, and minimally, to avoid over-compaction of the material in various parts of the blade.
Tempering is the most well-known part of the heat treatment process. During hardening, the workpiece is rapidly cooled, carbon steel becomes strong, hard and elastic (its ductility and toughness decreases).
Vasily adds charcoal and lights the forge, explaining: “Charcoal burns more evenly. In addition, it is lighter than coke, and therefore there is less chance of damaging a hot plastic blade when heated.” He heats the blade, trying to achieve uniform heating to approximately 890–900°C, then removes the workpiece from the forge and lowers it into a bath of saline solution for 7–8 seconds. Then the blade needs to be released - to remove the internal stresses accumulated in the metal during hardening, make it less brittle and increase impact strength: heat to a low temperature (180-200°C) and cool to room temperature in water (or air - methods vary). This operation is usually performed several times (in our case three) with breaks of 15–20 minutes. After this, the blade is left alone for several days so that the remaining internal stresses appear and “settle down.” “It is advisable to hang the blade, and not just put it on an anvil,” notes Vasily. “Otherwise, unevenness in heat transfer can disrupt the geometry, that is, the blade will simply ‘lead’.” But even in a suspended state after several days, the blade, as a rule, needs a little gentle cold straightening.


After heat treatment - another quality control. Vasily carefully examines the blade for “lack of penetration”, cracks, checks it for bending and torsion, hits the blade flat on the board and inspects it again. Then he grips the blade with two fingers and hits it with a metal stick, listens carefully to the ringing and shakes his head skeptically: “When the sound is ringing, bell-like, there is a long vibration through the sword - this indicates that the sword is forged, the absence of internal microcracks and a sufficiently high degree of hardening. If the sound is hoarse, dull and short-lived, it means there are some defects. There’s something wrong here: I don’t like the sound.” But there seem to be no objective signs, so we move on to the next stage.
Mechanical restoration
This rather monotonous process takes almost two weeks. During this time, the gunsmith, using wet abrasive sandstone stones, removes excess metal, grinds the valleys, shapes and sharpens the cutting edge. But finally, the work is nearing completion, and Vasily begins the final check - he examines the blade again, cuts several wooden blocks, a soft steel corner, bends the blade several times: “It seems that it was hardened unevenly - when bending, the base forms an arc, and the tip almost straight,” and at that very moment the blade, clamped in a vice, cracks with an unpleasant crunch. Its end is still clamped in a vice, and the rest is in the hands of Vasily, who shrugs: “I told you there’s something wrong here!” That’s why we made several blanks during smelting. It’s okay - we’ll figure out why this happened and try again.”
Broken Sword
Actually, this is what delayed the publication of this article for more than two months - it was necessary to understand the reasons for what happened, conduct several experiments, make adjustments to the process... and repeat the whole path from the multi-package bar again.
Why did our first sword break? “Let me remind you that we used non-standard steels, the exact composition of which is unknown, which means their characteristics are difficult to predict,” says Vasily. – Apparently, the quenching was excessively ‘hard’ - too high a temperature and the use of a saline solution led to the formation of microcracks in the high-carbon steel. This was felt already at the stage of preliminary testing after hardening - by sound and flexibility, but was finally confirmed only after machining - microcracks on the surface became visible.”

Sounding Blade
After a series of experiments, the heat treatment process was modified. First, we decided to slightly change the geometry of the blade, increasing the thickness of the tip to make the hardening more uniform. Secondly, they reduced the heating temperature to 830–850°C and decided to carry out the hardening itself not in a salt bath, but in a water-oil bath (30 cm thick layer of oil on top of water). After such a two-stage hardening (due to oil having a boiling point of about 200°C), lasting 7–8 seconds, the blade was cooled in air (in a frost of -5°C) until completely cooled (5 minutes). The method of further heat treatment was also changed: the blade was released to relieve internal stress in five passes, heated to a temperature of 280–320°C, and then left to cool in air.
And again - a break of several days, straightening, roughing, grinding and sharpening.
And finally, Vasily again hits the blade with a metal stick, listens to the long musical ringing, and a satisfied smile appears on his face: “It seems that this time everything worked out!” He clamps the blade in a vice and pulls on the tang - the blade bends into an almost perfect arc.
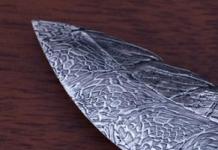
All that remains is all sorts of little things - etching the design so that a beautiful pattern appears on the surface of the blade, adjusting the wooden scabbard, installing a suede-covered handle, bronze crosshair and pommel (the so-called apple) on the sword. The sword, almost exactly the same as the one that Russian warriors of the 13th century could fight with, is completely ready.


Russian and Japanese
Since Vasily Ivanov is considered a recognized expert in the field of traditional Japanese weapons, we could not ignore the comparison of weapons technologies of two schools - Western and Eastern. “Despite the different names, the technologies for forging and preparing steel for the manufacture of eastern and western weapons are almost identical,” explains Vasily. – Japanese weapons are also, as a rule, multi-pack blades, the design of which varies depending on the school, price, and time of manufacture. Of course, the shape of Russian and Japanese weapons of those times is significantly different, but this is due more to the traditions and techniques of fencing than to technological reasons. But the hardening process is quite different - in the manufacture of Japanese weapons, so-called zone hardening is used, when part of the blade is coated with clay to slow down cooling in the hardening bath. Mechanical processing in Japanese weapons is also much more serious: grinding and polishing must be very careful and refined, since Japanese weapons, in addition to their direct purpose, also have an aesthetic function - they are, as a rule, a real work of art. That is why Japanese katanas must be polished, but a Russian sword can be easily polished and even traces of an abrasive stone are acceptable on it. By the way, thanks to careful polishing, Japanese blades are more resistant to corrosion.”
Material from the site: https://radosvet.net
Basics of crafts. Experience of masters of artistic forging.
In the article published below, LEONID ARKHANGELSKY talks about the manufacturing technology of Japanese samurai swords (katan) and at the same time outlines his philosophical and scientific views on the process of producing damask and Damascus steels.
Line "hamon" and "diamond" steel
When looking at the blade of a Japanese samurai sword - a katana - what catches your eye is a wavy or straight line running along the blade - the so-called “jamon” line. Upon closer examination, it turns out that the structure and color of the metal of the blade on both sides of the “hamon” line are different. I have read and heard a lot about the nature of this phenomenon. Moreover, the Japanese themselves, as expected, do not dwell too much on this topic. When making katanas, I know and put into practice several ways to obtain the “jamon” line. I'll try to tell you about them.
Method one.
The purpose of the blade determines its shape, and the shape determines the properties of the metal in different parts of the blade. It is clear that the sword should have a “hard” edge, and what should not be cut (butt) should be viscous and elastic. The simplest and most popular way to achieve this effect is uneven hardening. To do this, take a forged blade made of ordinary tool steel and apply a layer of clay to the butt, leaving the blade and tip open. The lower edge of the coating is given a wavy shape, after which the clay is dried. Then the blade is heated to the quenching temperature and, together with the coating, is dipped into the quenching liquid. The thermal conductivity of clay is low, and therefore incomplete, “soft” hardening of the areas covered by clay occurs, while the blade is hardened “dry”. When hardening carbon steel of type U10 in this way, the hardness on the blade reaches 64HRC, and on the butt - only 45HRC, i.e., the hardness of a spring. After low tempering, the entire product has good cutting properties and, at the same time, does not break upon impact, while having good elasticity, and has a “jamon” line (transition zone). After grinding, polishing and light etching, this zone is revealed - between the dark hardened blade and the lighter spine. The width of the transition zone depends on the grade of metal. On a blade made of steel U10, the "hamon" is narrow and clear, on a blade made from ShKh15 - wide and blurry. From this method, the “hamon” line received the name “temperline” in English literature - temperature line, and in ours - “hardening line” or simply “hardening”. Obviously, a wavy, or even better, jagged line does not allow the blade to break off in large pieces along the border of the hardened zone. Everything seems to be simple. But! If you simply spread clay on a steel blade, then when it dries the clay will crack and fall off. You need to add some sand to it. Then the clay will fall off only when heated in a furnace or forge. It is also necessary to add crushed charcoal, which at the same time reduces the thermal conductivity of the clay. But even after all these tricks, the coating will fly off as soon as you dip the blade into the quenching liquid. I do it simpler. I make a cover along the length of the blade from thin tin and put it on the butt. I fill the gap between the cover and the blade with clay, asbestos and other materials, depending on what thermal conductivity of the layer is needed. Dry and heat as you wish - there's nowhere for the coating to escape from the casing! Be that as it may, in one way or another, uneven hardening was achieved. Americans say that this is how they get “hamon” on katanas. They do, but... not in Japan.
Method two.
Take a blade from any low-carbon steel such as 20, 20X or even stainless steel 20X13, in general, one that does not become embrittled when hardened, but increases its strength. Then clay, a cover with clay, as in the first method, or molding mixtures based on liquid glass used in industry are applied to the butt. Having thus protected the butt, the entire blade is subjected to cementation, saturating the blade with carbon. After carburizing and hardening, the blade is polished and a sharp, clearly defined “jamon” line is obtained. A closed spine and a bare blade end up with dramatically different carbon contents, not just different hardening structures, so the blade differs from the spine in the color and shine of the metal immediately after a good polish. It is very difficult to distinguish such blades in appearance from the best Japanese ones. At high carburization temperatures, a coarse cementite network is formed on the blade, giving the blade a very high hardness, which makes it possible to cut glass with this blade if desired. Carbides are chipped from a sharply sharpened blade and the famous “damask steel” microsaw is formed on it, which cuts fibrous materials very well. For example, meat or pieces of various fabrics thrown into the air. And here is how German experts describe the receipt of the “jamon” line in Japan. The coating was applied to the butt and heated in a forge “until the color of the moon on a June evening.” Heating was carried out on wood, always pine, coal. The fact is that pine charcoal strongly carbonizes the metal, producing a reducing flame. At a temperature of approximately 1150 °C, carburization occurs quite quickly and the blade on the surface is saturated with carbon up to 1.5-2.0%. After polishing, the cementite mesh gives a characteristic matte surface with a sparkling sheen, which is why the metal is called “diamond” steel. However, different experts use this term for different steels: for example, XB4 or P18, which are hardened to 67HRC, and at this hardness they cut glass like diamond. The blades were hardened directly from carburization heating in running water at “February” temperature, i.e., in ice water. After such severe hardening, the hardness is more than 66HKS and the glass is successfully cut. Window glass is generally a kind of hardness tester - at 64 HRC there are scratches on it, at 65 units it crunches slightly, and at 66 HRC and more a crunching sound that pleases the gunsmith’s ear is heard, turning into a whistle. In Japan, and in Asia in general, using cementation, sometimes various images were obtained on the surface of iron - dragons, people, trees, etc. d. The method of obtaining such images on blades and armor was incomprehensible to “almost everyone” at that time - and legends about damask steel blades with a pattern of silhouettes of people, elephants and other animals and their supposedly highest quality spread throughout the world. And such images are obtained very simply: “windows” are cut into the coating in the form of the desired shapes, and then the product is cemented. This method is bad because when carburizing at high conditions, grain growth occurs, and the carburized hardened layer is small, therefore, with strong impacts, the cemented layer is broken and chipped, so the highest quality swords cannot be obtained using this method.
Method three.
Here we are getting closer to the essence of making the best damask blades, because forge welding comes into play. This method is many hundreds of years old, and it was used everywhere - from Rome to Novgorod. Its essence is that a steel blade was welded to the soft butt-base by forge welding. However, the Japanese didn’t seem to make their swords this way, and the rest, sorry, didn’t give a damn about the “hamon” line. After all, a line is only an edge, a boundary of something. In our case, this is the border between strong, hard steel and soft iron. In Japan, the hard part of the blade is called “yakiba” and it is its size and shape, as well as its structure, that determine the combat properties of the blade. By structure I mean here color, shine, as well as the presence or absence of a pattern, and if there is a damask pattern, then its shape and size. As you can see, everything is not so simple - a “hardening line” and that’s it! By the way, some of our American colleagues do not temper their “Japanese” swords at all. And here's why: these craftsmen weld wear-resistant alloys of the "sormite" type onto the iron base by electric or gas welding, which have a hardness of more than 60HRC even without hardening. Of course, in this way you can get a “yakiba” of any shape you like. And, of course, the Japanese didn't do that.
Method four.
The classic Japanese method is to forge weld ductile iron plates to a steel plate on two or even three sides. Moreover, if the facings were only sometimes made of patterned metal, then the blade part, as a rule, was damask steel. There are many varieties of this method, but it is obvious that obtaining the “jamon” line is not an end in itself, since it is only a reflection of the inner essence - the design of the blade. I have seen and read about many samurai swords. Based on the design of the blade, they can be divided into three types.
First view. Viscous plates are welded to a steel or damask plate on both sides, and both the plates and the rod are flat and rectangular. The thickness of the rod is from 1/3 to 1/2 the thickness of the blade. Because of its simplicity, this design is very popular even now. Both in Japan and in Europe knives are made this way. But for swords another design (second type) is more suitable. This cross-section of the blade can be obtained in two ways. Firstly, conical plates can be welded to the conical rod or flat plates can be welded onto it alternately. Secondly, due to the characteristics of metal flow during forging, the welded package has the cross-section shown in Fig. 4. Such a package is cut lengthwise slightly obliquely, obtaining blanks for two swords. From the geometry of the section it is clear that a sword of this design has greater resistance to blows, since it has little steel and a lot of iron on the butt, and vice versa on the blade. Third type. In this case, the butt is welded to the blade shaft by end welding, and only then the linings are welded. I use this option only when the blade steel is very good and needs to be saved. Although once my student forged a katana from such a package so that there was iron on the blade, and damask steel with 200 thousand layers on the butt. Well, it happens! All designs have one thing in common - a strong, hard blade and soft, viscous linings. It goes without saying that the quality of a blade is determined not only by its design, but also by the quality of the metal from which it is forged. And here I join weapons historians who consider Japanese layered damask steel to be the best of the best. Bulat is patterned steel, i.e. steel, on the surface of which the structure of the metal is visible to the naked eye. Bulat steel can be cast or welded, that is, some are produced by casting, others by forge welding. Welding damask steel is commonly called Damascus steel. In our country, cast damask steel is simply called damask steel, but in the West it is called wutz. Damascus steel is plates or fibers of hard steel and soft iron joined into a monolith by forge welding. One blade can contain from several tens to hundreds of thousands of such plates or fibers. These plates are rather conventionally called layers. For different purposes, that is, for different types of weapons and for different parts of the blade, a great variety of types of Damascus steel were used. The varieties were determined by the time and place of manufacture, since it is clear that the metal of the Roman gladius sword of the 3rd century BC. e. was very different from the metal of the Persian “shamshir” of the 17th century AD. e. But all the variety of varieties can be reduced to three: blade, lining and universal, which, by the way, is closer to blade. From differences in purpose - differences in structure. Everyone has read, and some have even seen, that a saber made of good Damascus was wrapped around the belt. In the outer, most loaded layers, stresses of 300 kg/mm2 should arise, but along the axis of the blade there are almost no stresses, and elasticity there is not so important. Only Damascus steel and cable wire can withstand stresses of 300 kg/mm2, while maintaining good toughness and low hardness. What is the reason for the high strength and toughness of Damascus steel? If we do not go into theoretical details here, then in the combination of such layers of steel and iron, as well as in their joint deformation during forging, during which super-strengthening of the metal occurs. The theory suggests that steel should be as strong and hard as possible, and soft fibers should be as tough as possible. This stark difference is fundamentally important! The dualism of nature is visible here - good and evil, white and black, hard and soft. In the combination of opposites, a new quality is born, and not just a sum of quantities. But let's return to Japanese damask steel. When making samurai swords, Japanese blacksmiths used their own molybdenum-alloyed iron, and the steel was brought from the “southern barbarians” - from China. Moreover, the shape of the first swords and the technology for their manufacture were also taken from the “barbarians”. But over time, swords of original shape began to be produced from Chinese steel and cast iron (!) using original technology. This technology combined carburization and forge welding. When making blade metal, during welding of the plates, they were sprinkled with crushed cast iron, which simultaneously cleaned the surfaces of oxides and produced carburization. At the welding temperature, the cast iron melts and carburization occurs very intensively, and a relatively thin layer is saturated with carbon, but to a high concentration: up to 3-3.5% C. In addition, the cast iron that has given up some of the carbon thickens (its melting point increases), so When forging a package, part of the cast iron is not squeezed out, but “sticks.” This is how 10-15 welds are performed. The result is an alternation of layers of viscous iron, steel and extremely hard white cast iron, i.e. the ultimate version of Damascus steel. And there are tens of thousands of these layers! The layers of cast iron over-enriched with cementite form long lines, the distance between them is small, so the “yakiba” turns out matte, and with good polishing, something like a diffraction grating is formed, decomposing sunlight into all the colors of the rainbow. The hardness of such a blade is about 70HRC - that’s “diamond” steel for you! The sharpness of such swords can be assessed by the following legend: the blacksmith Murimasa stuck his sword into the bottom of a stream and the tree leaves floating on the blade were cut in two. Only the legendary blacksmith Wieland, the ancestor of the Celtic blacksmiths, performed such tricks. Well, both Murimasa and Wieland are the best masters, these are extreme cases. In general, a good sword, according to the concepts of the samurai, was supposed to cut through two prisoners tied back to back or a bunch of hard bamboo at the belt. Samurai, I must say, are generally quite strange people. There is another original technology for producing blade metal, which can also be called “Japanese damask steel”. Using this technology, the master makes a “sandwich” from thick lining plates, and collects the core from pieces of iron and cast iron. This package is welded and forged at a very precisely observed temperature (if it is not heated enough, the package will not be welded, and overheating will cause the cast iron to crumble into crumbs). The result is a “yakiba” of a unique, bizarre shape. Something similar was obtained in the north of India and this metal was called “farand”, but it was obtained using a completely different technology, which is not discussed here. As you can see, “jamon” is not a “hardening line”, and Japanese damask steel is not damask steel at all, but Damascus steel, and if it is damask steel, then it is not Japanese - as is the case with “farand”.
Once upon a time, a good sword or dagger was not only an object denoting the status of the owner. The life of its owner often depended on the quality of the blade. Nowadays, edged weapons serve more of a decorative function, but many people want to know how to make a blade.
A sword made by yourself can become an excellent interior decoration and the pride of its owner.
An easy way to make a sword at home
To make a blade at home, you will need the following tools and materials:
- sheet steel about 5 mm thick;
- Bulgarian;
- drill;
- electric sander.

The outline of the template is traced with a marker on the forging and cut out on a grinding wheel.
The work begins with a sketch of the future sword on paper. After this, the contours of the blade are transferred to the metal, taking into account processing allowances.
- Using a drill, holes are drilled in the corners along the drawn contour if the shape of the sword is quite complex. This will make it easier to cut out the outline with a grinder. Make holes for attaching the handle.
- Cut the blank along the contour on the metal. If you don’t have a grinder, this operation can be performed using a chisel and hammer.
- Further processing is carried out using sandpaper or a file: excess metal should be removed, giving the product the shape of a sword, thicker towards the center and thin at the cutting edges. The relief on the blade in the form of fullers or other parts is made with the same tools.
- The blade is hardened and tempered. The process is described below, in a more complex method of making weapons with your own hands.
Return to contents
How to forge a blade with your own hands?

To obtain the desired thickness, level the plane of the blade by moving it back and forth in a circle.
Forging involves the formation of a metal product by striking a hot material, which, due to exposure to high temperature, becomes plastic and soft. To make a sword using the forging method, you will need:
- low-carbon steel (rod or strip);
- hammer;
- anvil and forge
If you start forging from a rod, then the first step is to forge it into a square or rectangle along its entire length. Then a strip is cut from this blank, the thickness of which corresponds to the thickness of the intended product plus excess, which will be removed during further processing.
You should try not to cool the metal too much, since the inevitable bending during forging is better to straighten before the next heating of the workpiece.

The allowance along the butt is ground together with the debris and aligned with the side surface of the circle.
A distance is set back from the end of the strip that will be slightly less than the required length of the handle, taking into account that when this part is thinned, it will lengthen. Heat the workpiece until the metal glows red and break the shank. To do this, at the required distance on the edge of the anvil or on the backing tool, use the sharp end of a hammer to form a “step” - the shoulders of the blade body. The thinner part is called the shank. Pull the shank to a cone.
The body of the blade is given the desired contour. Slopes from the middle to the edges can be formed using sandpaper or forged by striking at a strictly defined angle from the edges to the center of the strip. The forger's elbow pressed to the body will help maintain a constant position of the hammer during forging. This way the blows will be delivered strictly vertically, and the inclination of the striker to the plane of the anvil will be controlled by fixing the hand in a certain position. The fullers on the blade are traditionally forged using a template.
Scale particles remaining on the metal make its surface uneven, covered with dents of varying depths. To remove scale during the forging process, the hammer and anvil are periodically moistened with water.

The bottom of the blade is satin-finished along its entire length, then the transverse line of the heel is processed.
After the final finishing of the blade, it is annealed to eliminate internal stresses: it is heated to red and left to cool in the forge. Then start hardening:
- The blade is heated to a barely noticeable red glow as evenly and slowly as possible. The air flow from the blast should not hit the product. At the quenching temperature, it is kept for some time, which is calculated by a coefficient of 0.2 from the heating time.
- To quickly cool a heated blade, you need a large volume of cold water. It is completely immersed in the container vertically or at an angle.
- The blade section is cleaned to a shine and the blade is again placed in the forge for tempering after hardening. Heating is carried out until the cleaned area acquires a golden color. The sword is cooled in air.
The masters of the Internet weapon shop "Good Claymore" are always happy to work on something special and interesting. We accept individual orders for the production of medieval weapons according to your sketches and requirements. This is a unique opportunity to get not just a standard weapon, but an exclusive one that only you will have.
How to order a sword?
You can order a sword upon individual request by contacting our gunsmith by phone, Skype, email or via the VKontakte messaging service:
Telephone for individual orders: 8-977-265-39-17
Email:
Vkontakte community: http://vk.com/goodclaymore
Just tell the gunsmith what kind of sword you would like to receive, and you can discuss in detail the details and subtleties of its manufacture, as well as the price, which may vary depending on the complexity of the work. We will certainly be able to select the conditions that suit you, and the order will be accepted for execution.
Restrictions
The sword is the best weapon of war invented by man before the invention of gunpowder. Over the centuries, he improved his form, achieving perfection to suit the needs of his era. When ordering a sword based on an individual design, remember this! What can often be seen on screens, be it films, games or anime, can look very original and unusual: with various spikes, horns, double and triple blades and even gear shifters (Japanese fantasy is capable of a lot). But what is good in fiction will not be a weapon in the real world. A huge sword with an incredible amount of decoration and flourishes simply cannot be well balanced and used in fencing, just as a sword with a blade narrowed at the guard will be too fragile for real combat. Therefore, when planning to order a sword, decide for yourself for what purpose it will be used. After all, a real copy of Frostmourne would be completely impossible to use in battle, except to hang it on the wall.
Production time
The production time for a sword may vary depending on the complexity of the work and the workload of the gunsmiths, but usually it is from thirty to forty working days. Remember that when working with a beautiful, truly interesting sword, it is important to put a considerable amount of your own soul into its creation. Therefore, the master’s work occurs without fuss, and always with high quality.
Sword
An elegant and formidable sword is the pinnacle of blade development, the culmination of blacksmithing skills. Although its design is complex, the scope of use of a sword is much narrower than that of a knife. Those can serve not only as weapons, but as a sword, you can only kill. Swords appeared in the arsenal of the army quite late. The first swords were forged four thousand years ago.
A swordsmith uses the most common tools: a hammer, an anvil, a pair of tongs to hold the hot metal as it is worked on the anvil, chisels and a file.
How a sword is forged
To begin with, the blacksmith acquires iron ore and magnetite. Magnetite, similar to black sand. A blacksmith mixes ore with hardwood charcoal. The result is an iron cry. To get a kritsa weighing 200 kg, the master burns up to 180 kilograms of charcoal. The kritsa is cut into smaller pieces, from which the blacksmith produces steel. Pieces of kritsa are processed on an anvil. At the same time, impurities are burned out and shells are removed. Then the process of heating and forging is repeated and pure metal is obtained.
Repeated forging, heating, and forging again allows you to burn out impurities from the metal and remove air bubbles. This is how you get a durable one. The metal plates are welded together by repeated forging to fill all the gaps. This way you can make the forging larger. Next, the forging is folded in half, forming a sandwich. Then they begin to hammer the forging, stretching it to the desired length and width. The result is a strip of steel. Then you need to process the edges, stretch out the edges, and give the desired shapes with a hammer. After this, the t has cooled down and hardening is carried out. First the metal is then cooled very quickly in water. Mild steel becomes quite hard.
Processes occurring during steel hardening
The sudden cooling of the steel makes it especially strong, thanks to the molecular changes that occur when the sword is heated to a certain temperature. At this stage, the cells of the iron crystal lattice expand from heating, and carbon atoms enter them. If you quickly cool the steel at this moment, the cells of the crystal lattice will bind carbon inside. The result is very durable. Then the steel must be heated again, but to a lower temperature. This is called releasing the metal. This will make the steel less brittle.
Final finishing of the sword
Finally, you need to make the sword hilt. It consists of a guard that prevents the hand from slipping onto the blade, a handle and a pommel that helps to hold the sword in the hand and balance the weapon.
A sword is not just a weapon - it is a work of art. Blacksmiths were respected people. They mastered the techniques of craftsmanship and strictly kept the secrets of making the most formidable weapons of their time.
But, no matter how important the work of a blacksmith is, he only creates a sword. Next, to the skilled swordsmen who are on the battlefield.
Rewrite of bourgeois video


