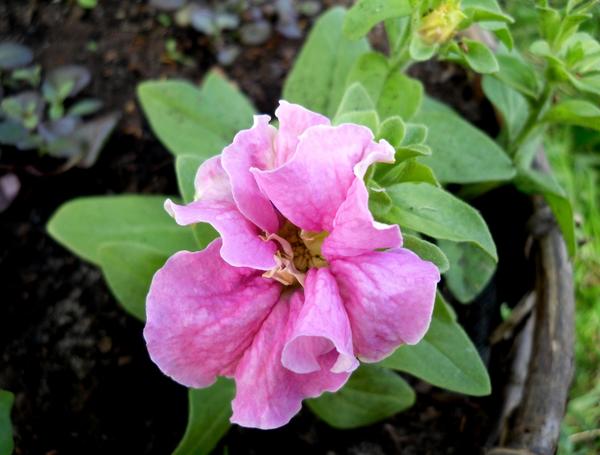
Petunias are wonderful flowers that have deservedly earned the love of many gardeners. In terms of the abundance of colors and shapes, few garden annuals can compare with them, and in terms of the duration and splendor of flowering they have even fewer competitors. There is only one “but”: grow good seedlings Not everyone succeeds in growing petunias.
Petunias are the favorites of many gardeners. Photo by the author
Problems often begin from the first steps: from a whole bag of seeds, 1-2 seeds may sprout, or even none at all. True, sometimes there are only 5-7 seeds in that bag, but it’s still a shame.
Step 1: choose varieties, buy seeds
As always, it all starts with seeds. I will not repeat the well-known rules - we already talked about how to choose seeds in article 7 the most important rules selection of seeds, and the reasons for possible failures were discussed in the publication 10 common mistakes when choosing seeds. But there are nuances that relate to petunias themselves:
- - ampelous varieties even with regular pinching, they usually branch weakly; if you plan to plant petunias not in hanging baskets or boxes, but in the ground, choose bush varieties; and in containers, hanging varieties should be planted more densely - this way they look more magnificent and look better;
- - coated seeds it is more convenient to sow than ordinary ones, but if there is a lack of moisture, they do not germinate - the shell does not dissolve; In addition, coated seeds are more demanding in terms of compliance with storage terms and conditions; in general, ordinary ones are more reliable, although they require more patience; however, this is subjective;
- - mixtures of varieties, as practice shows, rarely live up to expectations; if possible, give preference to specific varieties: at least there will be some confidence that you will get exactly the right one color scheme, which you are counting on;
- - buy only fresh seeds from reliable producers in trusted stores: Poor germination is one of the most common problems when trying to grow petunias from seeds.
Step 2: sowing correctly
Petunias are sown on the surface of the soil, without sprinkling soil on top - otherwise they will not germinate. But the seeds are so small that it is not easy to sow them carefully. An ordinary toothpick will come to the rescue: with its sharp tip you can easily pick up a microscopic seed and transfer it to a seedling container.
Little trick: use a second toothpick to mark where you place the seeds - they are almost impossible to see on the surface of the soil, and this simple technique helps to sow evenly. Another technique is sowing in the snow: the seeds are easily distinguishable against a white background.
I don’t know who it is (this method has both supporters and opponents), but for several years now we have been sowing everything in a mixture of soil and hydrogel, and petunias are no exception. If the hydrogel is soaked not in water, but in a solution of a suitable fertilizer (for petunias this could be, for example, Kemira), the seedlings will have access not only to the necessary moisture, but also to additional nutrition.
For sowing, it is convenient to use food containers with lids - you get mini-greenhouses in which the seedlings feel comfortable. Such containers are easy to ventilate; the transparent lid lets in enough light, and the volume of even a very small container allows it to be used until the seedlings are picked.
Having spread the seeds over the surface of the moistened soil, spray them again with water from a spray bottle, cover the container with a lid (or film, plastic bag- if there is no lid) and wait for the shoots. Periodically, crops need to be ventilated to prevent condensation from accumulating, and monitor soil moisture.
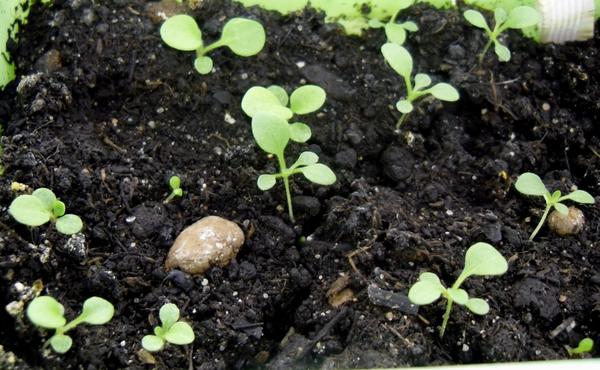
Shoots appear within 2 weeks; if the seeds are good, then together. But the results are not always encouraging. Noticed: if after 14 days the shoots have not appeared, there is no point in waiting any longer. That is, the seeds may still sprout (sometimes this happened almost a month later!), but there will be little joy from such a plant, and a lot of trouble. These seedlings emerge weakened, they literally need to be nursed, and these worries are rarely justified.
Sowing petunias for seedlings is shown and described in detail in this video:
Step 3: pick the seedlings
Grown seedlings need to be picked - carefully planted in separate containers.
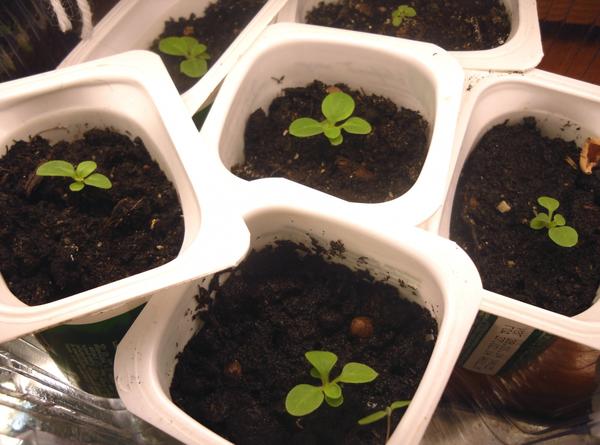
Both small and disposable pots are suitable. plastic cups, and yogurt containers - in a word, any usual containers for seedlings (by the way: if you haven’t yet found the most suitable convenient option landing tanks, I advise you to read this article).
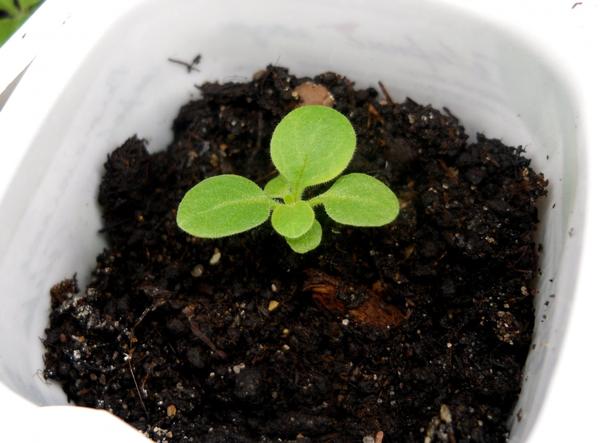
There is one more little trick. Petunias have a rather extensive, branched root system. And at home they should grow until it gets warmer outside - that is, at least 2 months, but in practice - up to 3, depending on the vagaries of the weather. Naturally, if we want to get healthy and strong seedlings, we will have to provide them with a sufficient volume of soil. If the roots are crowded, they do not receive enough nutrition, we will not see success.

Petunias have a strong and extensive root system. Photo by the author
You can go one of two ways: either immediately plant the seedlings into large containers (which is not always convenient), or use small cups at first, and after about a month, transplant the grown seedlings into larger containers. Sometimes during the growth of petunias this procedure has to be carried out twice, but the reward is a stocky, strong seedlings with formed buds. Such plants easily tolerate transplantation and quickly adapt after planting in the ground.
Step 4: take good care
Petunia is light-loving, so when sowing seedlings in February, you need to take care of additional lighting from the moment the seedlings appear. If there is not enough light, the seedlings will stretch out and turn out weak.
Temperature is no less important. Before petunias emerge, they need warmth (approx. +23...+25 degrees). When the seedlings appear, we begin to ventilate the container, gradually increasing the time the plants spend in the open air. A sharp change in conditions can destroy young shoots.
In order for seedlings to grow healthy and strong, you need to create conditions. Photo by the author
After picking, let the seedlings get a little stronger and continue reduce temperature. The ideal option is if it is possible to maintain the night temperature around +15 degrees, and the daytime temperature no more than +18...+20 degrees. In such conditions, with good lighting and sufficient watering, we will get strong, healthy, stocky seedlings.
Water carefully, do not pour on the leaves. It is important to observe moderation: petunia does not like to dry out, but excess moisture is also harmful to it: rot may appear.
Like any rapidly growing plant, petunia needs feeding. If the seedlings are planted on a mixture of soil with hydrogel soaked in a fertilizer solution, then they can be fed later and less frequently (the hydrogel absorbs moisture along with the substances dissolved in it, and plants can extract from its granules necessary nutrition according to need). You can feed with any complex flower fertilizer.
To make the bush neat, branched, compact, growing shoots pinching, forming a plant (this “trick” will not work with hanging forms: they can also be pinched, but they will still branch weakly, preferring to grow in length).

If everything is done correctly, by mid-May our seedlings are completely ready to move into the garden, and if the weather permits, we can plant them in pots, containers or flower beds.
Many people, including me, associate growing petunia seedlings with some difficulties.
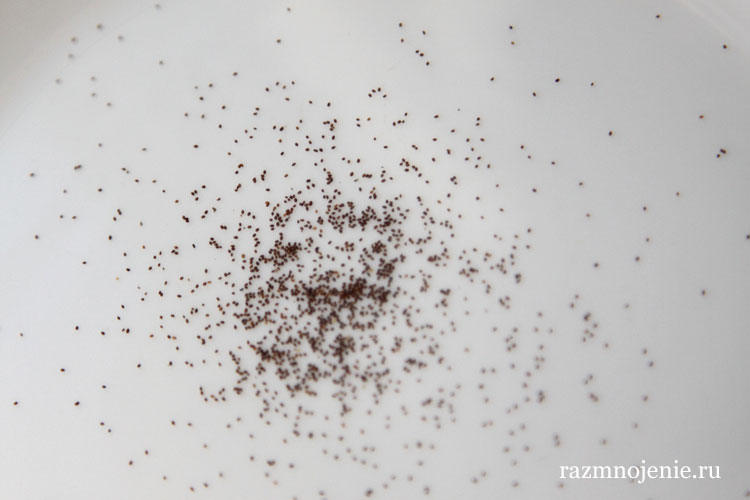
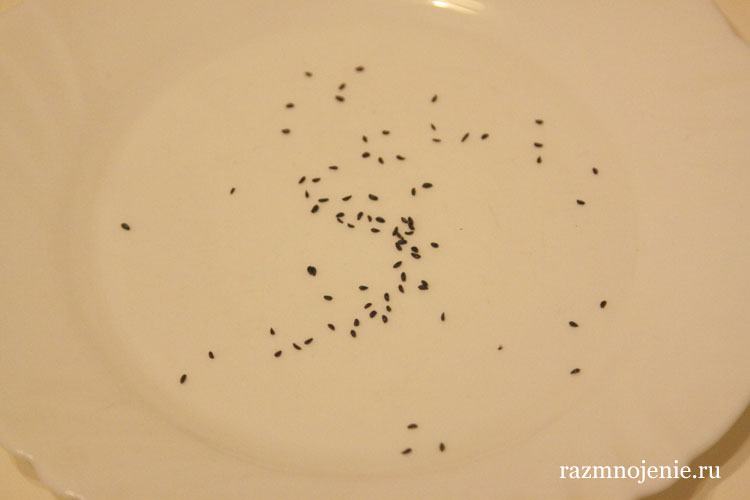
The seeds are very small and germinate only in the light. Not everyone is able to sow petunia seedlings correctly so that the seeds sprout and continue to develop and grow safely.
Many years ago I tried it, it didn’t work and I didn’t experiment anymore. But now, I really want to grow my own petunia seedlings of the exact variety that would look great in a flowerpot.
Everything changed two years ago when we settled outside the city. The year before last, I bought several petunia bushes as ready-made seedlings and planted them in a couple of flowerpots. The containers were not very deep, but they still looked great. Considering that the area has not yet been developed, such hanging baskets with flowers look bright and distract attention to themselves.
Last year, a friend gave me five bushes, but I didn’t like them: apparently the variety was the simplest. In the pots they looked like small stamens sticking out alone, and the color on them was inconspicuous and very poor. Therefore, now I decided to “try my luck” again "
I can’t say exactly where I found the information, most likely on the channel “In the Garden or in the Vegetable Garden” by Yulia Minyaeva that sowing petunias for seedlings should be done in a coconut substrate and then they will sprout well.
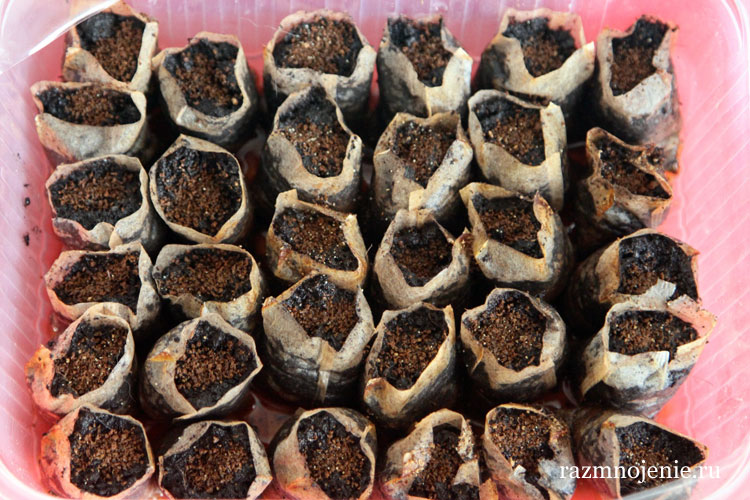
Planting petunias in coconut substrate
Planting any seeds in a coconut substrate is exactly the same as planting them in the ground. Simply coconut substrate has a number of wonderful qualities:
- breathable
- lush and light
- moisture-absorbing
- sterile
First you need to take a briquette of coconut substrate or a piece of it, depending on the required volume, fill it with water in the amount indicated on the package. After five minutes it will absorb water and become moist, voluminous and crumbly.
After such preliminary preparation you need:
- mash it, crumble it smaller
- spread the coconut substrate into plastic containers at half the height or slightly less
- On the surface of the substrate, place petunia seeds individually using a toothpick, the tip of which must first be dipped in water, and then pick up a tiny seed on it. Or sow using the “salt” method, as Yulia Minyaeva does
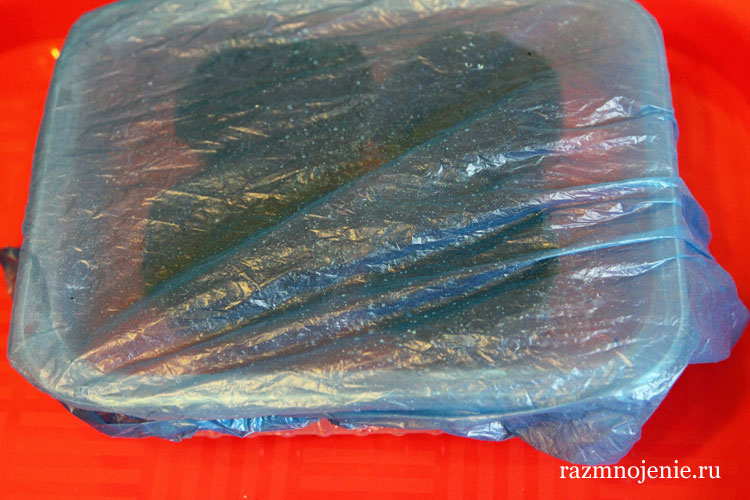
Sowing petunias in boiling water
 Sowing petunias in boiling water (with boiling water poured over) in an airtight plastic container
 Maybe it’s just me, but this year sowing seeds under boiling water is especially fashionable. This method, when the seeds are poured with boiling water, is good because the percentage of germination increases significantly.
That is, if you are not sure about the seeds (maybe they are not fresh, but from last year) or doubt your ability to do everything correctly (maybe due to home conditions or for you sowing petunia for seedlings for the first time), then try sowing petunia into boiling water. Success guaranteed.
For example, I had one bag of seeds from last year, but the shoots appeared no worse than from a bag of fresh seeds:
 Varieties of petunias: Baskin Robbins and ampelous “Delightful Cascade”
 - last year's seeds (expiration date ends 12.2016) - petunia Baskin Robbins - a profusely flowering variety with a bright characteristic flower pattern: on a scarlet background there are white petal-shaped stripes emanating from the center of the flower
- fresh seeds 2017 - ampelous petunia Delightful cascade", a mixture-plant with shoots up to 80 cm long, which, as they grow, form an avalanche of large flowers of various colors with a diameter of up to 8 cm.
When I bought petunia seeds, I paid attention to the weight indicated on the bag. You need to choose where in the bag there is not a capsule, but the seeds are poured in a shaft and their weight is written - 0.2 g. Then, indeed, there will be a lot of seeds and, as Yulia Minyaeva shows in her video, you can sow using the “salt” method. It will be easier than laying out each “grain of sand”.
I bought an ampelous petunia specifically for the purpose of planting it in a flower pot, and I liked Baskin Robbins because of its unusual coloring.
So, after the sowing of petunia seeds has been successfully completed, you need to:
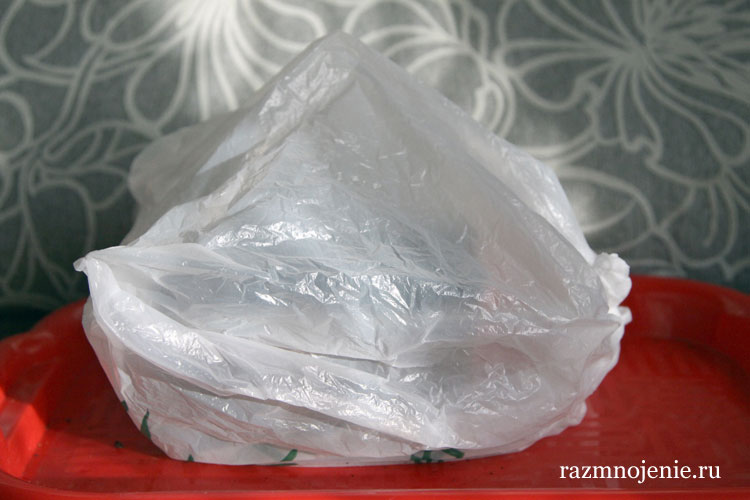
- take a kettle and carefully pour boiling water over the surface of the substrate with seeds
- Immediately close the container with a lid as quickly and tightly as possible
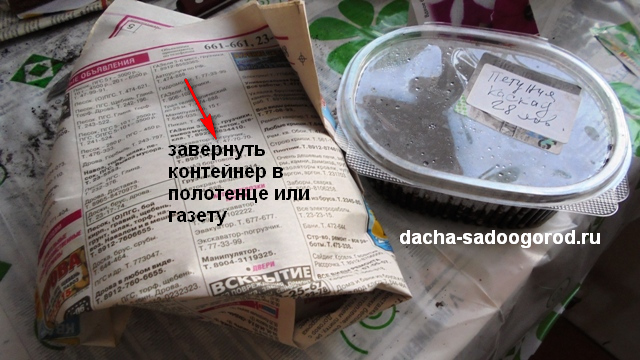
- the hot container must be completely wrapped in a towel, cloth or newspaper
- after a day you can remove the wrapper from the container
- place in the light (under a lamp or closer to the windowsill) for seeds to germinate in the light
As you can see, when sowing petunia seeds, two chips were used:
- coconut substrate
- watering seeds with boiling water
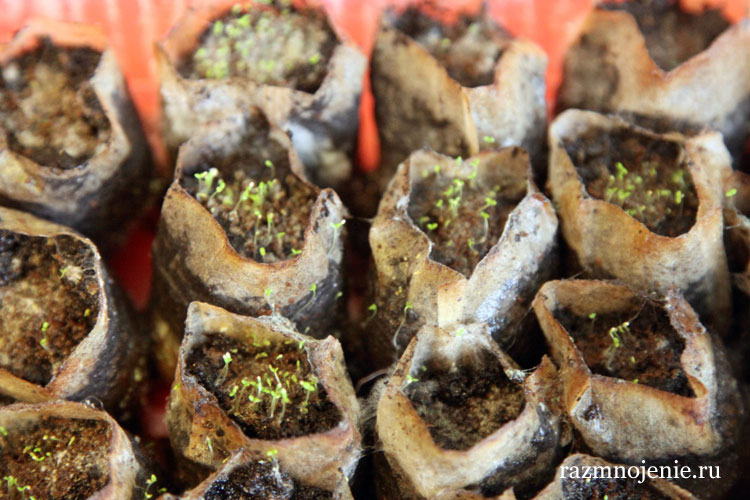
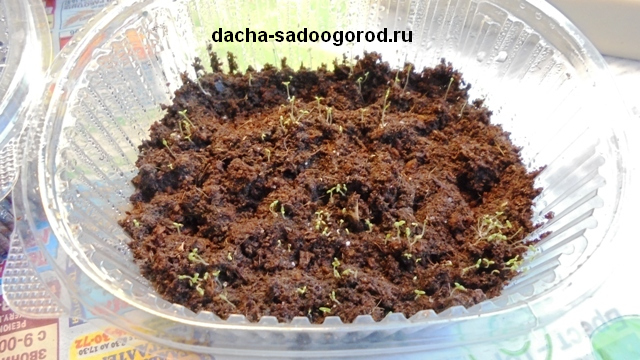 Planting Baskin Robbins petunia (last year's seeds) in coconut substrate and its germination on the 6th day
 Maybe that's why the seeds sprouted on the sixth day (February 3). True, in bushes. Maybe because I sowed them using the “salt” method, or maybe they will still sprout. In any case, I don’t need much, and for a person who sowed petunia for the first time, the result is quite good. In the future, the petunia will need to be pruned. But that’s later, a little later...
How beautiful petunia will be depends not only on good quality seedlings, but also on how it is then planted in a pot, in what container, how to care for it, etc. But that’s also later, already in the spring...
Tags:If you common man ask what the following row is associated with: tea bags, underlayment for laminate flooring, sawdust for cat litter, soil, shoe covers, toilet paper, toothpick, perhaps he will answer that it’s a madhouse. This question will not come as a surprise to summer residents. They will say: “Spring is coming. It's time to plant flower seedlings!
This period of growing annual seedlings reminds me of “Crazy Hands” from the project “While Everyone is Home.” Briefly speaking, Spring time of madness is approaching for summer residents.
Sowing methods
There are many techniques for growing annual plant seedlings from seeds. I think before you draw conclusions for yourself, you need try any methods including the most unusual ones.
Tea bags
Let's start with an unusual method - growing seedlings in tea bags. He's for thrifty summer residents who have time, because the method is labor intensive. This was the first time I planted it like this. I won't use it anymore. Why? Firstly, due to the long preparation of the bags. Secondly, mold forms. Perhaps because of the tea, or maybe because of the earth or improper observance temperature regime. This I tried the method as an exotic one. I even read that particularly “crazy” summer residents germinate cucumbers in eggshells. However, I'm not ready yet...
So, flower growers believe that tea bags are a replacement for peat tablets or pots. I will describe in detail how I planted lobelia seedlings.
Instructions
01. Tea shops the bags need to be prepared. It's better to get the Lipton tea bottles as they are double cut and have a seam where you cut them. Some other tea bags do not have such a seam, so they are not suitable for seedlings. The photo clearly shows the sequence of separating the bags.

02. After the bags are prepared, they must be filled with soil and placed in a container. It is not necessary to take the tea out of them, because it will play the role of drainage.

03. To root the seedlings you will need special remedy. I chose "Epin" in the proportion of 3 drops per 500 g of water. They need to spill the tea bags thoroughly.

04. Lobelia seeds are extremely small. They must be mixed with dry sand or tea for ease of planting.
05. I mixed them with dried tea bags.
06. Plant the seeds together with the tea leaves, as if adding salt to the soil.
07. Now you need to tightly close the container with the bags with a transparent lid, bag or shoe covers to create a greenhouse effect. Shoe covers, by the way, are very suitable for this method, because... They have an elastic band, maintain heat well and are easy to remove.

08. Lobelia seeds sprouted on the 4th day, but some bags became moldy. I had to spray them with an antifungal drug.
09. After 9 days, the mold disappeared, the lobelia seedlings thickened.

Tip: separate the bags when they are not completely dry. Otherwise they break. Verified.
Lobelia seedlings feel quite confident in tea bags. It will probably be convenient to immediately replant it in pots or in the ground without diving. This is a big plus.
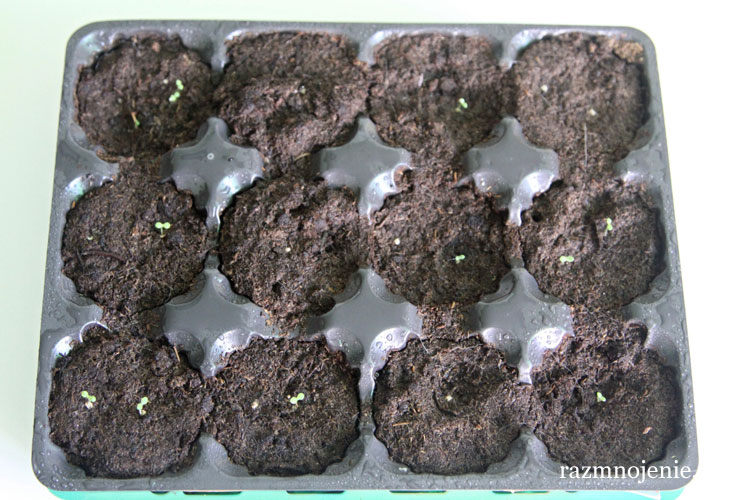
Peat pots
Perhaps the easiest way is to plant seeds in peat pots. I planted 2 petunias there. The process is the same:
01. Earth, Epin solution, seeds.

02. Cover with a bag.
03. After 4 days, some petunia seeds sprouted. However, just like the tea bags, some of the pots developed mold.

04. To eliminate it, we use an antifungal drug. Cover the pots for further seed germination. We open the seedlings several times a day to ventilate and dry the shoe covers or bag.
05. After 9 days, almost all the petunia seeds have sprouted. Now it is necessary to especially carefully monitor the soil, not allowing it to dry out or become waterlogged.

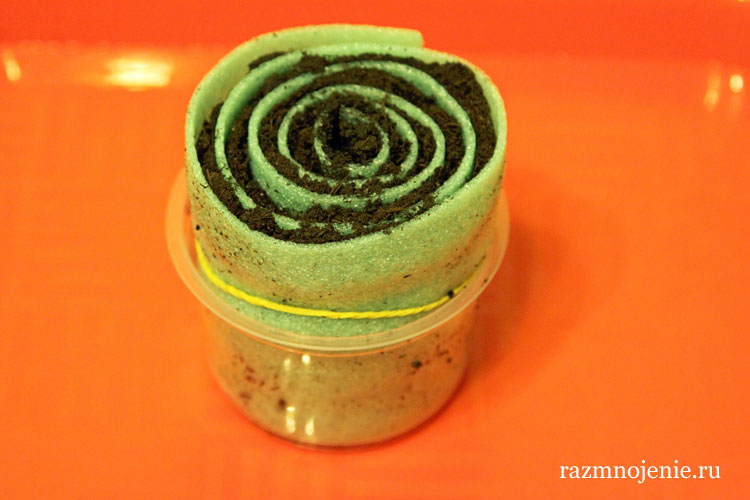
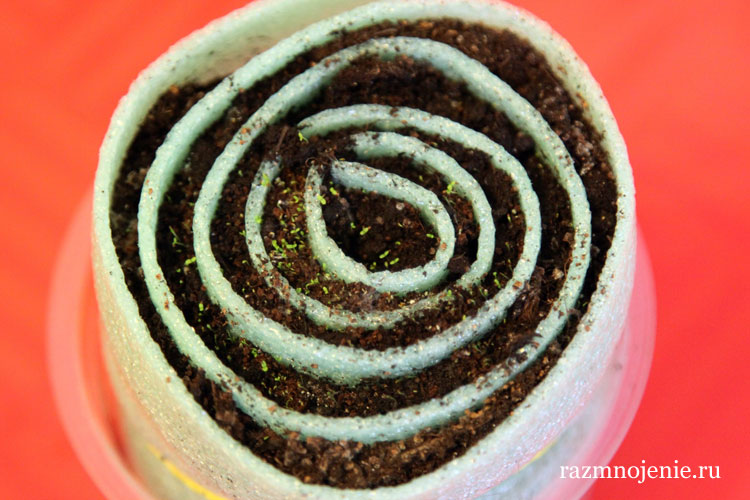
In "snails" without land
I recently learned about “snails,” or as they are also called, rolling papers. Yulia Minyaeva describes this method in great detail on her Internet channel. I also decided to conduct such an experiment on the seeds of viola, marigold, aquilegia, annual dahlia and salvia. I was very pleased. I advise you to also follow my instructions.
01. You will need a 2 mm thick laminate underlay. It will serve as a kind of greenhouse for growing seedlings. Length - approximately 40-50 cm, width - like toilet paper.

02. Cut double toilet paper of the same size and lay it on top of the backing.

03. Viola seeds are much larger than lobelia seeds, we will not mix them with anything.
04. For better seed germination, moisten toilet paper with Epin solution.

05. Take the seeds using a moistened toothpick.

06. Place viola seeds on moistened toilet paper, spacing 2 cm.

07. Carefully roll the backing into a roll and tie it with an elastic band so that it does not unwind. The “snail” is ready. We put it in a container.
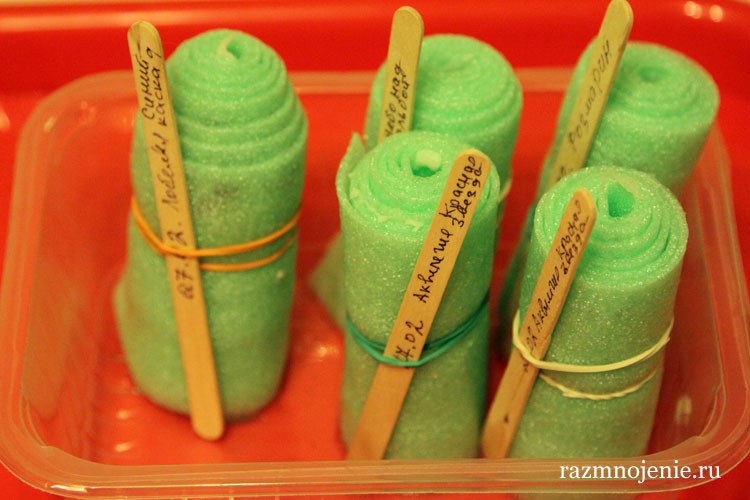
08. Cover with shoe covers or a bag and place in a warm place.

09. The seeds sprouted on the 6th day and gave good roots.

10. Place soil moistened with water on the seeds and twist the “snail”.

11. Place it in a container.
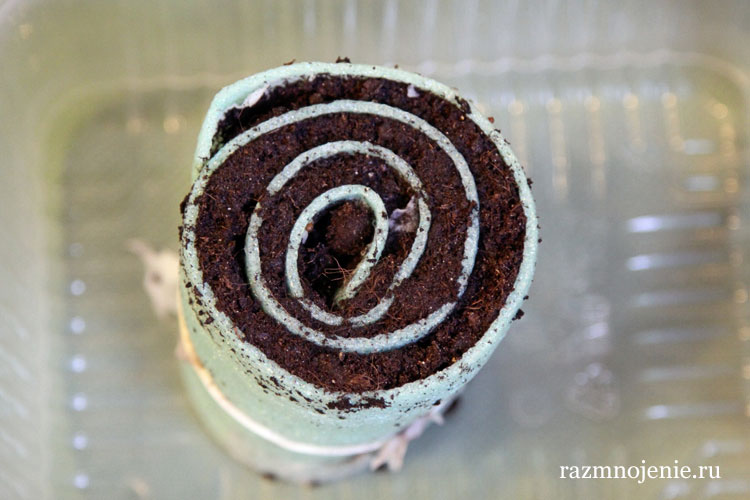
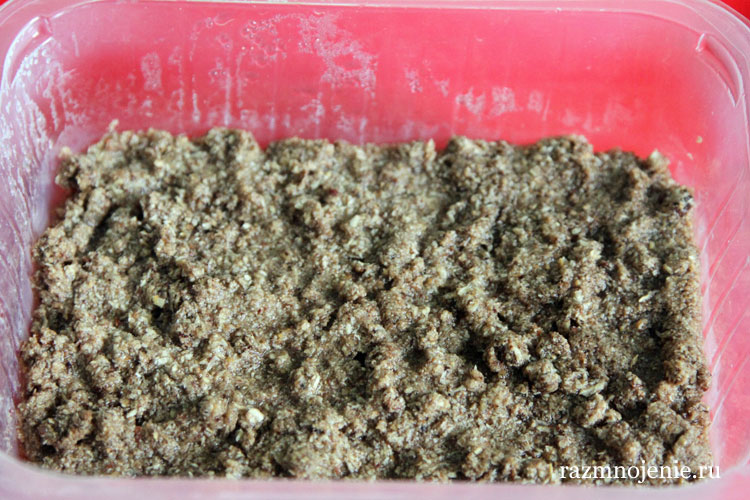
12. You can put sawdust in the container. I use wood cat litter.

13. The sawdust must first be filled with warm water.
14. Viola began to sprout amicably after 9 days.

In the "snail" with the earth
01. Take the substrate under the laminate and lay 1 cm thick soil on it. Spray it with Epin.

02. Roll it into a “snail” and place it in a container.
03. Evenly scatter, as if adding salt, lobelia seeds mixed with dry sand or drunk tea from a tea bag.

04. Cover with a bag and set aside in a warm place.

05. Lobelia germinated on the 4th day.
06. After 9 days, the lobelia sprouted into clumps, which we will then immediately plant in the ground.

Peat tablets
01. Soak peat tablets and sow petunia seeds. Cover. Several seeds sprouted on the 6th day.

02. After 9 days, not all of the petunia seeds have sprouted.
What methods will I use in the future?
All techniques have the right to exist. However for myself I chose “snails”, from which I will plant seedlings directly into flower beds or pots. A very compact and convenient way to grow seedlings in urban environments.
I didn’t like the method with tea bags because it was labor intensive and caused mold.
The downside of peat pots and tablets is that they dry out very quickly. You can ruin the seedlings.
Try it different ways and make your choice!


