Today, a good repair at the dacha and a landscaped garden comes as no surprise to anyone. And more and more people, to make their site unique, prefer to create a variety of crafts from scrap items. After all, a dacha is a large space for creativity, where every centimeter can be decorated beautifully and unconventionally.
In magazines and on the Internet there are many photographs of summer cottages, with various examples of their decoration. But a particularly interesting idea is to create crafts from computer disks. From them you can create a large number of original crafts. It is not necessary to have an art education. It all depends on your imagination and, of course, desire.

Crafts made from disks for the garden can be used as stands for anything, or used to decorate flower beds and make unusual fences. They will look quite beautiful both in the daytime and in the evening.

Probing of the suburban area
Among the owners of plots, you can rarely find those who probe their territory. Although it is extremely necessary to do this in order to have, for example, a convenient path to the plants. And if you want to make this path even more beautiful, then crafts made from disks will help you with this. Of course, it must first be paved.

To work you will need:

1. Instant, transparent glue.
2. Computer disks.
You need to take the disks and glue their top side to the track in any order. And in order for such art to last as long as possible, the discs must be glued evenly. The result will be a bright, attractive and unusual path.

To decorate flower beds with disks or highlight garden trees, you can take any multi-colored beads and attach them to each disk with glue. Then, around the flower beds, all the discs need to be firmly and beautifully stuck into the ground. The result will be magnificent and unusually decorated fences.


DIY animals made from CDs
Crafts from disks for the dacha can be made not only in the form of fences and framing flower beds, but also in the form of stunningly beautiful animals.

So, an owl made from disks, which you can make with children, would be an excellent decoration for a tree.
Manufacturing scheme
To complete this you will need the following parts:
1. Wheels of different sizes.

2. Instant glue.
3. Colored cardboard.
4. Acrylic paint with scissors.

Take 2 small disks and draw pupils on them in the center in green. Next, paint one large disk black, and 5 more of the same ones - half black and brown. The torso will consist of these disks, and the head will consist of black ones. The next step is to take the cardboard. Cut out the beak from red, and the claws and ears from white. Glue the body of the owl onto black cardboard. Attach eyes and other details to the head. You can apply a layer of varnish to the created craft to protect it from exposure to bad weather.

The resulting decoration in the shape of an owl will always look unique and interesting in your garden.
Another craft - a peacock - is a little more difficult to make, since in addition to disks, other materials are used in this work.

Namely:
1. About two dozen large disks.
2. Yellow, white and blue paint.
3. Thick wire and glue.
4. Garden net for work.
5. Five-liter plastic bottles.

You need to cut out the torso and neck from a plastic bottle, and also make a head. To make paws you need wire of the same length. They should be painted yellow. Next, take the mesh and cut it into a triangle shape. This will be the peacock's tail, onto which the disks should be glued, shiny side up. The body can be painted blue, and eyes can be painted on the head. After which, assemble the entire structure into a single whole. Glue the paws to the body, and secure the tail. And place a small disk on the head, like a tuft. After completing the work, you will definitely have a delightful and unique craft - a peacock, which will delight you for many years.

The same peacock can be made from an old tire, which will be used as a body. But in this case, you will need male help and the presence of an angle grinder.

Thus, from disks you can create a variety of animals and not only them. And then, all the possible decorations that you come up with will certainly make your summer cottage not only beautiful, but also unique.

Video
If you decide to clean up your home, then you probably found a large number of CDs in your home. If you cannot find a worthy use for them, then do not rush to throw them away. It turns out that you can make wonderful crafts from them that will easily decorate your garden. And in this article you can find out what garden crafts you can make from computer disks with your own hands. Here we will offer the most interesting ideas that you will definitely like.
What crafts to make for the garden from old CDs
You can easily use old CDs to create useful and at the same time cute products.
Peacock for a summer cottage.
You probably already know that discs are suitable for creating absolutely any crafts. And if you have come across homemade crafts from disks before, today you can see several ideas for your own summer cottage. And if you love decorating your garden plot, then take a closer look at this peacock. You can use wood or plywood as a base. You must paint the finished bird figurine with paints.
But to create a luxurious ponytail, you will need a net and a few unnecessary CDs. You must cut out the base of the tail from the mesh, and only then glue several old disks to it using glue. Look how very beautiful it looks.

Three-dimensional figures from old disks.
Today you can see many ideas for using CDs. Craftswomen and craftsmen create a wide variety of garden crafts from computer disks. And if you have discs collecting dust at home, then find a worthy use for them. For example, in order to create such cute figures, you just need to break the disk into several pieces. You should do the same with all other disks. Then you have to make cute animals out of them.
Surely, they will look very nice in the design of your garden plot.


A craft that can be hung on garden trees.
Surely, on your garden plot there are trees that have a very unattractive appearance. You may not want to get rid of them. And you don't need to do this. After all, you can decorate such trees with figures from unnecessary computer disks. Use your imagination and create original animals that will definitely delight you.

Craft - a chair and from CDs.
Some people who have skills don’t just waste their time. It turns out that such craftsmen have learned from old disks to create practical furniture for their garden, on which it is convenient and pleasant to relax on summer days. But to make such a chair, you will need to collect a lot of disks. And this point must be taken into account.

Figurines.
You can also make interesting figurines to decorate your garden. Subsequently, you should attach them to sticks and place them in different parts of your garden. Surely, such a craft will delight all the guests of your home.
You can also make characters from the popular animated series - Smeshariki. And also place a similar craft in the country courtyard.


Useful craft from CDs.
Crafts made from computer disks for the garden may be useful. For example, if you create such a thing, then your garden harvest will not be touched by birds and other pests. The shine from the CD will repel birds and other pests that like to feast on the fruits of summer in the summer.

Finally
In this publication we have listed the most interesting crafts for you. And if you like to make unusual things, then this article was created especially for you. In general, get more CDs, be patient and start creating the most extraordinary things for your garden.
If you have old CDs at home, do not rush to throw them away. You can make wonderful crafts from scratched or damaged CDs and DVDs that will serve you for many years as original home decor items. Such a craft can also be presented to your loved ones as a gift for any holiday, because beautiful candlesticks, boxes, vases, photo frames, handmade paintings for interior decoration bring much more positive emotions and are always appreciated than ready-made options bought in stores.


Crafts for home from CDs
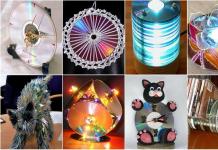
Most often, CDs are used for simple crafts for the home. For example, it is very easy to make a small table lamp or a table or wall clock from them. With children, you can make wall hangings or New Year's tree decorations from old music CDs. If there are a lot of disks, they make original curtains. And this is just a part of the home crafts that you can make from old and no longer needed CDs, so don’t rush to throw them away.

Crafts for the garden from CDs
CDs are an excellent material for garden crafts - durable, resistant to rain and snow, and easy to use. So, if you have any unnecessary discs left, you can use them to make decorations for the garden. The simplest option is a tree or a windmill - you only need disks and wooden or plastic rods.
Related article: Furniture for a dressing room: features, varieties, components

You can also make large flat shapes from CDs for your garden - it could be a violin, trumpet or some other musical instruments, arrows, hearts, circles and any other simple shapes, if you don’t yet know how to do something complex, birds and animals, for example, beautiful flamingos, and other crafts in this style:


Or, if you have a lot of unnecessary disks, you can come up with something completely creative. For example, one music fan unknown to me completely decorated the facade of his house with CDs:

Three-dimensional figures from CDs
For lovers of complex crafts that look like works of art, I can suggest trying to make these original three-dimensional figures from CDs - a cat, a dragon, a bird, or it could be something close to you. In this case, not whole disks are used, but pieces cut from them, and making such figures is not so easy, but look what you can get:


CD clock
Clocks are not only a device with which we determine the exact time, but also serve as an excellent way to decorate the interior. That is why crafts made from aged CDs in the form of wall or table clocks are always relevant and in demand. Such watches can be the main accent in the interior or complement the overall idea and composition.
To make a clock from a CD, you will need a clock mechanism with hands from an old alarm clock, a glue gun, numbers and elements for decorating the clock, and the disk itself. The clock shaft is inserted into the hole in the middle of the disk and the clock mechanism is fixed to the disk from the reverse side with a glue gun. Next, the arrows are strung together and the numbers are glued to the dial. Depending on whether it is a wall clock or a table clock, a hook or a clock stand is glued to the back side. If you want to make a larger clock, you can also glue it to a beautiful panel.
Related article: Original bouquets for the balcony


Lampshades and lamps made from CDs
These can be table lamps and lamps, pendant shades and even entire ceiling chandeliers. An original design solution and unusual lighting in the room will be provided. You can make such unusual decorative elements in a variety of ways.

So, for example, you can get a magnificent table lamp, chandelier or night light by:
- Gluing disks together edge to edge in the form of a multifaceted figure, gluing it onto an additional disk stand, after inserting a light bulb or New Year's garlands inside.
- By making holes in each disk along the edges at 5 points at equal distances from each other, and fastening the disks at these points with wire, you will get a wonderful lampshade.
- If you use wire and a metal frame, you can even make a ceiling chandelier.
- You can also paste discs over an ordinary and initially unremarkable lampshade.
- Another interesting way is to chop the discs into small pieces and make a mosaic out of them on the lampshade.
- You can even make a glittery disco ball with mosaic tiles.


CD curtains
To build such unique curtains, you need to make holes parallel to each other on both sides of the disk and then fasten the disks together with wire or metal rings. Next, the disk links fastened together are fixed to a cornice or wooden crossbar. Such unusual curtains will perfectly harmonize with the interior of a room in the style of pop art or disco with a stereo system and karaoke.


Crafts for the kitchen from CDs
Every housewife will love handmade coasters made from CDs, dishes for cereals and pots for indoor plants, decorated with beautiful shiny mosaics, coasters for napkins made from CDs, as well as all kinds of wall paintings and panels. All these items together will help create a bright, original interior design.
Previously, we all bought CDs/DVDs with movies, music and various programs, but now they just sit there. All of them have already been reviewed and re-listened to, but it would be a shame to throw them away. Therefore, I want to tell you how to make useful and beautiful crafts with your own hands from unnecessary disks. Even a beginner can cope with the work provided below, but an experienced person will also have something to learn from this article. The range of uses for such crafts is wide: kindergarten, room decor, as well as useful little things for storing various materials.
Napkin holder made from discs
A homemade napkin holder will be an interesting and useful craft. It turns out to be stable and you can decorate it with any design. You can involve your child in the execution process. To make such a napkin holder, read the step-by-step instructions, photos and video descriptions.
You will need:
- Discs 3 pcs.
- Ruler
- Marker
- Stationery knife
- Glue gun
- Paints
Progress:
- Take the disk and draw a line with a marker along the extreme edge of the central part. We do the same with the second disk.
- Cut the disk along the drawn line.
- On the third disk, draw 2 parallel lines along the extreme edge of the central part of the disk.
- We glue the disks from which we cut off parts onto strips with a glue gun onto the marked strips of the 3rd disk.
- We paint the outer part of our napkin holder with paints. One side is gold and the other is silver.
- When you paint with a sponge you can create texture on the surface. Our napkin holder is ready!
Mirror disco ball
To decorate your interior, you can make a small disco ball from CDs. You can hang it on a lamp and it will shimmer beautifully and brightly. Let's start making the box with our own hands.

You will need:
- Ball or Christmas ball
- CD disk - 2 pcs.
- Scissors
Progress:
- We cut the disks into small squares.
- We begin to glue the squares onto the ball in circular stripes. So first we glue one half of the ball.
- If you took a ball, then you need to bend one side of the paperclip and pierce the ball with it, pulling it out through a small gap. We bend the paper clip back and then it can be hung. It will be easier with a Christmas ball, there is a ready-made mount.
- Now we glue the ball to the very end. Our disco ball is ready!
Video on how to make a disco ball with your own hands
Christmas decoration "Owl"
A bright and shiny owl will be used to decorate the interior for the New Year. You can hang it on the Christmas tree or in another part of the room. Let's start making our craft with our own hands, for this we have made instructions with a step-by-step description.

You will need:
- CDs - 9 pieces
- Glue gun
- Plasticine
- Scissors
Progress:
- We take 2 disks and glue them together, placing one on top of the other until the outer line of the central circle.
- We make a fringe along the free edges of these discs, making frequent cuts up to 1 cm deep.
- Under the two disks we glue two more so that they protrude from the bottom by about 2 cm. We glue another disk in the same way, only it should protrude from the top between the two top layers.
- Under the two disks of the last layer we glue two more, which should protrude from the bottom a little more than the previous layer. We make fringe on the free edges as described earlier.
- Now glue the side parts, which should protrude by about 3 cm.
- We make circles from plasticine and attach them to the circles of two disks, so we will get eyes. Pupils can be made from plasticine, or you can take peppercorns.
- We cut out 3 triangles from the disk - the beak and ears, and fasten them with glue to the owl. We also need to cut out the eyebrows and glue them at an angle to the center.
- For the paws, cut out triangles from the disk, cut off the top of the triangle, and cut out small pieces from the bottom to make three fingers.
- Now you can attach a ribbon to the owl and hang it on the Christmas tree.
Useful craft “Clock”
This kind of craft would be interesting to do with school-age children. A clock made from old disks and a broken keyboard will appeal to any schoolchild and can decorate any children's room. You don’t need to “reinvent the wheel”, everything has already been done before you. You just need to carefully study the process of completing the craft and, together with your child, make our original watches and beautiful clocks.

You will need:
- Clockwork
- Glue gun
- Unnecessary number keyboard
Progress:
- Can be used on both sides.
- From the old keyboard you need to remove the buttons with the letter F. They are located at the very top, you will need numbers from 1 to 12.
- Now you need to glue the buttons. Marking the gluing areas in advance. To make it more convenient, first glue the numbers 12, 6, 9 and 3.
- You can write something on the clock, or decorate it with small decorative elements. But don't overdo it with decoration.
- Carefully insert the arrows from the old alarm clock into the central hole. You need to glue all the parts together.
- Now let it dry for hours and the craft is completely ready. This is how easy it is to make something useful for your home. You can also give such an interesting watch to a friend or work colleague.
Video on how to make an original watch
Craft fish from disks
If you need to make a craft for kindergarten or school, then this fish is perfect. A child of 3, 4, 5, 6 years old can handle it. You will be able to spend time with your child and contribute to the development of his imagination and motor skills. To make a fish craft with your own hands, read the step-by-step instructions.

You will need:
- Colored paper
- Scissors
- Rope
- Marker
Progress:
- From colored paper we cut out a mouth, an upper fin, a tail and round eyes.
- Glue everything onto the disk.
- From a sheet of paper of the same color, fold an accordion about 1 cm wide and insert it into the hole of the disk. Spread our side fins.
- Using a marker, draw a pupil on the eye.
- To hang the fish you can glue a string.
Convenient pen holder
If you have several old disks, you can make an original stand that you can use for both pens and small tools. To make this craft with your own hands, you can watch our master class with photo and video instructions. 
You will need:
- Disks - 9 pcs.
- Ruler
- Marker
- Screwdriver and drill
- Bolts 120×6 - 4 pcs and nuts
- Plastic bottle 0.5 l
Progress:
- On the disk with a marker, draw two perpendicular lines passing through the center.
- Now we put marks on the lines, measuring 1 cm from the edge.
- We put all the disks together and place them on a wooden block. Using a self-tapping screw and washer, secure the discs in a stationary position so that it is convenient to drill.
- We make holes using a screwdriver at the marked points.
- We disassemble our structure and remove one disk to the side, which will serve as the bottom.
- We fix 8 disks on the board using self-tapping screws in 4 holes.
- Using a crown of the desired diameter, we make a hole in the center of the structure. And then we analyze it.
- We take a disk in which we did not drill the center and insert bolts into 4 holes, and secure the disk with bolts.
- We put another nut on each bolt and tighten it at a distance of approximately 12 mm from the previous one.
- We put the next disk on our design and fix it with nuts.
- We tighten the next row of nuts at a distance of 12 mm and put on the 3rd disk.
- We put on all the disks in a similar way.
- When the entire structure is assembled, we cut out a part from the bottle 11 cm long and the width that you chose for yourself.
- We twist the blank from the bottle into a tube and insert it into the hole of the stand. This way it will be more convenient for you to insert pens and other objects into the stand; they will not cling. Our original stand is ready!
Magic flower
A flower made from discs that you can make with your own hands can become a beautiful interior decoration. It can also be taken to a kindergarten or an exhibition. Watch our master class and you can make such a flower easily and quickly.

You will need:
- Discs
- Candle
- Scissors
- Needle
Progress:
- Cut off the outermost part of the disk in a circle.
- Using a needle, divide the disk into layers.
- On the shiny part of the disk we make 5 cuts to the central circle.
- Using a candle, heat the edges of the disks and form petals. This must be done carefully and gradually. This will give us 5 petals.
- We form the second part of the disk into a part of the flower in a similar way, without making any cuts. This will be the bottom solid part.
- We glue our blanks together with glue.
- We turn the flower over from top to bottom and begin to decorate it with beads, gluing them in a small circle. You need to move from the edge so that you can insert the rest of the beads into the hole of the disk.
- When you have transferred the beads to the front part of the flower, we place them in the same way, forming the voluminous core of the flower. The magic flower is ready!
Disc curtain
To decorate the New Year's interior, you can make an original curtain with your own hands. It’s very easy to do, you just need to find a lot of old disks and your house will sparkle with bright holiday colors. 
You will need:
- CDs
- box of paper clips
- Drill
- Drill
Progress:
- It is necessary to decide on the size of the future curtain. Place them on the floor in the chosen order. Mark with a marker the places on the disk where you need to drill holes. Using a thin drill bit, drill all the marked holes on them. To prevent the disc from cracking, you need to drill from the picture side.
- All that remains is to connect them using paper clips into one curtain. To do this, make a “canvas” from ready-made strips; by the way, the length of the staples can be increased, this will give the curtain dynamism.
- Your interesting curtain is ready! You can simply hang it on the wall, it will transform your room, make it unusual and original.
Disk candlestick
From the disk you can make an unusual candlestick that will decorate your room. You can do it yourself together with your child, as it is easy to do. To make such a candlestick, you can read the step-by-step instructions that we made for you.

You will need:
- Candle tablet
- Glue gun
- Half pearls
- Beads with a flat side (oval and droplets)
Progress:
- We glue the pearls around the central part of the disk, along the edge.
- Next we glue the oval beads, this will be your second row.
- We glue the droplets between two oval beads with the sharp part towards the center. So we glue it alternating through two oval ones.
- Between the droplets you can glue smaller decorations, such as flowers.
- Our candlestick is ready, all that remains is to place the candle in the center.
Progress cannot be stopped. Until recently, we were thinking about how to copy old videotapes onto CDs. And now - a whole stack of carefully collected disks is gathering dust in the closet like a useless burden. Don't rush to throw them away!
Scratched or damaged CDs and DVDs can be used to make great crafts. Designers and simply amateurs create from them many useful and necessary things for home and outdoor recreation.

© DepositPhotos
What to make from old disks
ideas from all over the world
- Cup coasters. The size and shape are exactly what you need. All that remains is to decorate. You can glue felt circles to the disks and decorate them with multi-colored scraps of fabric.

Or paint it in different colors and decorate it using a stencil.


- Not quite sure what to call this group of crafts. Mobiles, musical pendants or dream catchers? You can hang them on your porch or in your garden and they will magically reflect light and play with the wind and sun all summer long.


It is also claimed that structures made of discs moving in the wind effectively scare away birds.


- Mirror mosaic. Using scissors or pliers, break the discs into small pieces. You will get miniature shards that can be used to decorate any surface: frames, flower pots, dishes and furniture. Whatever you do, it will shine with all the colors of the rainbow.

The technology of work is the same as when laying tiles: preparing (degreasing) the surface, applying a layer of glue or putty, laying out the mosaic, drying. The gaps between individual fragments can be filled with stained glass paints.

- Volumetric figures. Graphic designer and children's book illustrator Sean Avery from Australia makes figurines of truly fabulous beauty from fragments of old CDs.


- Crafts for children. Children love the iridescent shine and shape of the discs. Together with the kids, you can arm yourself with scissors, colored paper and turn a stack of old CDs into a home zoo.

- Creative lamps.

- Watch dials.

- Coffee tables.

- Stands.

- New Year decoration.


- Installations.
British artist Bruce Monroe collected 65,000 used CDs and turned them into 100 sparkling lily pads, which he placed on the surface of a lake at Longwood Gardens in Pennsylvania.

The installation Wastelandscape, presented at the Centquatre cultural center in Paris, is most similar to a sea of CDs.

We have listed the most interesting ways how to use old disks. If you love, then this article was created especially for you. Get more CDs, be patient and start creating!
It is better to use factory-recorded discs for work. They give a uniform reflection of all the colors of the rainbow and do not delaminate when cut. When cutting old CDs into pieces, you need to protect your hands with gloves and your eyes with plastic glasses. To make cutting the discs easier, it is more convenient to preheat them.
Crafts from old disks You can use it at home, or you can give it to your loved ones. After all, beautiful and hand-made candlesticks, boxes, vases, and photo frames bring much more positive emotions than store-bought ones.
Nikolai Laduba loves to spend time actively and goes hiking. He is a big fan of science fiction. Nikolai’s son is only 7 years old, but he shares his father’s hobbies: what could be better than cozying up and watching the Star Trek series with the whole family? Our author approaches all issues in detail, as evidenced by the quality of his articles. Nikolai's favorite book is “The Black Prince” by Iris Murdoch.


