Summer residents who are engaged in growing plants on their plots know how important it is to properly and timely care for plantings, whether it be trees, bushes or flowers. For effective care, every amateur gardener or gardener has a garden sprayer. Often gardeners-inventors make a sprayer with their own hands. It should be noted that it is not so difficult to design a homemade sprayer on your own, providing good care for all plants and protecting yourself from frequent machine repairs.
The main task of a garden sprayer is to effectively spray liquid (chemicals, fertilizers, stimulants, etc.) onto plants. The liquid applied in this way adheres perfectly to the plantings and exhibits its protective properties for a long time. Spraying is a necessary measure to protect bushes and fruit trees from diseases and pests (caterpillars, aphids, mites, etc.). In order for the processing process to proceed correctly, it is worth using special equipment - a garden sprayer.
All devices of this purpose can be divided into groups according to the principle of operation (from elementary manual to self-propelled). There are the following types:
- Manual sprayer, which is a plastic tank with a lid with a built-in pump pump. The pump creates the necessary pressure in the tank, then you can spray the liquid by pressing the lever located on the handle. Units of this type are produced with a tank volume from 0.5 to 2 liters. It is excellent for spraying seedlings and other small plantations.
- The pump sprayer is designed for spraying a large number of plants. The volume of the tank is 3-12 liters. It must be worn on the shoulder on a special belt. There is also a pump on the lid, and a hose (1-1.5 meters) with a special handle, a rod and a nozzle comes from the body. Today, pump-action garden sprayers are one of the most popular. This is a great option for processing areas up to 30 acres.
- Hand-held knapsack sprayer - here the pressure is built up in the pump. Devices of this type are convenient in that they can be carried behind the back, like a backpack. When processing plantations with the help of this unit, you need to pressurize with one hand, and hold the spray bar with the other hand, which is not very convenient and rather tiring.
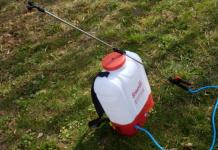
- The backpack battery sprayer is an improved model of the previous one. Its main advantage lies in the fact that the pressure is generated by means of an electric drive from the battery. Such a mechanism greatly facilitates the process of processing plants and speeds up the process. Electric garden sprayers, due to their efficiency and productivity, are suitable for small private gardens and vegetable gardens, as well as for mini-farms.
- It is expedient to use a petrol motor-sprayer for work on large areas. The volume of the liquid container here varies in the range of 12-20 liters. Sprayers of this type are divided into two types: knapsack, which are worn behind the back; wheeled, which can be freely moved around the garden and vegetable garden.
All of the above units can be easily bought in the markets or specialized stores, as well as ordered via the Internet. But you can do it on your own by making the device yourself from available materials. Perhaps this method will be the most correct, because a self-made garden sprayer can be easily adjusted to your needs and not worry about repairs in case of any breakdown.
Video Mounted Garden Sprayer
Video on the use of a mounted self-propelled sprayer, by attaching it to a tractor structure.
What materials will be required
Many gardeners and gardeners use home-made means for spraying green spaces on their plots. You don't have to be an engineer or an inventor to make a garden sprayer - just be smart. For work in the garden or greenhouse, you can use an ordinary broom that will cope with the role of a sprayer. This is a cheap and easy method, but not very practical as chemicals are spilled in the process.
To process a small number of bushes or seedlings, you can make an excellent manual sprayer from a windshield wiper container. Before use, you just need to wash the container well to clean it of unwanted elements. If you plan to create a more advanced garden sprayer, for example, an electric one, then you will need quite complex and serious parts: a tank, a pump, a check valve, a reinforced hose, a spray bar, a push-button switch, a stranded wire, etc. If you wish, you can even do self-propelled vehicle, but for this you already need to use equipment.
How to do it yourself
Consider how you can design a battery sprayer. To make it, you need to take a tank - an old pump-action sprayer with a broken pump that cannot be repaired is perfect. At the same time, it is extremely important that there is an airtight tank, a working rod and an air valve.
You will also need a battery (12 V) and a car compressor. You need to drill a hole in the tank and insert the car nipple to which the compressor is connected. To seal the hole for the washers, you can lay a rubber gasket or blow it with sealant. Then the compressor must be connected to the battery.
Due to the high pressure in the tank, the spray is very fine. The required pressure is pumped up, and its excess exits through the valve. The undeniable advantage of a self-designed battery sprayer is the ability to repair and replace any element. When working with any sprayer, it is worth remembering to follow the safety rules: protective clothing, use gloves, a respirator, a headgear. At the end of the work, the device should be disassembled and thoroughly rinsed with water, then dried and reassembled.
Video "Making a homemade sprayer"
Video instruction for making a garden sprayer from an unusable vacuum cleaner.
From timely and quality use of special means when growing a crop, the quality of the grown products, its productivity, and, ultimately, the return on financial and physical investments depend.
Every gardener wants to please himself and his loved ones with a crop grown with his own hands, which can be saved and further increased.
A garden sprayer is an important and highly effective tool in the competent organization of labor in a garden plot, which allows you to protect the plant, fertilize it in time, carry out prevention, while using a minimum of harmful substances, acting selectively and accurately.
How does a garden sprayer work?
Any sprayer works on pressure difference principle ambient air and working fluid (chemicals or fertilizers) in a sealed container. The Zhuk, manual pump, Stanley, gasoline knapsack and garden sprayers work on the same principle.
Due to the high pressure, the liquid tends to break out and, when the valve is opened, passes through a flexible hose and a hollow telescopic “fishing rod” with sprayers and nozzles, spraying in the form of a cloud, a fan, a jet, or in a combined form.
The pressure of the working fluid is created in various ways, depending on the device and the purpose of the sprayer. It can be a powerful motorized sprayer for trees 5-10 m tall or a simple hand sprayer for plants in a flower bed.
For more information about garden sprayers, see the video below:
Classification according to the method of creating pressure of the working fluid
Motor sprayers
The most powerful from garden sprayers - these are motor sprayers; spraying occurs under the pressure of a jet of air created by a membrane-type pump driven by a small engine, usually gasoline.
Membrane type
Diaphragm type pump (membrane, diaphragm pump) - a positive displacement pump, where the working body is flexible plate, fixed at the edges. Under the action of some mechanism or forces, the plate bends, performing the function of a piston pushing the working fluid.
Electric knapsack
A slightly less powerful class is the electric backpack garden sprayer. The diaphragm pump is powered by a 12 volt battery.
Due to its optimal power and size, this sprayer has gained wide recognition and is often used for more than its intended purpose; and for example, for window cleaning or as a sprayer in construction and renovation. You can also make a do-it-yourself foam generator for washing. The working fluid is in a container behind the back of the operator.
Garden backpack
Garden backpack sprayer manual - the most simple, convenient and versatile option. The pressure in it is created by manually moving a special lever that controls the pump pump. Increased pressure is created in a special pumping chamber, from where the liquid is supplied to the spraying system.
pump action
The pump pump is cylinder with a moving piston; at the end of the body there is a valve for the intake of pumped air into the working area and for preventing its exit, thereby forcing an increased pressure of the working fluid.
Knapsack manual
There are also manual knapsack sprayers with pressure pumping pump directly into the container with working fluid. Their disadvantage is the not always strong design of the seams of the working container, as a result of which the seams can diverge, which can lead to operator burns.
Video on how to choose the right sprayer.
Be careful with these models.
Pump on the belt
An automobile electric pump was originally designed for pressures up to 3-4 atmospheres and often has a built-in pressure indicator.
Stages of work:
- A hole is marked on the cylinder where the nipple will be installed. It is better to mark closer to the neck for the convenience of future connections.
- The hole is drilled slightly smaller than the diameter of the neck of the nipple for its tight installation.
- The rubber seal of the nipple is lubricated with liquid soap and the nipple is inserted into the drilled hole using round nose pliers. After installation, the nipple should hold pressure.
Assembly and connection of the pump:
- pour the required amount of liquid into the balloon;
- connect the pump hose to the nipple on the cylinder;
- connect the wires of the battery and the car pump, observing the polarity;
- turn on the pump and watch the pressure readings; when the pressure reaches 2.5-3 atm, turn off the pump;
- check the sprayer in operation.
After setting the required jet quality, the system is set up and ready for operation. Next, the pump with the battery must be fixed on the sprayer cylinder. For this, any rectangular bag of the required size is suitable. It is desirable to make a hole in it for reading the pressure gauge.
For additional fastening to the bag, straps can be sewn - "Velcro" on top and bottom, the upper part of the straps will "grasp" the neck of the cylinder, the lower - its middle part, making it possible to easily dismantle the entire structure.
12V 10Ah battery is enough for charging two bottles with a capacity of 5 liters, while charging the battery of the specified capacity can take up to 10 hours. If this is not enough to complete all the work, you can purchase a second battery and charge them alternately.
And finally, the easiest option. How to make a sprayer from a simple plastic bottle. If you have a desire to increase spraying performance without buying expensive devices, you can do with little effort.
For this you will need:
- a children's bicycle pump accidentally found on the mezzanine (or its store counterpart Puky HP-25);
- plastic bottle of the required volume;
- bicycle nipple;
- sprayer (spray nozzle screwed onto the throat of a standard plastic bottle);
- needle nose pliers.
Procedure:
- We cut out the nipple from the old bicycle chamber along with the round rubber section into which it is glued. The diameter of the rubber “washer” is about the size of an average coin, it will serve as an internal seal.
- We twist the sealing nut from the nipple body - it will tighten the connection from the outside.
- We drill a hole in the upper part of the plastic bottle with a diameter for the nipple.
- We launch the nipple into the neck of a plastic bottle and “catch” it inside with the help of two knitting needles, directing it into the drilled hole.
- We grab it with needle nose pliers and pull the nipple out, pressing the rubber seal against the wall from the inside.
- We drip a couple of drops of waterproof glue on the hole between the nipple and the edges of the drilled hole.
- We cut out the second rubber sealing washer from the bicycle chamber and, after the glue has dried, carefully put it on the nipple.
- We twist the nut on top of the nipple until it stops.
It remains to screw the hose from the pump to the nipple, fill in the liquid and screw the spray gun onto the neck.
If the size of the plastic bottle is noticeably larger than the liquid intake pipe that comes with the spray gun, any plastic tube of the same diameter will work for replacement; the main thing is that she got to the bottom and had a slightly "oblique" cut.
After installing the sprayer, it is necessary to fix the pump with transparent tape on the bottle.
The pump handle in the closed position should be slightly higher than the neck of the plastic bottle and spray gun, so that the fingers of the hand do not touch its walls and interfere with the pumping process, and also so that the handle does not interfere with unscrewing the spray gun.
Make several pumping movements with the pump, feeling how the walls of the bottle become elastic. Having pumped up the container almost to the density of a “soda bottle”, you can press the spray gun handle. The pressure of the jet and the absence of the need for frequent pumping will pleasantly please you.
Conclusion
Modern imported devices are not always economically viable in our unstable climate, when it is not always possible to harvest even one crop. Russian products do not always reach the required level in terms of quality and reliability.
But this only means that, having shown ingenuity and ingenuity, you can collect no less efficient and reliable do-it-yourself copies that are not inferior to the best samples, albeit not in design, but in reliability and overall efficiency.
Foreword
Garden sprayers come in many different types, and we offer a look at them all. We determine the convenience of devices, find out their performance and efficiency, get acquainted with the technical characteristics
Before talking about the type of sprayer we are interested in, let's look at what alternatives the modern market can offer (we will not think about homemade products for now). According to the method of movement, without exception, models of any brand can be divided into manual, knapsack and wheeled, and the latter can be installed on the basis of a walk-behind tractor. Of the manual ones, in turn, there are sprayers with a small reservoir, as well as pumping ones, with only a small chamber filled with a piston by suction of a substance according to the principle of a syringe.
Pump-action models are both manual and knapsack, they have a handle for pumping liquid into a hose and a spray tube located at the top in the center of the tank. are divided into mechanical: pump-action and lever, as well as automatic: battery and gasoline. The principle of the pump is to force air into the tank with a piston to increase pressure, and for this the knapsack must be removed. The lever garden version is convenient in that you can constantly pump the active substance by conveniently placing the reservoir behind your shoulders and moving the lever with your left hand. Gasoline models are heavy and massive, in addition, the internal combustion engine vibrates unpleasantly during operation.
Battery sprayer
True, their jet ejection power is quite large, which is why the spray bar is short, about a meter, and a flexible corrugated hose is rarely longer than 20 centimeters. But battery models can be called the golden mean among knapsack models. Almost as light as levers, they do not require constant mechanical action at the same time. The liquid is pumped from the tank into the hose by a small compressor powered by an electric motor.
The noise emitted by the pump is small, the vibration is almost imperceptible, the only thing you need to pay attention to when choosing is the battery capacity. I must say that the more famous the brand, the better the battery will be in it, which will last longer, and the charge will hold better. Therefore, the purchase must be justified by the volume of spraying. It is especially worth talking about wheeled sprayers. This can be a combined garden option, that is, a knapsack-type tank, if necessary, is installed on a platform with wheels and a handle, where it is securely fixed.
But there are also models made according to the type of electric cultivators, that is, only on wheels, not portable. The peculiarity of such atomizers is in a large tank and a powerful compressor, which can be powered by a very capacious battery, which would be too heavy for a backpack version. But it should be noted that most wheeled models are still produced on a gasoline engine, and not on an electric motor.
"Anatomical" analysis of the unit
Since all self-powered garden sprayers are of the tank type, the main part of the body is a volumetric tank filled with various active substances. Below it is usually a compressor, the retractor nozzle of which is inserted into the tank, and a hose is connected to the outlet valve, at the other end of which there is a sprinkler bar.

garden sprayer
By the way, the outlet nozzle can produce a cone of ejected liquid of a certain shape: a cloud, jet or fan. The ejection range depends on the power of the electric motor, the maximum vertical distance is up to 7 meters, and the horizontal distance is up to 15. The cases of most models are made of plastic. Moreover, the batteries and the compressor in the lower part are usually hidden in a compartment with an opening hinged lid, so that if necessary, you can easily replace the batteries or have access to the electric motor for repairs.
The standard battery voltage is 12 V, but the capacity can be different, usually 5 and 7.2 mAh batteries are installed. Often, only the tank is made of plastic, and the lower compartment with the compressor is protected from accidental impacts by a metal casing reinforced with a frame made of light steel thin-walled or aluminum tubes.
First of all, any mechanical, electric or gasoline unit requires performance, or at least efficiency. Therefore, it is very important to match the length of the hose and rod to your gardening needs, taking into account the jet power. If spraying is performed with a small cloud of fine particles that are easily blown away by the wind, and you need to spray tall trees, you definitely need a long spray tube.

garden processing
The capacity of the reservoir can be small, about 3 liters, or very large, up to 18-20 liters. In the first case, it will be easier to carry a satchel, but you will have to fill it more often, and the second option will be heavy, but will allow you to do more work at a time. It is better to choose an electric sprayer with a wide mouth of the tank, so that it is convenient to fill in the active substance directly in the "field" conditions.
The hose of most models usually exits on the right, but there are options when it is located in the middle, which is also convenient for left-handers. At the same time, it is highly desirable that the hose is not short, otherwise you risk cutting it off by stretching your hand up or to the side, reaching for distant branches in the crown of a tree or shrub. The backpack should be tried on before buying, the straps can be too narrow and uncomfortable, and some models are angular and cause discomfort when worn. A number of brands offer very convenient "backpack" solutions, where the back-stacked surface of the tank is covered with a soft pad.
Most often, farmers face the question of choosing between a gasoline sprayer and a cordless one. Each has undeniable advantages, but a unit with an internal combustion engine seems to be preferable if there is a car in the garage. But let's look at the advantages and disadvantages of each option. First, let's talk about efficiency. It must be said that in this respect the gasoline sprayer wins, since its air pump drives a powerful stream of air through a large diameter pipe.
And already at the exit, splashes of the active substance from the nozzle fall into the air jet, due to which they are carried away over a long distance. In winter, the garden machine with an empty cylinder can be used to blow snow. As for the electric sprayer, a thin hose and a long small diameter tube give a fairly narrow cone, although the spray force can be quite large. And yet it is almost impossible to blow off the snow with such an air jet. But the cordless garden sprayer has another advantage - many models are equipped with a telescopic rod that acts as a feed tube.

Powerful petrol engine
And for some brands, these rods can be replaced with long ones, that is, a telescopic or multi-section version is included in the kit, in addition to the standard short nozzle. It should also be taken into account that when putting on a gasoline spray bag, you will carry on your back not only a reservoir with an active substance, but also a gas tank. Comparing the technical features of the two types of sprayers, we will find out in which case the purchase of one or another option will be justified. First of all, you should pay attention to the price range. If budget models of battery sprayers cost from 1,000 to 3,000 rubles, then gasoline ones will cost at least 12,000 rubles.
The average prices for the former are from 3 to 7 thousand, and for the latter - from 20 to 50 thousand rubles. That is, buying a unit with an internal combustion engine is justified only if you constantly have to cultivate several hectares of planted area. For a small area, it will be much more practical to buy a battery model. Moreover, a battery charge (up to 300 watts) will cost less than filling a fuel tank with fuel (2-3 liters).
Overview of the units "Umnitsa", "Sadko" and "Hard worker"
The form factor for most models produced by domestic manufacturers is very similar and not particularly original - many sprayer models look like rectangular canisters. On the one hand, in the upper part there is a neck with a screw cap, in the center the body passes into a comfortable handle. There are other options, in particular, outwardly resembling fire extinguishers, but we will not talk about them.
So, garden battery sprayer "Umnitsa". In fact, this is not one line of devices, but several with different names and, among other things, the manufacturer produces a number of Comfort sprayers. The average price is about 5 thousand rubles. Battery sprayers of the Umnitsa brand of early and late models, produced for the garden, have different degrees of power. That is, if the first models are designed for 2 hours of operation without recharging, with a throughput of up to 100 liters for a specified period of time, then the latest release works non-stop for up to 6 hours with a capacity of about 450 liters.

Model "Clever"
The manufacturer uses thick impact-resistant polypropylene as a material. Almost all models have triple filtration of the liquid being poured when it is supplied through the compressor to the spray tube, which, as a rule, is made of brass.
The devices of the "Trudaga" line from the manufacturer of the same name are almost the same in appearance, that is, the tanks are shaped like rectangular canisters or cylindrical tanks. The average price of sprayers is within 3000 rubles. They are made of very durable and resistant to aggressive conditions ABC-plastic. The main advantage of sprayers of this brand is that they are almost always equipped with stainless steel telescopic rods, which is convenient and, most importantly, reliable in operation. In addition, some models have up to 3 interchangeable nozzles. It should be noted that, despite the relatively low cost, the batteries in the devices are capacious, providing an average duration of up to 5 hours.

Devices of the "Hard worker" line
And finally, consider the Sadko models. First of all, it is worth noting the non-standard shape of the sprayer bodies of several lines of this brand, it differs somewhat from the previously described brands in a streamlined shape. The rest of the form factor is different, reminiscent of canisters, tanks and fire extinguishers. The housings are made of durable plastic, and the spray arms are made of stainless steel. These units are produced in Slovenia, their average cost in the domestic market does not exceed 5 thousand rubles. Most of the models have standard equipment, however, some have an interesting addition - a two-wheeled trolley for transportation, which can also serve as a stand, and it is convenient to carry the device by the handle.
Based on the descriptions of the designs above, you will first need an active substance tank with a sufficiently wide mouth. In its lower part there should be a regular hole or cut manually. You can use a plastic canister or barrel as a base, but the best solution would be to upgrade a cheap pump-action garden sprayer. For carrying, it will be convenient to fix the container on the finished metal frame of a tourist backpack or make a similar design yourself.
The platform at the bottom will allow you to place a compressor with batteries. We insert the automobile nipple into the hole cut in the upper part (it must fit in diameter so that the valve sits tightly), based on the air supply inside the container. We attach a compressor to it for pumping air into the tank, the lid of which must be closed hermetically and tightly enough so that it does not fly off from the internal high pressure. If you are using a tank from a pump-action sprayer, then we use the standard outlet valve to connect the hose with the spray bar attached to it.

homemade sprayer
If you have a canister or other container in your hands, cut another hole in the bottom and screw on the removable valve from the drip irrigation kit. We connect the batteries to the compressor, turn the switch and work. The second option, which we propose to make in a home workshop, is a wheeled one, based on a two-axle trolley, on which we install a large plastic tank (you can also use a single-axle, but with folding props). The neck of the container should be wide enough, because through it we will lower a 12 V submersible pump inside. We will power it from a high-capacity car battery, connecting directly with special crocodile-type contacts to the terminals.
The only drawback of such pumps is that many of them can be turned on for no more than 20 minutes, so you need to choose those models whose technical specifications indicate a long operating mode.. Also pay attention to the presence of a mud filter, it will come in handy for spraying on the site. We lower the pump into the tank and, if possible, fix it with wire spacers so that it does not hang out when the sprayer is moved. In the cover we make a slot for the outlet hose and power cord. Next, we look at where the water intake hole is located.
If it is at the bottom, then we simply lower the pump to the bottom of the tank, and if it is from above, then we attach a short piece of hose to it, the end of which should lie on the bottom. We put the outlet hose on the sprayer bar, and it is highly recommended to have a trigger or a button to start the flow of liquid into the sprayer tube. Both proposed home-made installations can be used not only for spraying chemical and biological substances that act against pests and plant diseases. Also on the site you can spray herbicides and pesticides to accelerate the growth of garden crops, as well as fertilize large areas of cultivated soil.
In this case, the second electric sprayer, which has a larger tank and battery potential due to the wheelbase, can be used to water the garden plot. There is another advantage in using a submersible pump for irrigation - there is no binding to a specific capacity. You can always take a larger tank or lower the pump into a body of water, for example, into a pool, which will empty along the way.
From timely and quality use of special means when growing a crop, the quality of the grown products, its productivity, and, ultimately, the return on financial and physical investments depend.
Every gardener wants to please himself and his loved ones with a crop grown with his own hands, which can be saved and further increased.
A garden sprayer is an important and highly effective tool in the competent organization of labor in a garden plot, which allows you to protect the plant, fertilize it in time, carry out prevention, while using a minimum of harmful substances, acting selectively and accurately.
How does a garden sprayer work?
Any sprayer works on pressure difference principle ambient air and working fluid (chemicals or fertilizers) in a sealed container. Sprayers work on the same principle, and for.
Due to the high pressure, the liquid tends to break out and, when the valve is opened, passes through a flexible hose and a hollow telescopic “fishing rod” with nozzles, spraying in the form of a cloud, a fan, a stream, or in a combined form.
The pressure of the working fluid is created in various ways, depending on the device and the purpose of the sprayer. It can be a powerful motorized sprayer for trees 5-10 m tall or a simple hand sprayer for plants in a flower bed.
For more information about garden sprayers, see the video below:
Classification according to the method of creating pressure of the working fluid
Motor sprayers
The most powerful from garden sprayers - these are motor sprayers; spraying occurs under the pressure of a jet of air created by a membrane-type pump driven by a small engine, usually gasoline.
Membrane type
Diaphragm type pump (membrane, diaphragm pump) - a positive displacement pump, where the working body is flexible plate, fixed at the edges. Under the action of some mechanism or forces, the plate bends, performing the function of a piston pushing the working fluid.
Electric knapsack
A slightly less powerful class is the electric backpack garden sprayer. The diaphragm pump is powered by a 12 volt battery.
Due to its optimal power and size, this sprayer has gained wide recognition and is often used for more than its intended purpose; and for example, for window cleaning or as a sprayer in construction and renovation. You can also make . The working fluid is in a container behind the back of the operator.
Garden backpack
Garden backpack sprayer manual - the most simple, convenient and versatile option. The pressure in it is created by manually moving a special lever that controls the pump pump. Increased pressure is created in a special pumping chamber, from where the liquid is supplied to the spraying system.
pump action
The pump pump is cylinder with a moving piston; at the end of the body there is a valve for the intake of pumped air into the working area and for preventing its exit, thereby forcing an increased pressure of the working fluid.
Knapsack manual
There are also manual knapsack sprayers with pressure pumping pump directly into the container with working fluid. Their disadvantage is the not always strong design of the seams of the working container, as a result of which the seams can diverge, which can lead to operator burns.
Video on how to choose the right sprayer.
Be careful with these models.
Pump on the belt
An automobile electric pump was originally designed for pressures up to 3-4 atmospheres and often has a built-in pressure indicator.
Stages of work:
- A hole is marked on the cylinder where the nipple will be installed. It is better to mark closer to the neck for the convenience of future connections.
- The hole is drilled slightly smaller than the diameter of the neck of the nipple for its tight installation.
- The rubber seal of the nipple is lubricated with liquid soap and the nipple is inserted into the drilled hole using round nose pliers. After installation, the nipple should hold pressure.
Assembly and connection of the pump:
- pour the required amount of liquid into the balloon;
- connect the pump hose to the nipple on the cylinder;
- connect the wires of the battery and the car pump, observing the polarity;
- turn on the pump and watch the pressure readings; when the pressure reaches 2.5-3 atm, turn off the pump;
- check the sprayer in operation.
After setting the required jet quality, the system is set up and ready for operation. Next, the pump with the battery must be fixed on the sprayer cylinder. For this, any rectangular bag of the required size is suitable. It is desirable to make a hole in it for reading the pressure gauge.
For additional fastening to the bag, straps can be sewn - "Velcro" on top and bottom, the upper part of the straps will "grasp" the neck of the cylinder, the lower - its middle part, making it possible to easily dismantle the entire structure.
12V 10Ah battery is enough for charging two bottles with a capacity of 5 liters, while charging the battery of the specified capacity can take up to 10 hours. If this is not enough to complete all the work, you can purchase a second battery and charge them alternately.
And finally, the easiest option. How to make a sprayer from a simple plastic bottle. If you have a desire to increase spraying performance without buying expensive devices, you can do with little effort.
For this you will need:
- a children's bicycle pump accidentally found on the mezzanine (or its store counterpart Puky HP-25);
- plastic bottle of the required volume;
- bicycle nipple;
- sprayer (spray nozzle screwed onto the throat of a standard plastic bottle);
- needle nose pliers.
Procedure:
- We cut out the nipple from the old bicycle chamber along with the round rubber section into which it is glued. The diameter of the rubber “washer” is about the size of an average coin, it will serve as an internal seal.
- We twist the sealing nut from the nipple body - it will tighten the connection from the outside.
- We drill a hole in the upper part of the plastic bottle with a diameter for the nipple.
- We launch the nipple into the neck of a plastic bottle and “catch” it inside with the help of two knitting needles, directing it into the drilled hole.
- We grab it with needle nose pliers and pull the nipple out, pressing the rubber seal against the wall from the inside.
- We drip a couple of drops of waterproof glue on the hole between the nipple and the edges of the drilled hole.
- We cut out the second rubber sealing washer from the bicycle chamber and, after the glue has dried, carefully put it on the nipple.
- We twist the nut on top of the nipple until it stops.
It remains to screw the hose from the pump to the nipple, fill in the liquid and screw the spray gun onto the neck.
If the size of the plastic bottle is noticeably larger than the liquid intake pipe that comes with the spray gun, any plastic tube of the same diameter will work for replacement; the main thing is that she got to the bottom and had a slightly "oblique" cut.
After installing the sprayer, it is necessary to fix the pump with transparent tape on the bottle.
The pump handle in the closed position should be slightly higher than the neck of the plastic bottle and spray gun, so that the fingers of the hand do not touch its walls and interfere with the pumping process, and also so that the handle does not interfere with unscrewing the spray gun.
Make several pumping movements with the pump, feeling how the walls of the bottle become elastic. Having pumped up the container almost to the density of a “soda bottle”, you can press the spray gun handle. The pressure of the jet and the absence of the need for frequent pumping will pleasantly please you.
Conclusion
Modern imported devices are not always economically viable in our unstable climate, when it is not always possible to harvest even one crop. Russian products do not always reach the required level in terms of quality and reliability.
But this only means that, having shown ingenuity and ingenuity, you can collect no less efficient and reliable do-it-yourself copies that are not inferior to the best samples, albeit not in design, but in reliability and overall efficiency.
Modern agriculture is impossible without labor mechanization. In particular, sprayers are often used to care for cultivated plants. This equipment is divided into several categories, respectively, can be used in any area.
For example, there are small manual models that are used in greenhouses. For processing medium and large areas, the sprayer acts as an attachment for a tractor or walk-behind tractor.
It should be noted that the design of sprayers is extremely simple, so it is not necessary to purchase factory models. Even without proper experience, you can make a sprayer with your own hands, using suitable improvised materials. Consider several installation schemes.
Design features
Before proceeding with the manufacture of a homemade sprayer, it makes sense to familiarize yourself with the basic requirements that apply to this type of equipment.
Any sprayer, regardless of design, must meet the following criteria:
- Drop size. The spray of chemicals must be thin to avoid burning the plants. In addition, it helps to control fluid flow.
- Uniformity. Pesticides must evenly cover the plants to ensure the quality of the treatment.
- Distribution. Fluid from sprayers should be distributed evenly regardless of ambient conditions, planting frequency and row spacing.
- Consumption. The amount of liquid consumed should not depend on the concentration of the substance.
- Convenience. The capacity of the barrel should match the length of the runs, this will provide the best performance. In addition, the equipment must be easy to store and use.
The main thing is that the sprayer does not damage the plants while moving. This does not apply to factory models - here each element is calculated by specialists. However, with home-made manufacturing, this nuance is worth paying attention to.
Sprayers are classified by liquid consumption per treated hectare. According to this criterion, the equipment is divided into four groups:
- ultra-small - up to 5 l;
- small - 75-100 l;
- medium - up to 200 l;
- large - from 200 liters.
The last two categories are usually installed on walk-behind tractors and tractors. Having dealt with the basic provisions, we will consider options for self-production. 
Method number 1
You can assemble a sprayer from ready-made parts. Spare parts for sprayers are sold in specialized stores, so you can buy individual parts, creating your own model.
For example, make a small manual sprayer with an extended boom. With the help of such a product, it is possible to process not only bushes and beds, but also tree crowns.
As a result of such modernization, a practical and compact model can be created. However, the economic benefit disappears - the parts will still have to be bought. But you can assemble a sprayer in accordance with your individual needs. 
Method number 2
We offer a variant of a manual sprayer made from improvised materials. As a liquid tank, you can use a tank from an old washing machine. This element is usually made of stainless steel and will therefore be inert to pesticides and chemical fertilizers.
In addition, such tanks have sufficient capacity, so it will be enough to process a medium-sized plot of land.
The tank can be installed on an old trolley to facilitate the movement of the structure around the site. The tank is attached to the trolley frame with threaded connections. To supply fluid under pressure, an oil pump from a passenger car is required.
The pump will operate from a small electric motor, which is more economical than diesel and gasoline counterparts. The drive is provided by a belt drive, for this the motor shaft is equipped with a small pulley, the pump with a large one.
 The pump is installed inside the tank, the motor is outside. We attach a copper tube to the pump, which we join with the spray hose. The engine can be powered by a battery or an electric cable.
The advantage of this design is that no spray nozzles are used. This is a rather expensive part that often gets clogged. The disadvantages include the inability to regulate the supply and spraying of the liquid.
Method number 3
Consider the option of manufacturing a more cumbersome, and, accordingly, productive design. Such sprayers are suitable for a tractor and can be used on large areas. For manufacturing you will need:
- Metal container with a volume of 200-300 liters.
- Steel corner for the manufacture of the frame.
- Pipes of round section.
- 12 V electric pump.
We weld the frame from the corner, supplement the structure with pipes on which the sprayers are installed. A liquid tank is also installed on the frame, inside which the pump is mounted. The sprayer is aggregated to the tractor hitch, the drive to the pump goes through the power take-off shaft.
Note that the spray bar can be made movable to regulate watering depending on external conditions. To do this, you can use the screw from the car jack. The lifting mechanism will be controlled by the tractor hydraulics.
Such a sprayer will cope well with the processing of potato fields. Ideal for areas over 20 acres.
Please note that only options for homemade sprayers are shown here. You can make changes and improve the design as you wish.
TELL YOUR FRIENDS
In contact with


